With the Social Feed plugin, you can display feeds from the most popular social networks - Instagram. The feeds could be integrated on different parts of your site through widget zones.
With this plugin, you can also have a separate Social Feeds page on which all the feeds are displayed, sorted by date of creation.
Before creating a Social Feed you need to set up your Social Networks. A Social Network contains the setup required to retrieve data from Instagram. You can think of the Social Network as your saved credentials and configuration for obtaining data from Instagram.
Once you have configured a social network you can create a social feed using the data from that network.
Let's look at each section of the plugin administration separately.
Settings
This is where you can enable the plugin and the Social Feeds page.
- Enable - enable/disable the plugin.
- Enable social page - From this setting, you can enable/disable the Social Feeds Page.Social page is the place where you can see all your social feeds in one place.
- Header Menu Integration - Choose where to show the link to the Social Feeds page in the main menu. This will provide a link to the Social Feeds page where all of the available social networks will be shown. Choose "None" if you do not want to show the Social Feeds page link in the menu.
Configure Social Networks
From this section, you can configure the connection to each social network. The Name setting is just a system name used only in the administration. You can use it to distinguish your social networks in the administration.
Let's look at the supported social network.
To display your Instagram feed, create a Meta app with Instagram API with Instagram login, then connect it in the plugin admin.
Part 1 — Create and configure your Meta app
- Log in to the Meta for Developers portal: https://developers.facebook.com/.
- Click Create App and choose Business (recommended).
- Enter your App name and App contact email, then click Create app.

- On the app dashboard, go to Add products (or Use cases) and add Instagram API with Instagram login.
- Open API setup with Instagram login (or Instagram business login settings).
- Copy your Instagram app ID and Instagram app secret — you will paste these into the plugin.

Part 2 — Connect the plugin in nopCommerce admin
- In your store admin, go to Nop-Templates → Plugins → Social Feed → Configure Social Networks and click Add new.
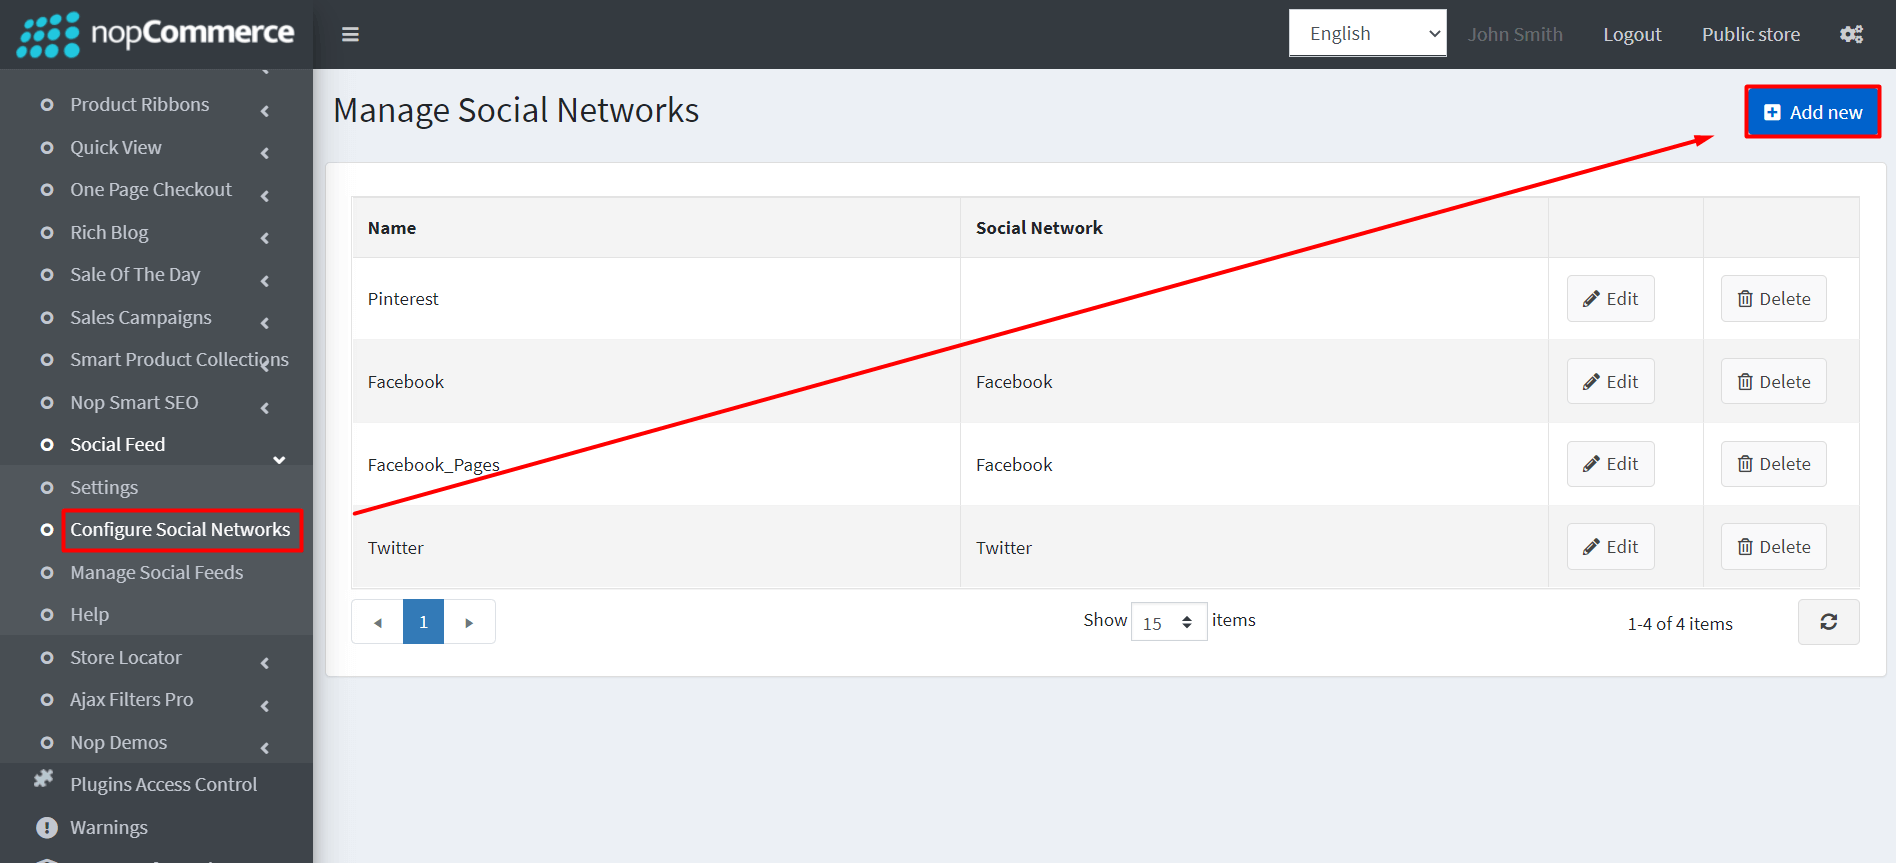
- Enter a Name (for admin use only) and select Instagram from the Social Network dropdown.
- Paste your Instagram app ID and Instagram app secret from Meta.
- Leave Use Test User unchecked unless you are a developer testing with a manual token.
- Click Save (required before authorization).

Part 3 — Add callback URLs in Meta
On the same plugin page you will see three URLs:
- Redirect Url — e.g.
https://yourdomain.com/Instagram/Authenticate - Deauthorize Url — e.g.
https://yourdomain.com/Instagram/Deauthorize - Delete Url — e.g.
https://yourdomain.com/Instagram/Delete
/Instagram/Authenticate, not /en/Instagram/Authenticate).- In Meta, open Instagram API with Instagram login → OAuth redirect URIs (or Instagram business login settings).
- Add the Redirect Url from the plugin exactly as shown.
- Add the Deauthorize Url and Delete Url if your Meta app provides fields for them.
- Save the Meta app settings.

Part 4 — Authorize your Instagram account
- Back in the plugin admin, click Authorize.
- Log in with the Instagram Business or Creator account you want to display on your store.
- Grant the requested permissions. When successful, the button shows Authorized and the status shows Connected.

Part 5 — Create a Social Feed
- Go to Nop-Templates → Plugins → Social Feed → Manage Social Feeds and click Add new.

- Select Instagram from the Social Network dropdown.
- Enter Name, Title, Subtitle Label, and Subtitle link text, then save.
- Set Published to enabled and choose Widget Zones where the feed should appear.
If you enable the plugin under Nop-Templates → Plugins → Social Feed → Settings, enable Enable social page, and select a header menu widget zone, your store menu will include a link to the Social Feeds page. The Instagram tab will show posts from your authorized account.
Troubleshooting
- Invalid platform app — Use credentials from Instagram API with Instagram login, not an old Basic Display app.
- Invalid redirect_uri — Redirect URL in Meta must match the plugin URL exactly (https, no language prefix).
- Empty feed on storefront — Confirm the Social Feed is Published, linked to your Instagram social network, and site cache is cleared.
Manage Social Feeds
From this section, you can control from which social network, for which store, and how many feeds will be displayed in the public area.
There are two tabs in this section, let's look at them separately:
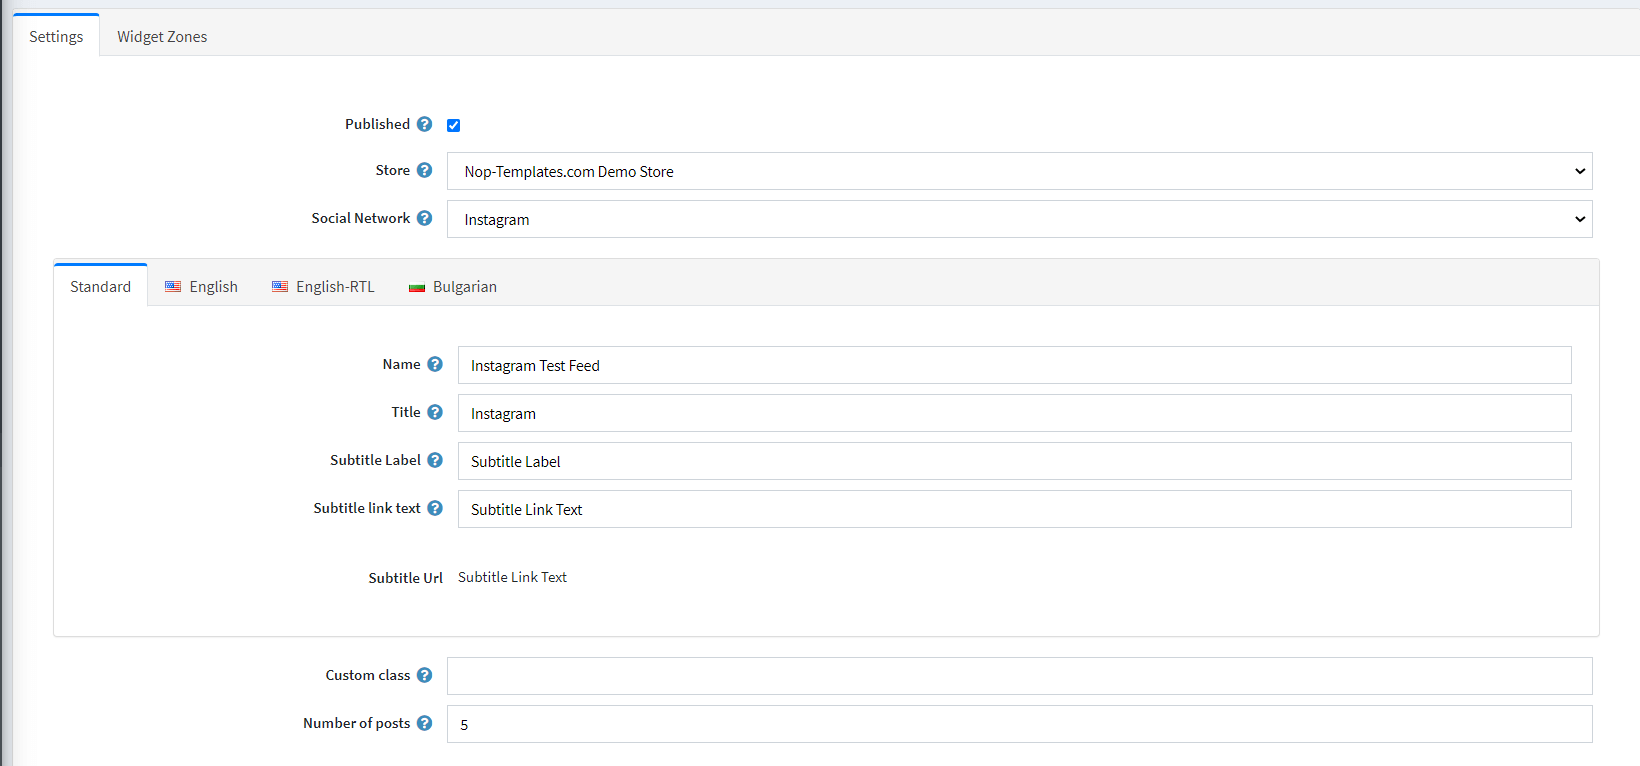
Settings
From here you can map certain social networks to the current feed, control some of the display settings and choose for which store this feed will be available.
- Published - This setting determines if the feeds from the social networks mapped to this feed will be available in the public area.
- Store - Select for which store the feed will be available.
- Social Network - Social network source from where the feeds will be taken.
- Name - This is just a friendly system name used only in the administration.
- The next three settings determine the title above the posts of the selected social network visible in the public area.

- Title - This is the primary part of the title
- Subtitle Label - Social network subtitle label - i.e. Follow us, Like us, etc.
- Subtitle link text - Social network profile/source name - i.e. @noptemplates
- Subtitle Url - This is not a setting that you can control. It is just a representation of the link + text that will be displayed in the public area. It is generated automatically, depending on the social network you choose.
- Custom class - Will be applied to the social feed wrapper. Can be used for styling purposes.
- Number of posts - Number of posts you want to be pulled from your Instagram social network for this feed.
Widget Zones
From this tab you can select where in the public area you want your feeds to appear. You may select several widget zones, this way you can make one feed appear on multiple places on a certain page or only on pages that have the selected widget zone/s.