4 NopCommerce On-page SEO Strategies To Boost Your Rankings & Skyrocket Sales

In February, we published a detailed guide to structural SEO for nopCommerce. Structural SEO refers to the process of creating a low-depth page hierarchy, optimizing your URLs for search, and creating an intuitive website navigation structure.
All in all, structural SEO is an integral part of on-page SEO. So, if you still haven’t had a chance to read our guide, do check it out before proceeding to today’s article → Structural SEO for NopCommerce: The 3-Step Strategy To Follow
In today’s guide, we’re going to help you level up your on-page SEO game. Here’s what we’ll cover:
- What is on-page SEO and why it is important
- How to optimize your meta tags (meta title and meta description)
- How to optimize your images (including alt tags, image file names, image size, and more)
- How to optimize your headings and subheadings
- Why installing an SSL certificate is important (and how to do it)
What is on-page SEO and why it is important
On-page SEO refers to the process of optimizing the pages of your website (both their content and HTML code). In other words, on-page SEO refers to the process of optimizing your nopCommerce homepage, category pages, product pages, blog and article pages, landing pages, and more.
On-page SEO is important because:
- It improves your store’s usability (which helps you deliver a better shopping experience)
- It helps you solve duplicate content issues, thin content issues, and more
- It helps search engines better understand your store and categorize its content (which helps you rank higher on the SERPs)
- It drives targeted traffic to your store (i.e. high-quality traffic that converts)
- And more!
That is, of course, if on-page SEO is done right, which we’ll show you how to do in the sections below. Let’s dive right in!
How to optimize your meta tags in nopCommerce
Meta title tags
Meta title tags are small snippets of HTML code which provide both your customers and search engines with important information about your nopCommerce store and its individual pages.
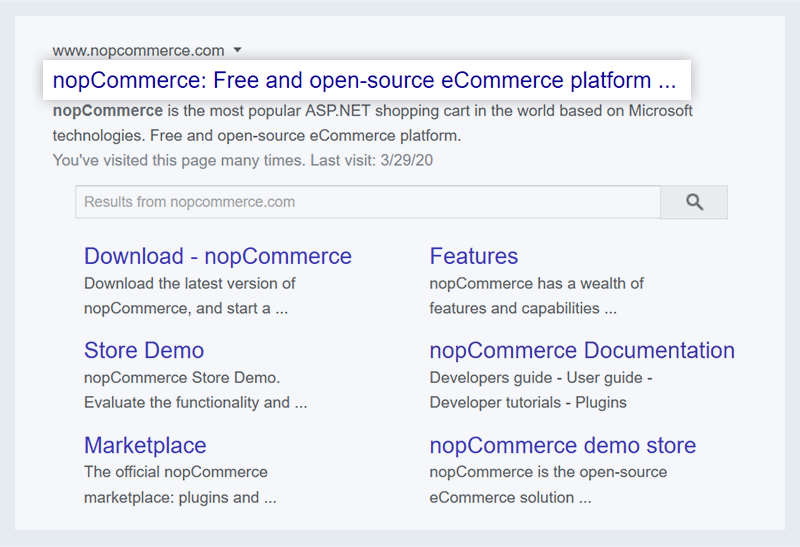
Google displays meta title tags as titles of the listings on the SERPs (which tell people what they can expect to see or read after clicking on the link). For example, take a look at nopCommerce’s listing - its title tells people that nopCommerce is a “free and open-source eCommerce platform”.
So, the meta title tag of a page should:
- Describe what the page is about - the more descriptive and specific the title tag is, the better. There are a number of things you can do to make your page titles more descriptive. For example, you can include product details in the titles of your product pages (e.g. fabric, material, serial numbers, what the item’s used for, etc.).
- Contain keywords (for example, “open-source e-commerce platform”, “bamboo cup”, “porcelain cup”, “glass vase”, “men’s classic watch”, “women’s bathing suit”, etc.), but shouldn’t be stuffed with keywords and sound spammy.
- Be concise - it is best to keep your title tags below 60 characters because Google displays only the first 50-60 characters of the title tag (source: Moz). If your title tag is longer, it may not be displayed entirely, i.e. it will end with an ellipsis [“...”].
How to edit product page meta titles in nopCommerce
Open your nopCommerce admin panel → Catalog → Products → Locate the product which title tag you want to edit → Click “Edit” → You’ll be redirected to an “Edit product details” page:
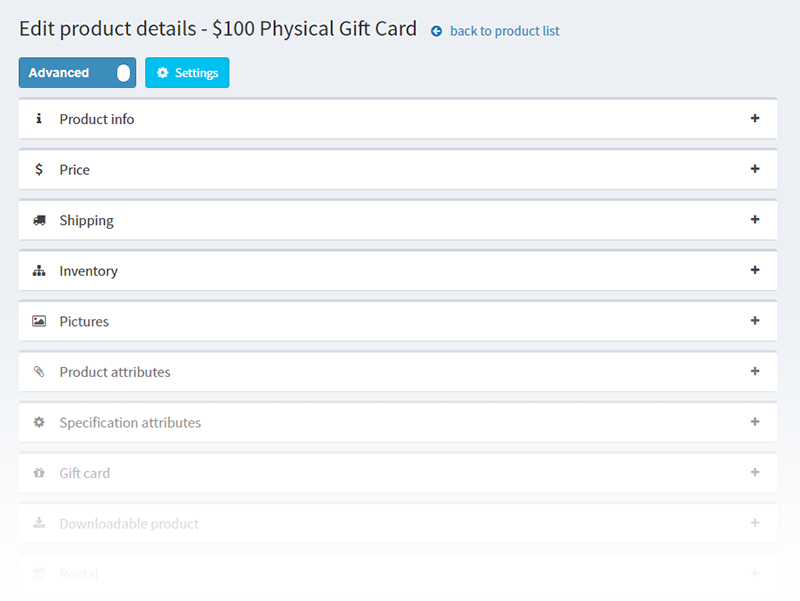
Click on “SEO” → Fill in your meta title in the “Meta title” field.

How to edit category page meta titles in nopCommerce
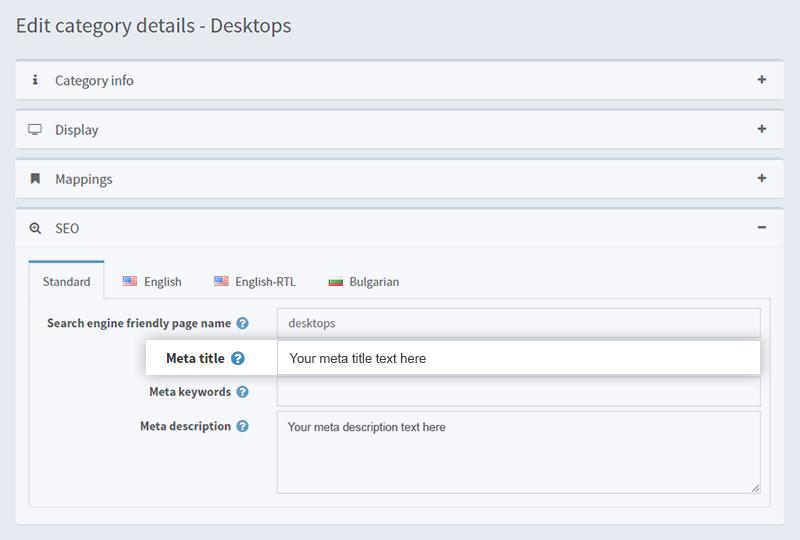
Open your nopCommerce admin panel → Catalog → Categories → Locate the category page which title tag you want to edit → Click “Edit” → You’ll be redirected to an “Edit category details” page → SEO → Fill in your meta title in the “Meta title” field.
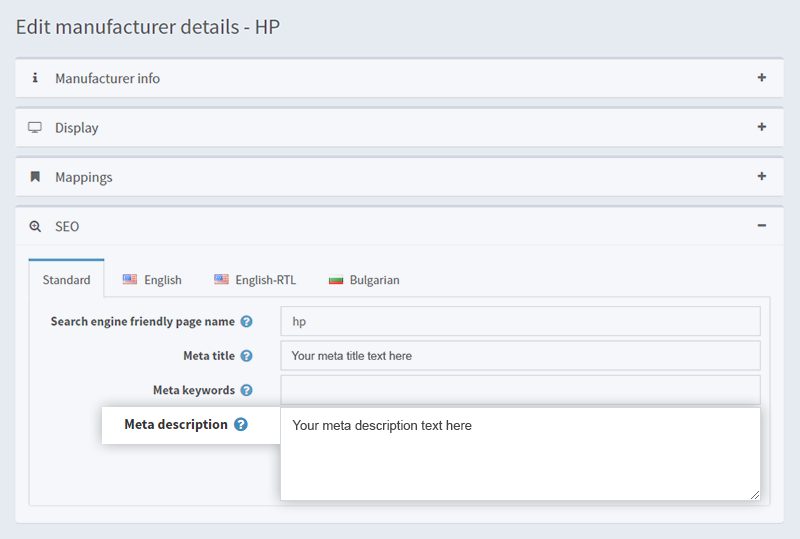
How to edit manufacturer page meta titles in nopCommerce (if you’re running a multi-vendor nopCommerce installation)
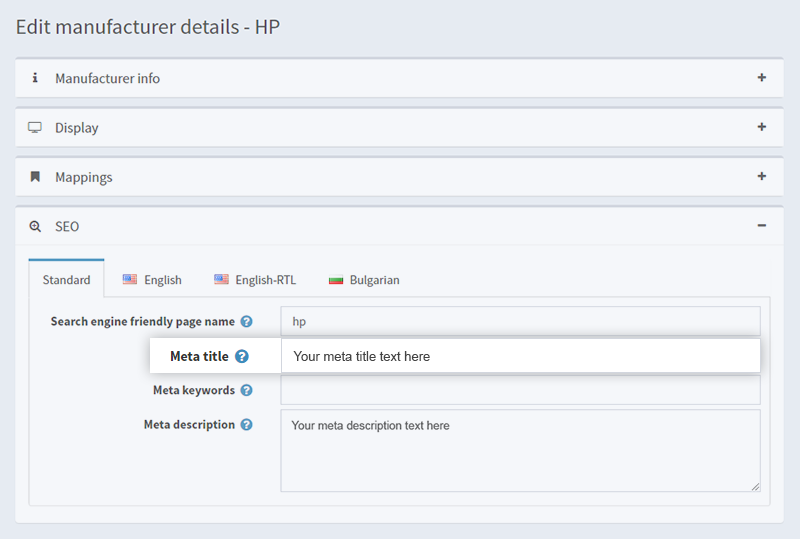
Open your nopCommerce admin panel → Catalog → Manufacturers → Locate the manufacturer page which title tag you want to edit → Click “Edit” → You’ll be redirected to an “Edit manufacturer details” page → SEO → Fill in your meta title in the “Meta title” field.
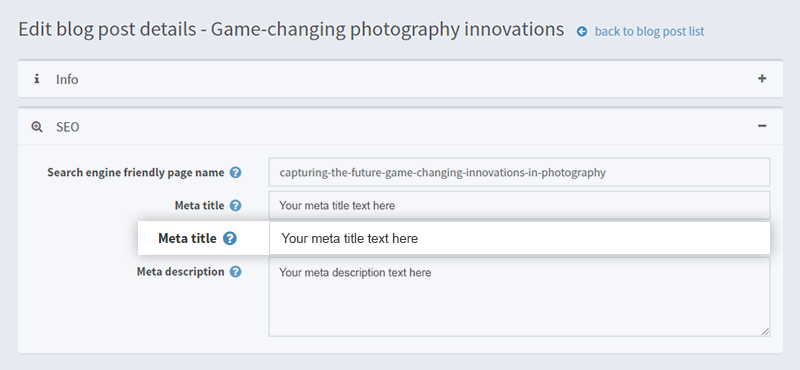
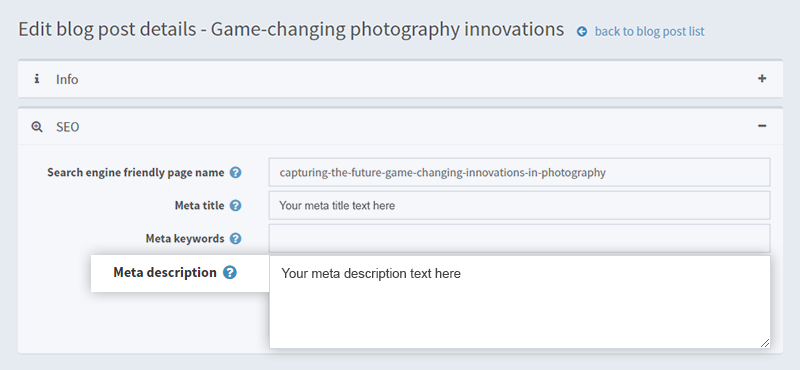
How to edit blog post meta titles in nopCommerce
Open your nopCommerce admin panel → Content management → Blog posts → Locate the blog post which meta title you want to edit → Click “Edit” → You’ll be redirected to an “Edit blog post details” page → SEO → Fill in your meta title in the “Meta title” field.
Meta description tags
Similar to the meta title tags, meta description tags are small snippets of HTML code and contain important information about your website and what it's about.
Google displays meta description tags as descriptions of the listings on the SERPs. For example, let’s take a look at nopCommerce’s listing one more time - this is its meta description:
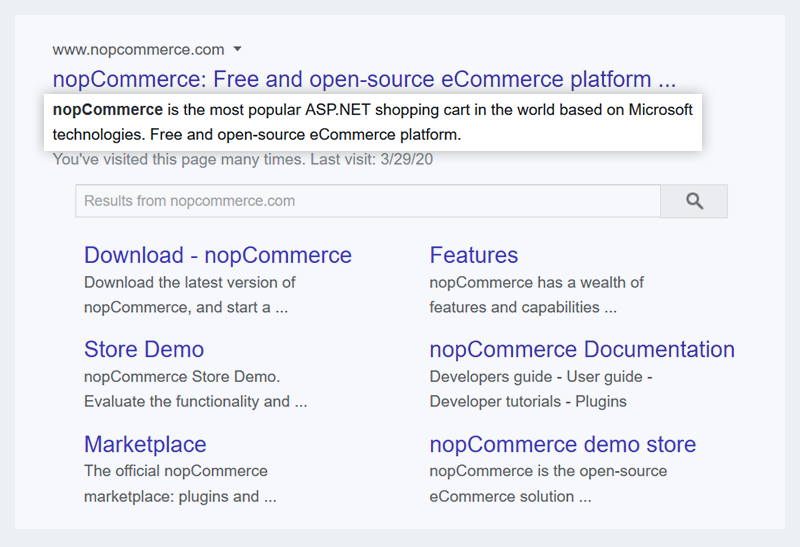
As you can see, the meta description doesn't tell us that nopCommerce is an open-source e-commerce platform (we already knew this because we read the title tag), it tells us that nopCommerce is the most popular ASP.NET shopping cart. In other words, the meta description tag shouldn’t provide the same information as the title tag. Instead, it should complement it and provide additional value.
Even though meta descriptions aren’t used by Google as a ranking signal, they are an important aspect of your on-page SEO, because, if they’re well-written and compelling, they will increase your CTR (which is a ranking factor). So, here are a few guidelines that can help you write SEO-friendly meta descriptions:
- The meta description of a page should provide a short summary of the page (i.e. give people and search engines an overview of its topic). You can use your meta descriptions to talk about your products - benefits, features, etc. However, don’t make it all about the sale. A good rule of thumb is to focus on your customers and try to put yourself in their shoes. For example, if you were thinking about buying a specific product, what would you like to know about it? What would facilitate your buying decision? Try to provide this type of valuable information when writing your meta descriptions. But don’t go overboard.
- You only have 150-160 characters - according to Moz, Google only displays the first 155-160 characters of meta descriptions. So, make them count - keep your meta description tags informative and to the point.
- Include target keywords. Your goal here is not only to avoid keyword stuffing, but to also find the balance between commercial and informational keywords. For example, if you’re writing the meta description of a product page, make sure to include commercial keywords; however, when it comes to the meta description of a blog post, focus on informational keywords.
- Include LSI (latent semantic indexing) keywords - this will help search engines understand the topic of your website better, as well as help build your topical authority. Both will contribute to higher rankings and more high-quality traffic, i.e. traffic that converts.
- Include CTAs - give your customers an enticing reason to click on your link, but be subtle. Don’t overdo it.
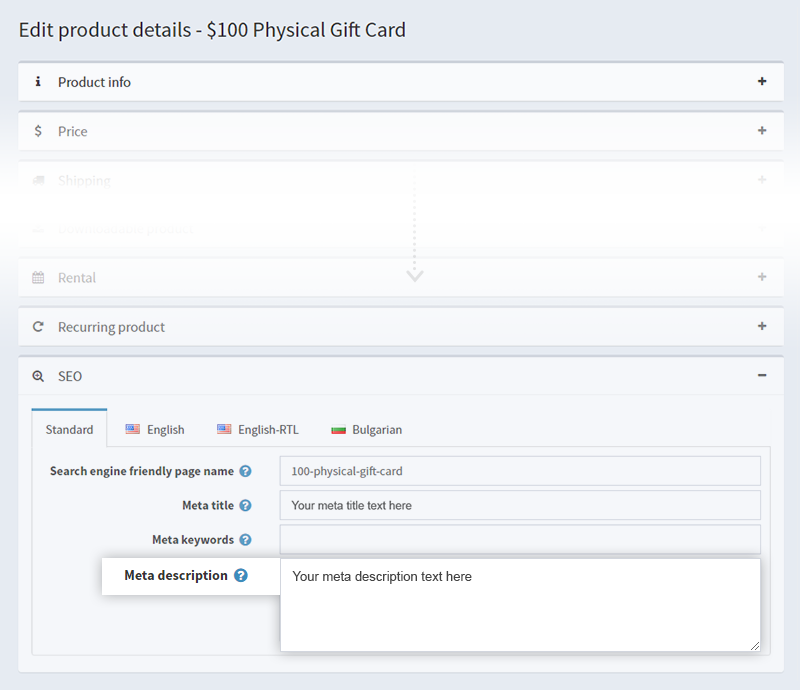
How to edit the meta descriptions of product pages in nopCommerce
Open your nopCommerce admin panel → Catalog → Products → Locate the product which meta description tag you want to edit → Click “Edit” → You’ll be redirected to an “Edit product details” page → Click on “SEO” → Fill in your meta description in the “Meta description” field.
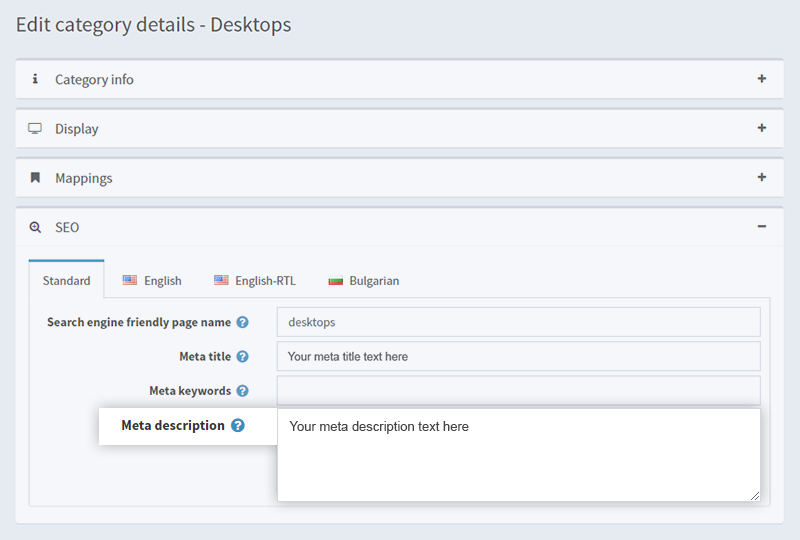
How to edit the meta descriptions of category pages in nopCommerce
Open your nopCommerce admin panel → Catalog → Categories → Locate the category page which meta description tag you want to edit → Click “Edit” → You’ll be redirected to an “Edit category details” page → Click on “SEO” → Fill in your meta description in the “Meta description” field.
How to edit the meta descriptions of manufacturer pages in nopCommerce (if you’re running a multi-vendor nopCommerce installation)
Open your nopCommerce admin panel → Catalog → Manufacturers → Locate the manufacturer page which meta description tag you want to edit → Click “Edit” → You’ll be redirected to an “Edit manufacturer details” page → Click on “SEO” → Fill in your meta description in the “Meta description” field.
How to edit the meta descriptions of blog posts in nopCommerce
Open your nopCommerce admin panel → Content management → Blog posts → Locate the blog post which meta description you want to edit → Click “Edit” → You’ll be redirected to an “Edit blog post details” page → Click on “SEO” → Fill in your meta description in the meta “Meta description” field.
There you have it - this is how you optimize your meta tags (meta title and meta description) in nopCommerce. Next, let’s take a closer look at image optimization.
Optimizing your images for SEO
Image optimization is more than just optimizing your alt tags to help search engines understand your images better. It also refers to the process of writing SEO-friendly image file names, choosing the right image file type and optimizing the size of your images (so that your pages load faster and you can provide a more seamless shopping experience).
Simply put, image optimization is an integral part of on-page optimization. This is true for stores of all sizes - from family-run stores with very few products to large-catalog stores. Let me explain why...
John and George are competitors who open their nopCommerce stores on the same day. Both offer amazing products at fair prices. John decides to optimize his images, George thinks that it is not such a big deal and decides not to do it.
During the first month both add 10 products to their stores. Both stores perform well.
The next month each of them adds 20 more products to their stores. The month after this - 30 more products appear on each of the catalogs. John keeps optimizing his images, George doesn’t. But now things are different...
Now John’s website starts to perform better in search (because somehow search engines understand his product pages and images better). In addition, John’s website and its product pages load much faster… and because John is able to provide a better shopping experience, his customer base grows, whereas George’s customers start to get a little frustrated… some of them are even considering shopping from John (others have already received their first orders from his store).
Do you see what I mean? At first sight, image optimization may not seem like “a big deal”... but if you decide not to do it, it can easily become a deal breaker for your customers, as well as have a negative impact on your rankings (and your revenue) in the long run.
So, even if your store is still small, you should definitely optimize your images, so that you can easily scale your business.
So, the question at hand is: How do you optimize your images for search?
As I already mentioned, when it comes to image optimization, there are a number of factors you need to take into account: alt tags, image file names, image size, and image type are the most important ones.
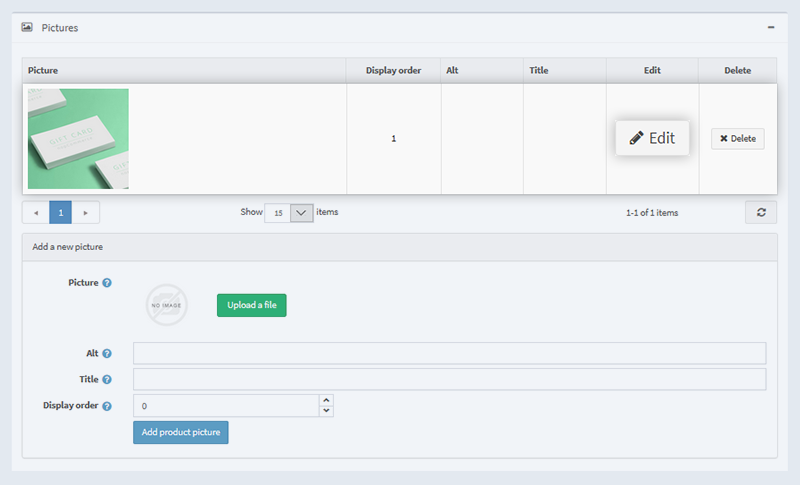
Let’s start with alt tags. Alt tags provide a text alternative to images. Adding alt tags is a principle of web accessibility. For example, alt tags are read by screen readers, thus, adding alt tags to your images makes your website more accessible to the visually impaired. It can also help you provide a better shopping experience if a specific page doesn’t load properly, and more. Alt tags also help search engines “see” images, i.e. they describe the image in a way that search engines can read and understand.
Let’s say you want to change the alt tag of a product image in nopCommerce. Open your nopCommerce admin panel → Product → Locate the product page that contains the image → Click “Edit” → You’ll be redirected to an “Edit product details” page → Pictures → Locate the picture which alt tag you want to edit → Click “Edit” → Fill in the new alt tag text in the “Alt” field → Click “Update”.
↓
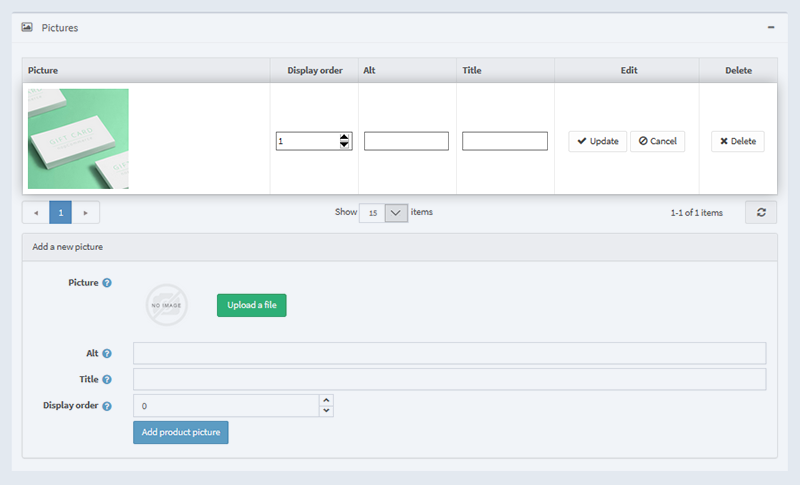
* Note: The steps are similar for images on other pages in your store.
Besides alt tags, search engines also use image file names to understand what a specific image is about. Therefore, you should write short and descriptive image file names that make sense. For example, if you have a picture of blue sneakers with brown laces, its image file name should be blue-sneakers-brown-laces.png, not IMG1234.png. It is better to separate the different words in the image file names with dashes (“-”), instead of underscores (“_”).
Pro tip: When writing image file names, put yourself in your customers shoes. Ask yourself: “If I wanted to buy a pear of blue sneakers with brown laces, how would I search for such sneakers? What words would I use? In what order?” Writing image file names that match common search patterns will help Google understand and index your images better. You can also use Amazon’s autocomplete feature to explore different search patterns and learn more about how people search for products like yours online.
* Note: Once you upload an image to nopCommerce, you cannot edit its file name. So, make sure you optimize the file names of your images before you upload them to your nopCommerce store.
Now that we’ve covered what you need to know about image alt tags and file names, let’s take a closer look at choosing the right image file type and optimizing the size of your images.
There is a correlation between the image type and its size. And it is crucial that you find the balance between the size of an image (i.e. you shouldn’t choose images that are too heavy and slow down your website) and its quality (images of poor quality may ruin your customers' shopping experience).
There are 3 common image file types: jpeg, png, and gif.
- JPEGs are approximately 30kb and can be compressed without compromising their quality. Therefore, this image type is suitable for product images. Note that you shouldn’t edit them too many times because their quality degrades with each edit.
- GIFs are slightly heavier than JPEGs (approximately 35 kb) and have a slightly lower quality. This makes them more suitable for thumbnails or smaller icons - this is because even if the quality of such images is poor, it won’t impact the shopping experience of your customers.
- The quality of PNGs is higher than the quality JPEGs and GIFs. They also support much more colors. However, this comes at a price - their size is considerably larger (from 30 kb to 100+ kb).
Ultimately, if PNGs aren’t so heavy that they slow down your website, they are the best choice for product photos, blog post covers, screenshots, banners, etc. However, if you want a faster loading website, while still being able to present your products in the best possible light, you can use JPEGs for your product photos and provide customers with the option to view a larger image of higher quality (i.e. a PNG) in a different tab with the click of a button.
These are the basics of image optimization. Next, we’ll take a closer look at headings and subheadings - why they’re important and how you can optimize them.
Headings and subheadings
Headings (H1-H6) define a page’s hierarchy and its most important sections. They can be used to define the topic of a page, or to break up and categorize its content. In all cases, headings improve the usability of your website and help both humans and search engines understand your pages better.
Here’s what you need to know about headings:
- H tags should be used in hierarchical order. For example, H3 tags should be nested in H2 tags, H4 tags should be nested in H3 tags, H5 tags should be nested in H4 tags, etc.
- The H1 tag defines the topic of the page & there should be only one H1 tag per page.
- H2 and H3 tags are used to break up and categorise the content of a page. H4-H6 tags can be used for the same purposes, but their use is not recommended unless it is absolutely necessary (for example, if you’re writing a long and complex article with a lot of sections, subsections, cases, examples, etc.). Ultimately, the simpler the structure of a page is, the better.
- The heading tag of a specific section (of a page, or an article) should define the topic of the section, i.e. they should be informative.
- All H tags should be relevant (to the topic of the page) and there must be a logical correlation between them (this is particularly true for headings and their subheadings, e.g. H2 and H3 tags).
- Including keywords (commercial keywords, informational keywords, and LSI keywords) in your headings and subheadings is good for SEO. However, be careful with keyword stuffing - it is never good and makes your content look spammy and not trustworthy (both to humans and search engines).
How to edit the H1 tag of product pages in nopCommerce?
In nopCommerce the product name is the H1 tag of the product page. So, to edit the H1 tag of a product page, you should:
Open you nopCommerce admin panel → Catalog → Products → Locate the product page which H1 tag you want to edit → Click “Edit” → You’ll be redirected to an “Edit product details” page:
Click on “Product info” → Fill in the H1 tag of the product page in the “Product name” field.
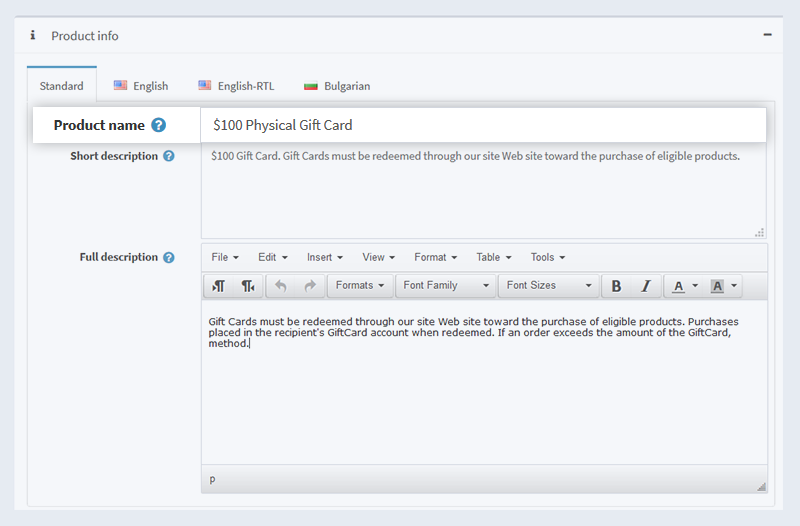
How to add H2-H6 heading to your product pages?
Take a look at the “Full description” field of the “Edit product details” page (“Product info” section).
Highlight the text you want to apply the H tag to → Click on “Formats” → “Headers” → Choose the header you want to apply. Reminder: It is important that a page has only one H1 tag (which, in this case is the product name), so, don’t apply an H1 tag anywhere else in the product description.

The process is similar for other pages in your nopCommerce. For example, the H1 tag for category pages is the same as the name of the category, so to edit the H1 tag of a category page, you need to:
Open your nopCommerce admin panel → Catalog → Categories → Locate the category page which H1 tag you want to edit → Click “Edit” → You’ll be redirected to an “Edit category details” page → Click on “Category info” → Fill in your new H1 tag in the “Name” field.

In the “Description” field, you can apply H2-H6 tags to your text following the steps described in the section on applying H2-H6 tags to product pages.
Or, if you want to edit the H1 tag of a manufacturer page, go to Catalog → Manufacturers → Locate the manufacturer page which H1 tag you want to edit → Click “Edit” → Click “Manufacturer info” → Fill in your new H1 tag in the “Name” field.
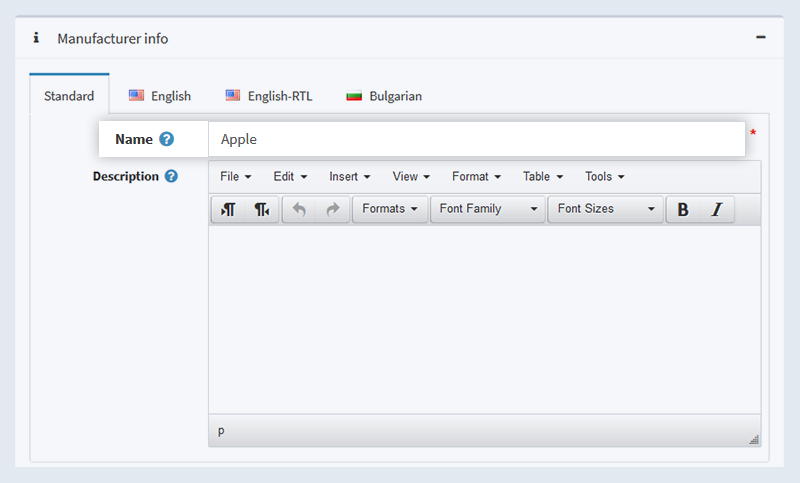
In the “Description” field, you can apply H2-H6 tags to your text following the steps described in the section on applying H2-H6 tags to product pages.
As you can see, the process of adding and optimizing your H tags is straightforward. Now, we’ll move on to the last section of today’s article - SSL certificates.
Enabling SSL for nopCommerce: why it's important & what you need to know
An SSL (Secure Socket Layer) certificate is an important part of your nopCommerce on-page SEO. The reason is simple: search engines prefer secure websites (“https://” websites) over non-secure websites (“http://” websites). Thus, not having an SSL certificate will have a negative effect on your rankings.
But installing an SSL certificate is an absolute must for other reasons as well. For example, an SSL certificate ensures that your customers’ sessions (visits and shopping behavior) and transactions are secure. Thus, not having an SSL certificate will undermine your credibility.
Simply put, enabling an SSL certificate will have a positive effect on your rankings, it will help build your credibility and it will help you make more sales.
For more information on how to enable SSL for nopCommerce, read our article on the matter → Q3: How to Enable SSL for Your NopCommerce Store
Note: To enable an SSL certificate for your nopCommerce store, you need to first install and properly configure an SSL certificate for your domain.
Why? Once SSL is enabled nopCommerce will always redirect the Administration and Login pages to the secure URL (https://) you've entered. If the SSL configuration is not correct, or that URL is not accessible, you will not be able to login into your store or your administration. Therefore, it is essential that you make sure your SSL configuration is correct before enabling SSL for your store.
Wrap-up
In this article we talked about a few easy to apply, still, very important on-page SEO strategies for nopCommerce:
- Optimizing your meta tags (meta titles and meta descriptions)
- Optimizing your images (alt tags, image file names, image size and image type)
- Optimizing your headings
- Enabling an SSL certificate for your nopCommerce store
We hope this guide gave you a better idea on what you can do (and how you can do it) to make search engines fall in love with your nopCommerce store.
Now, we’d like to hear from you! Which strategy will you start with? Meta tags optimization, image optimizations, page structure optimization, or enabling an SSL for your store? Let us know by leaving a comment below!