CONFIGURING THE HOME PAGE
Follow these steps in order to configure your home page like the Element Earth Variant One Demo.
You need to have in mind the following options when setting up your store home page. Please have a look at the different elements you can display on the home page:
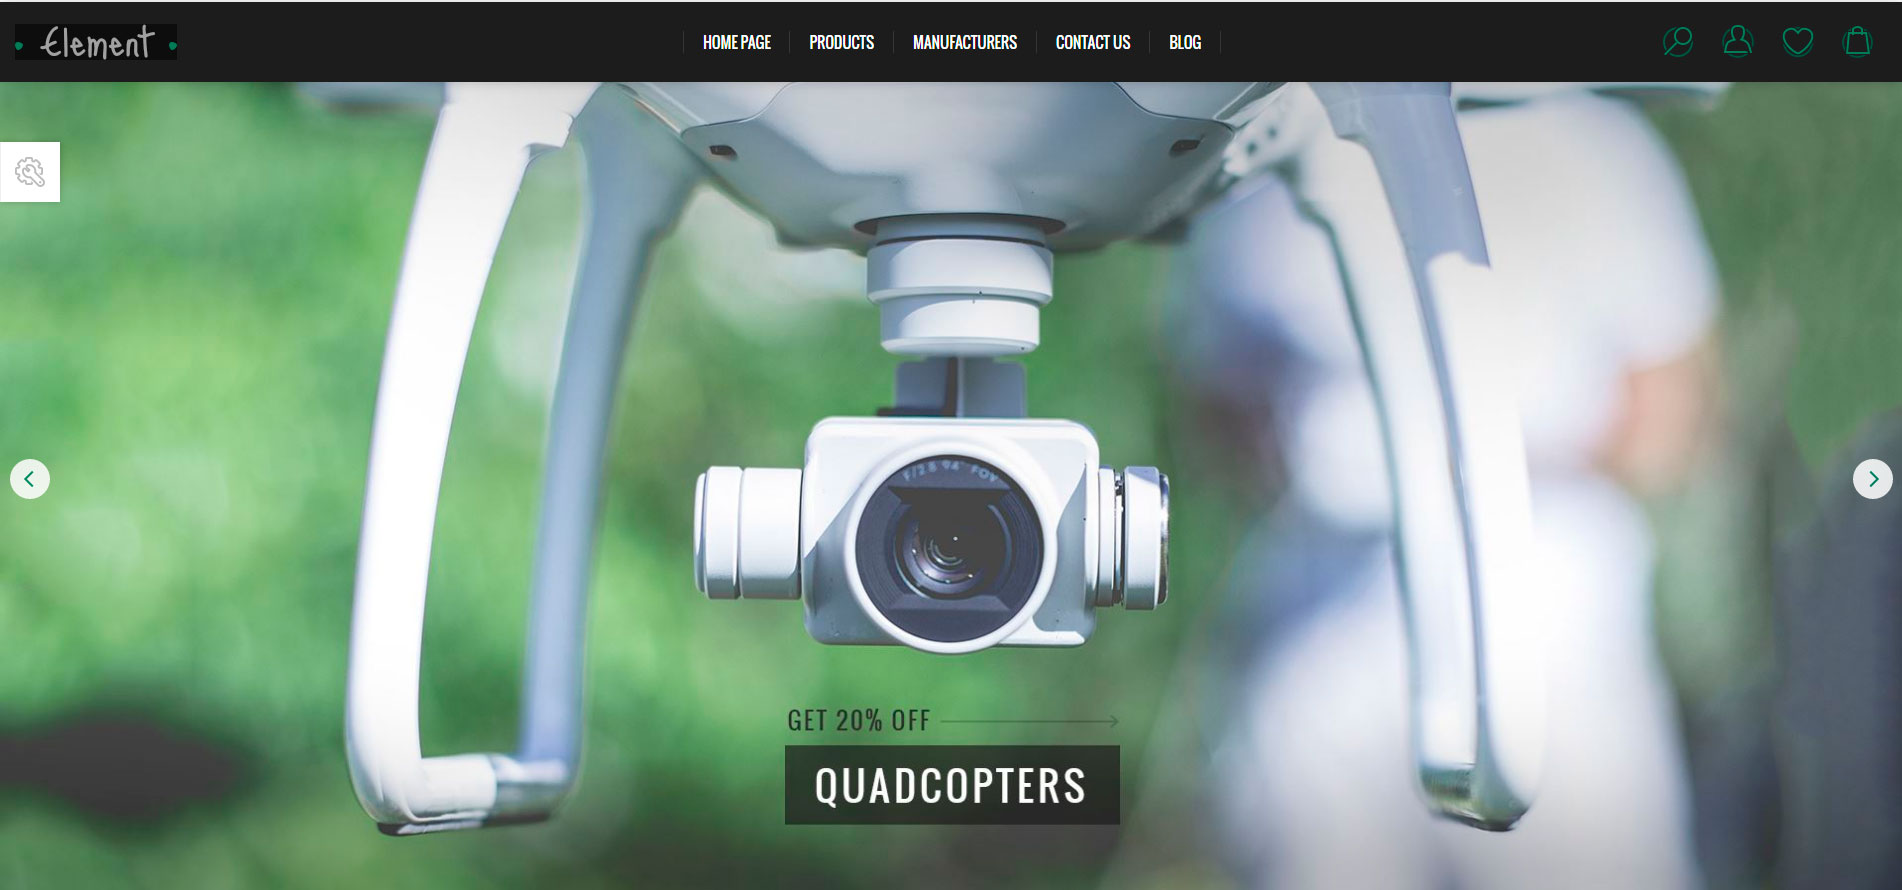
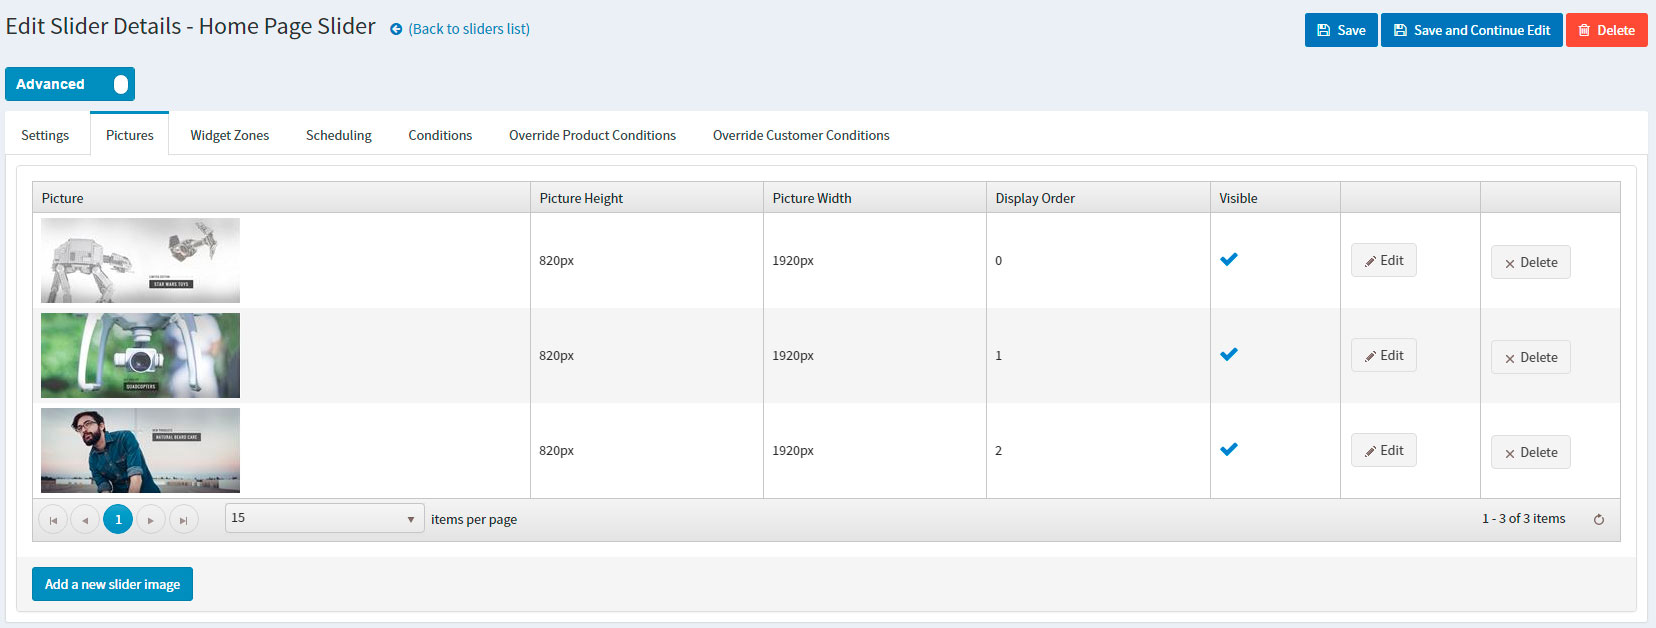
You can create a Slider using our Nop Anywhere Slider plugin as shown below.
Create a new slider of type Nivo.

Add the required images to the slider.
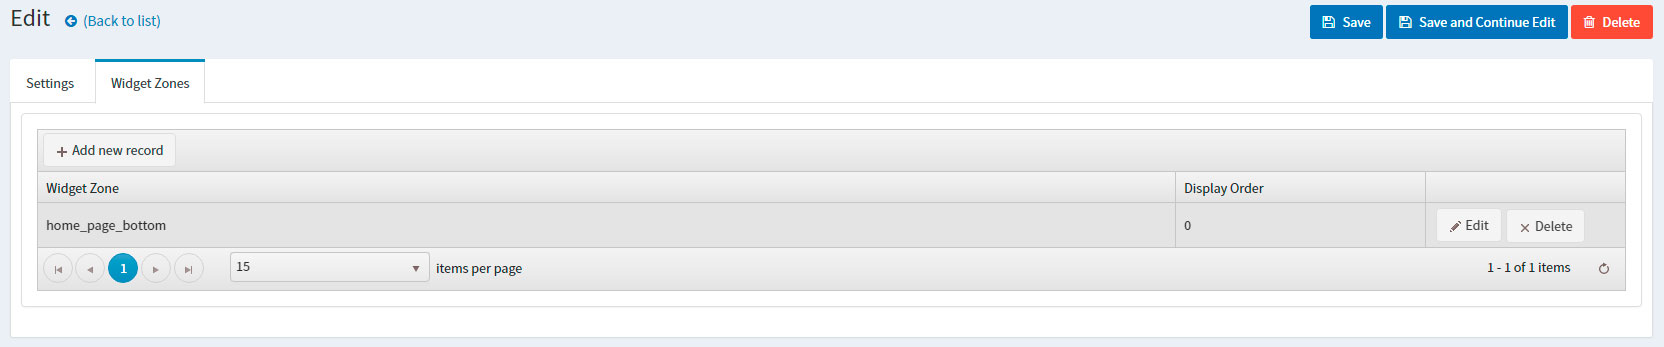
Finally, map the slider to the "home_page_main_slider" widget zone in order to display it on the home page.

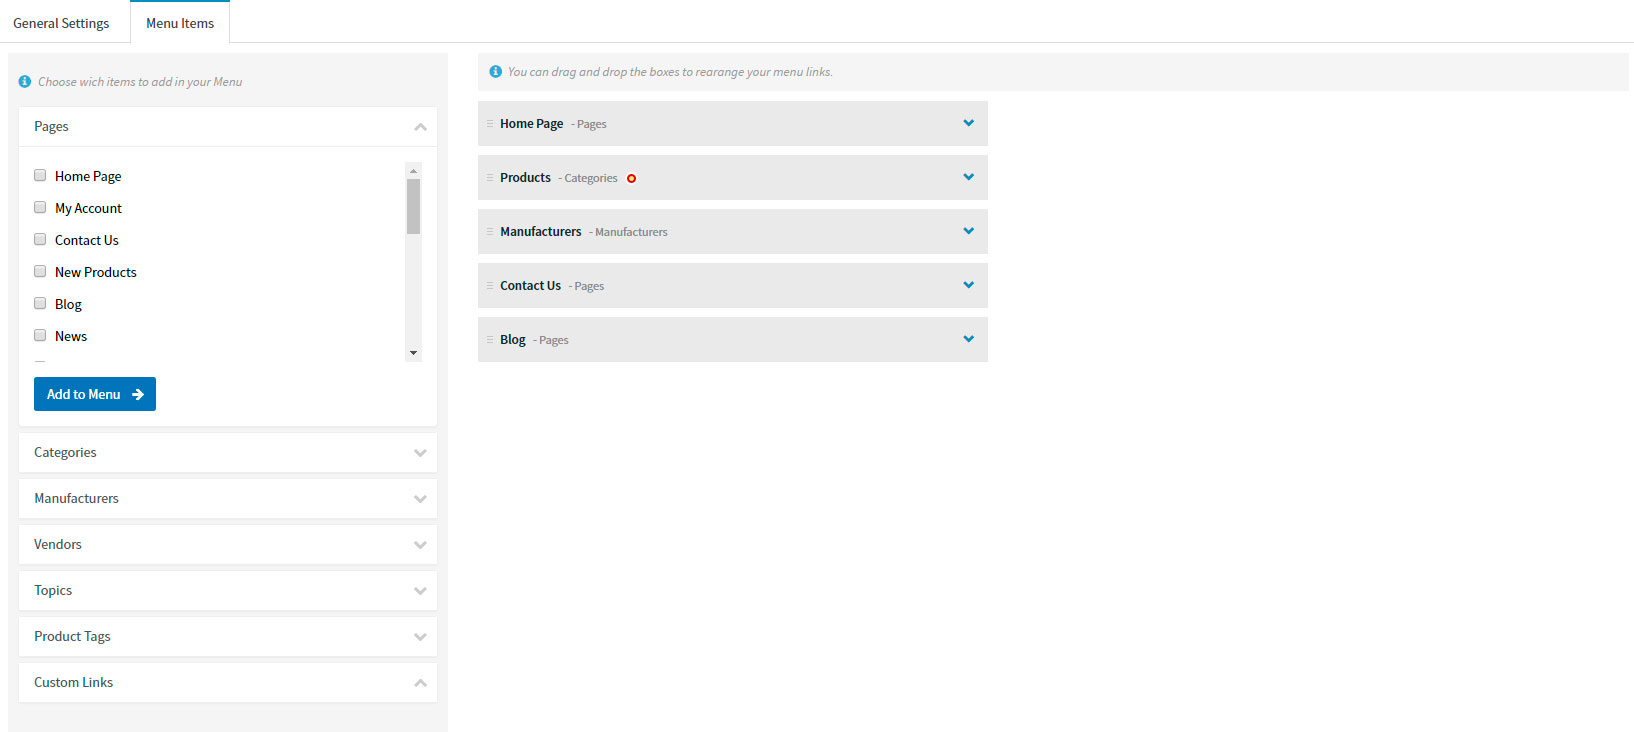
The Nop Mega Menu plugin, that is shipped with the Element Theme, provides you with the ability to create your own templates for the menu navigation of your store. In order to create your own Mega Menu you will need to go to Administration -> Nop-Templates -> Plugins -> Mega Menu -> Manage Menus and add a new Mega Menu.

After creating your Mega Menu you will need to configure your Menu Template. The Nop Mega Menu is a very powerfull and simple to use tool. You can arrange, nest and even edit Menu Items like shown in the image below. You can find more information on how to configure your Mega Menu in our Documentation.
The next step in configuring your home page is to set your Featured Products. You can show all products of your choice on the home page of Nop Element Theme.
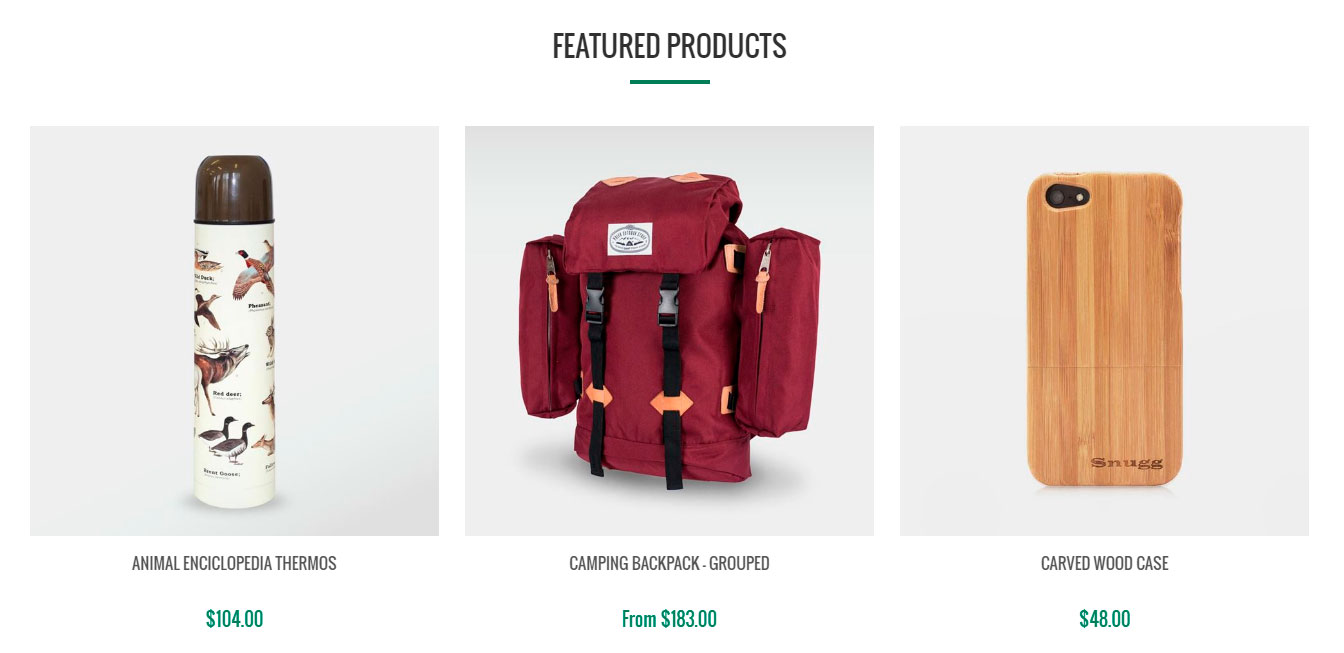
In order to achieve this, you will need to edit your Products and check the Include on home page setting.
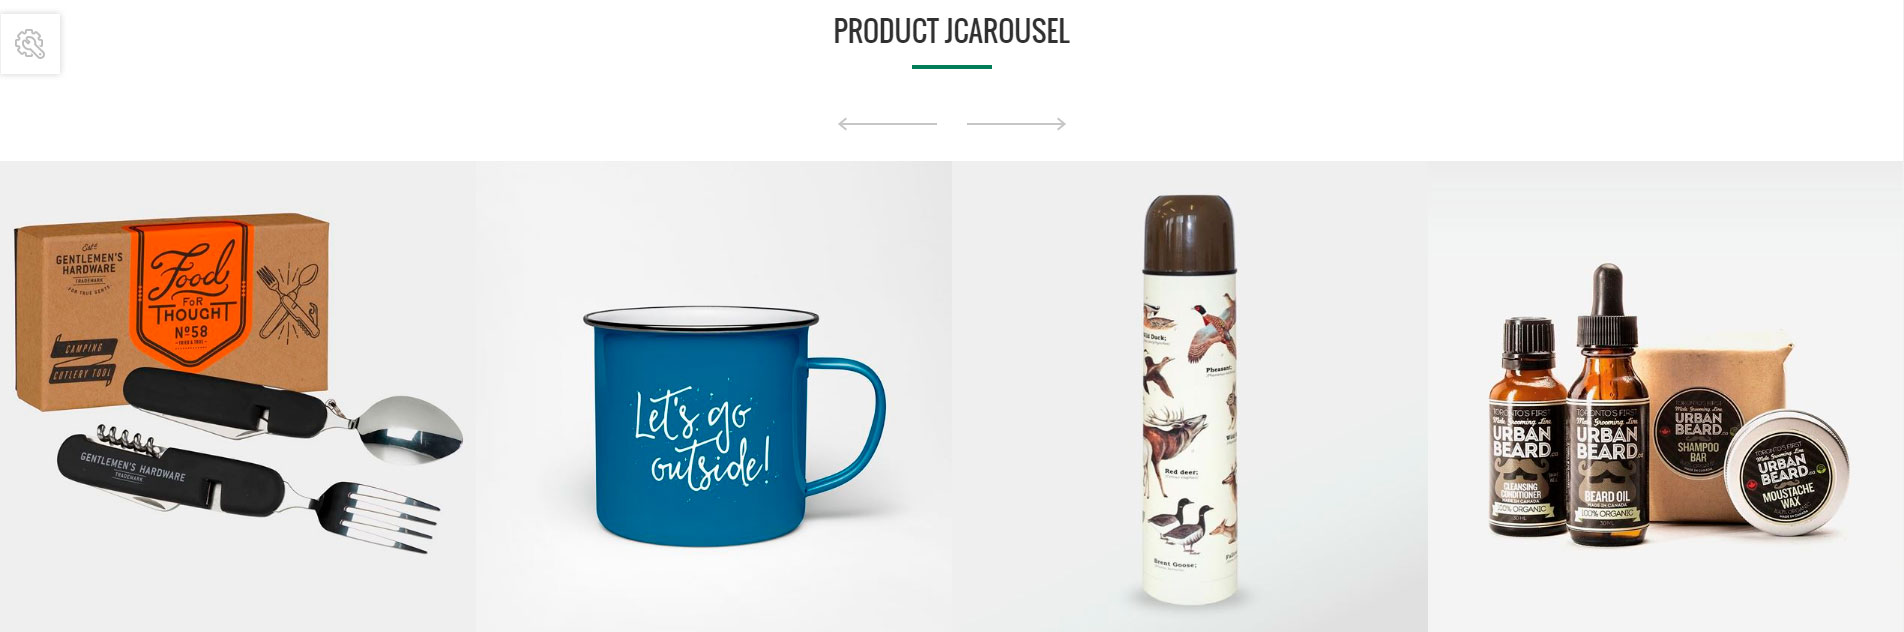
Moving on to the Product JCarousel section of your Home Page. This is a nice way to show your best products on your Home Page. Using the JCarousel plugin you can show your desired products on the home page.
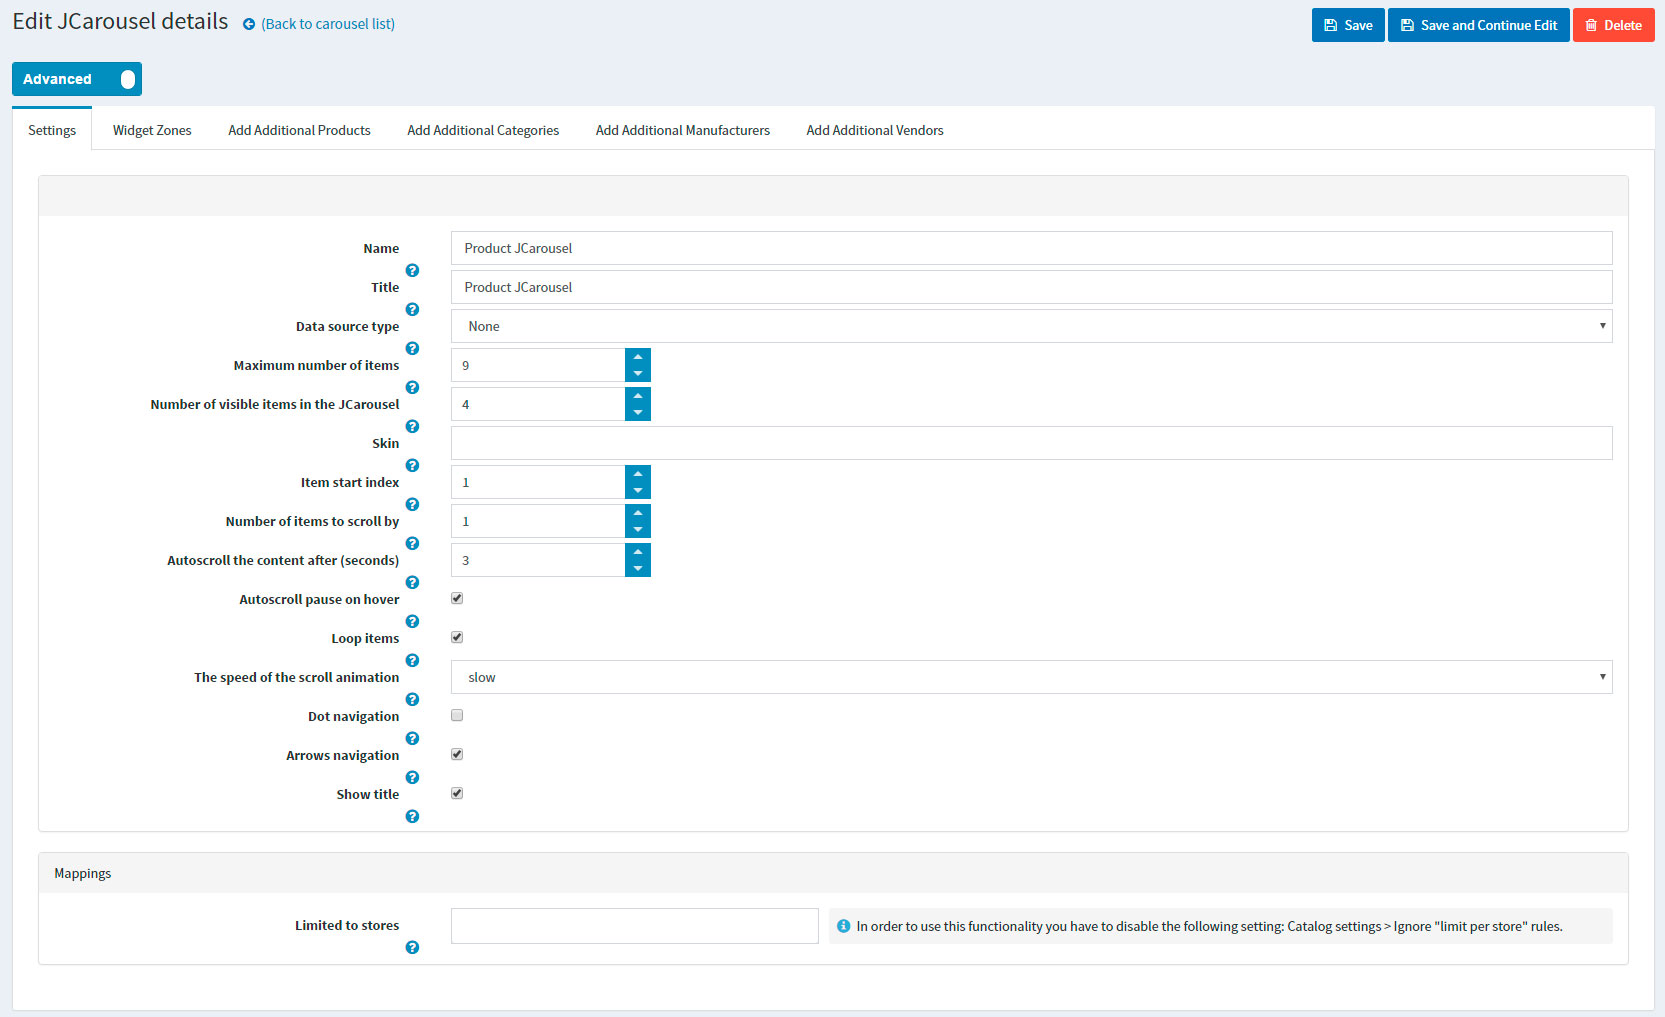
You will have to create a JCarousel from Administration -> Nop-Templates -> Plugins -> JCarousel -> Manage JCarousel.
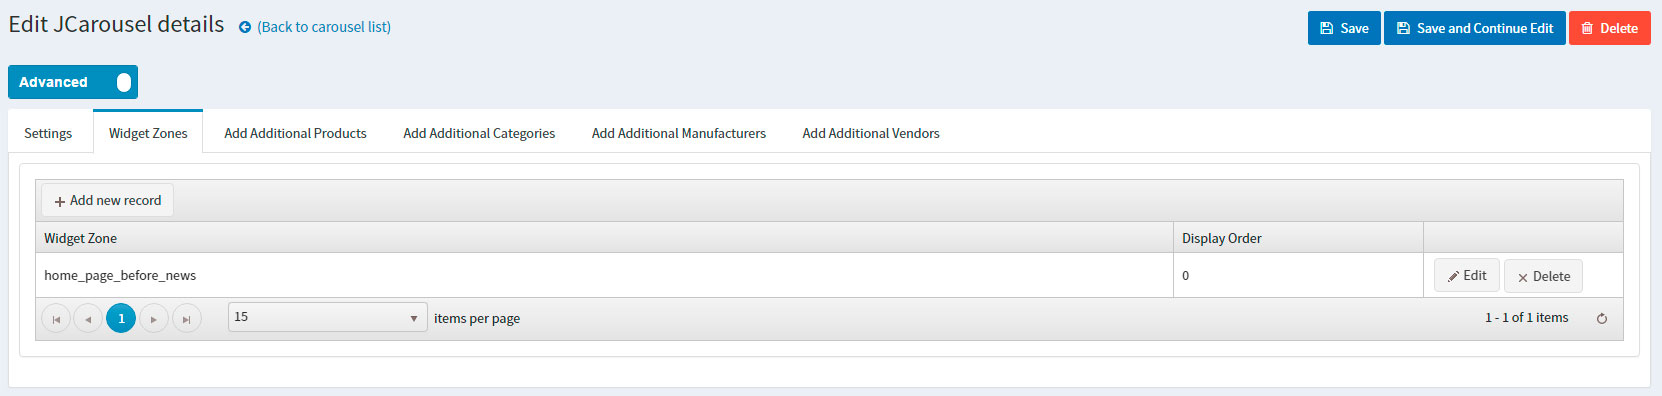
After that, you will have to set your JCarousel to the "home_page_before_news" widget zone.
That will result in a nice Carousel on your home page displaying your selected products.
Moving on to the Smart Product Collection plugin. Using this plugin you can show your best products on your home page and group them accordingly in categories. There are two types of Smart Product Collections: Category Product Collections and Custom Product Collections.
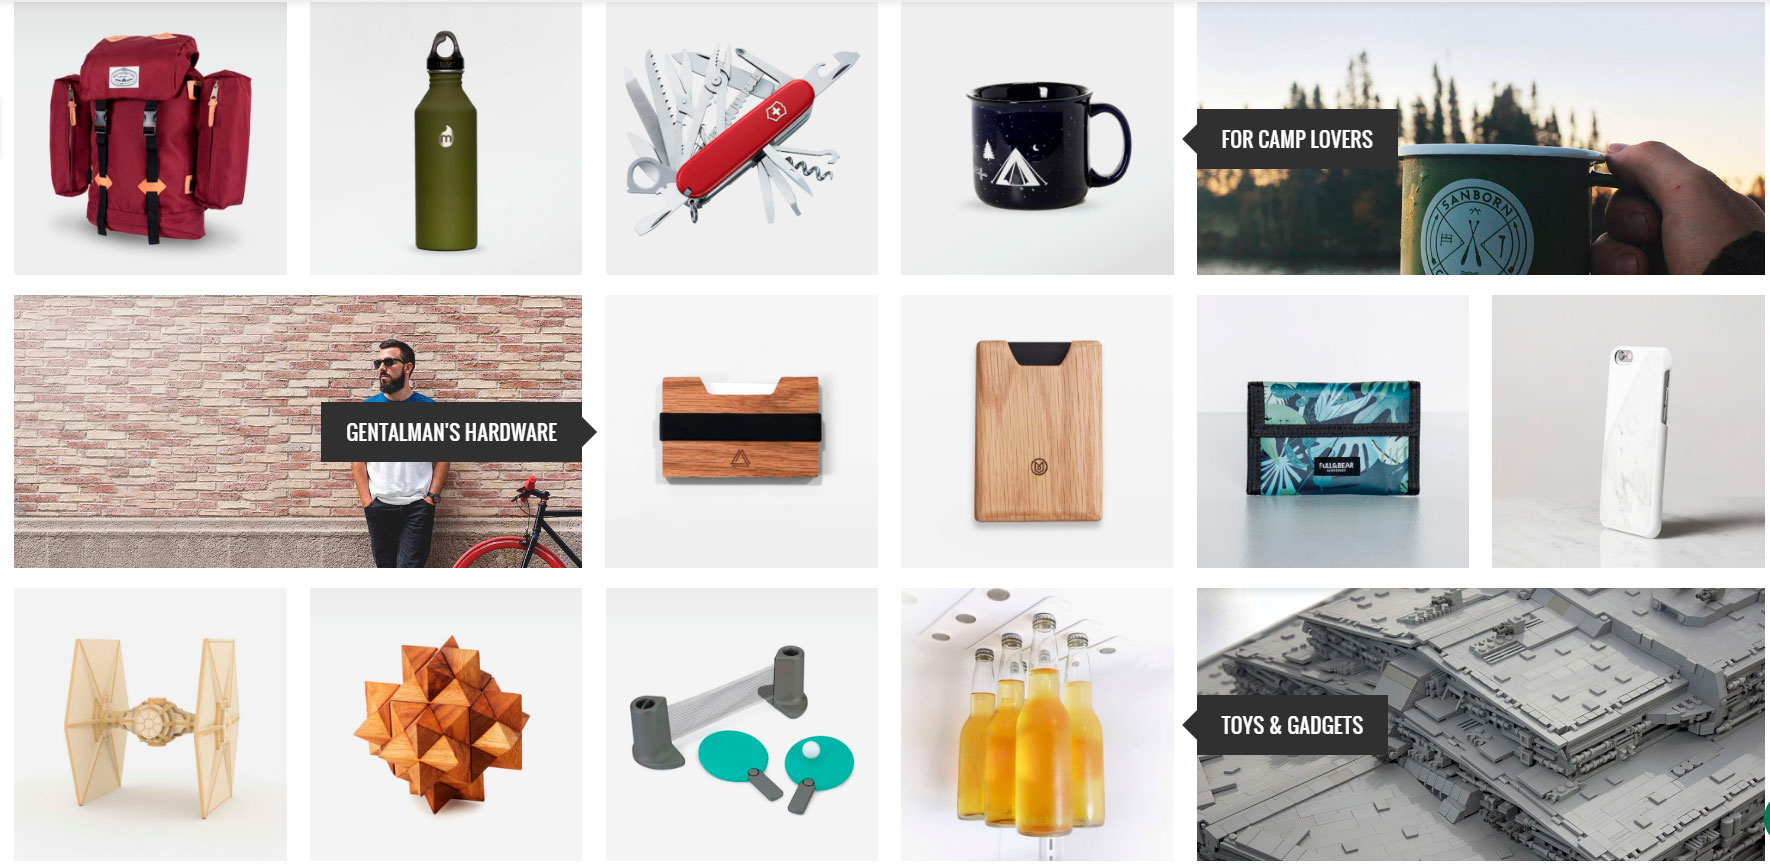
You can use the category product collections to display different products from a certain category depending on many criteria(e.g. Most Wanted, Best Sellers, etc).
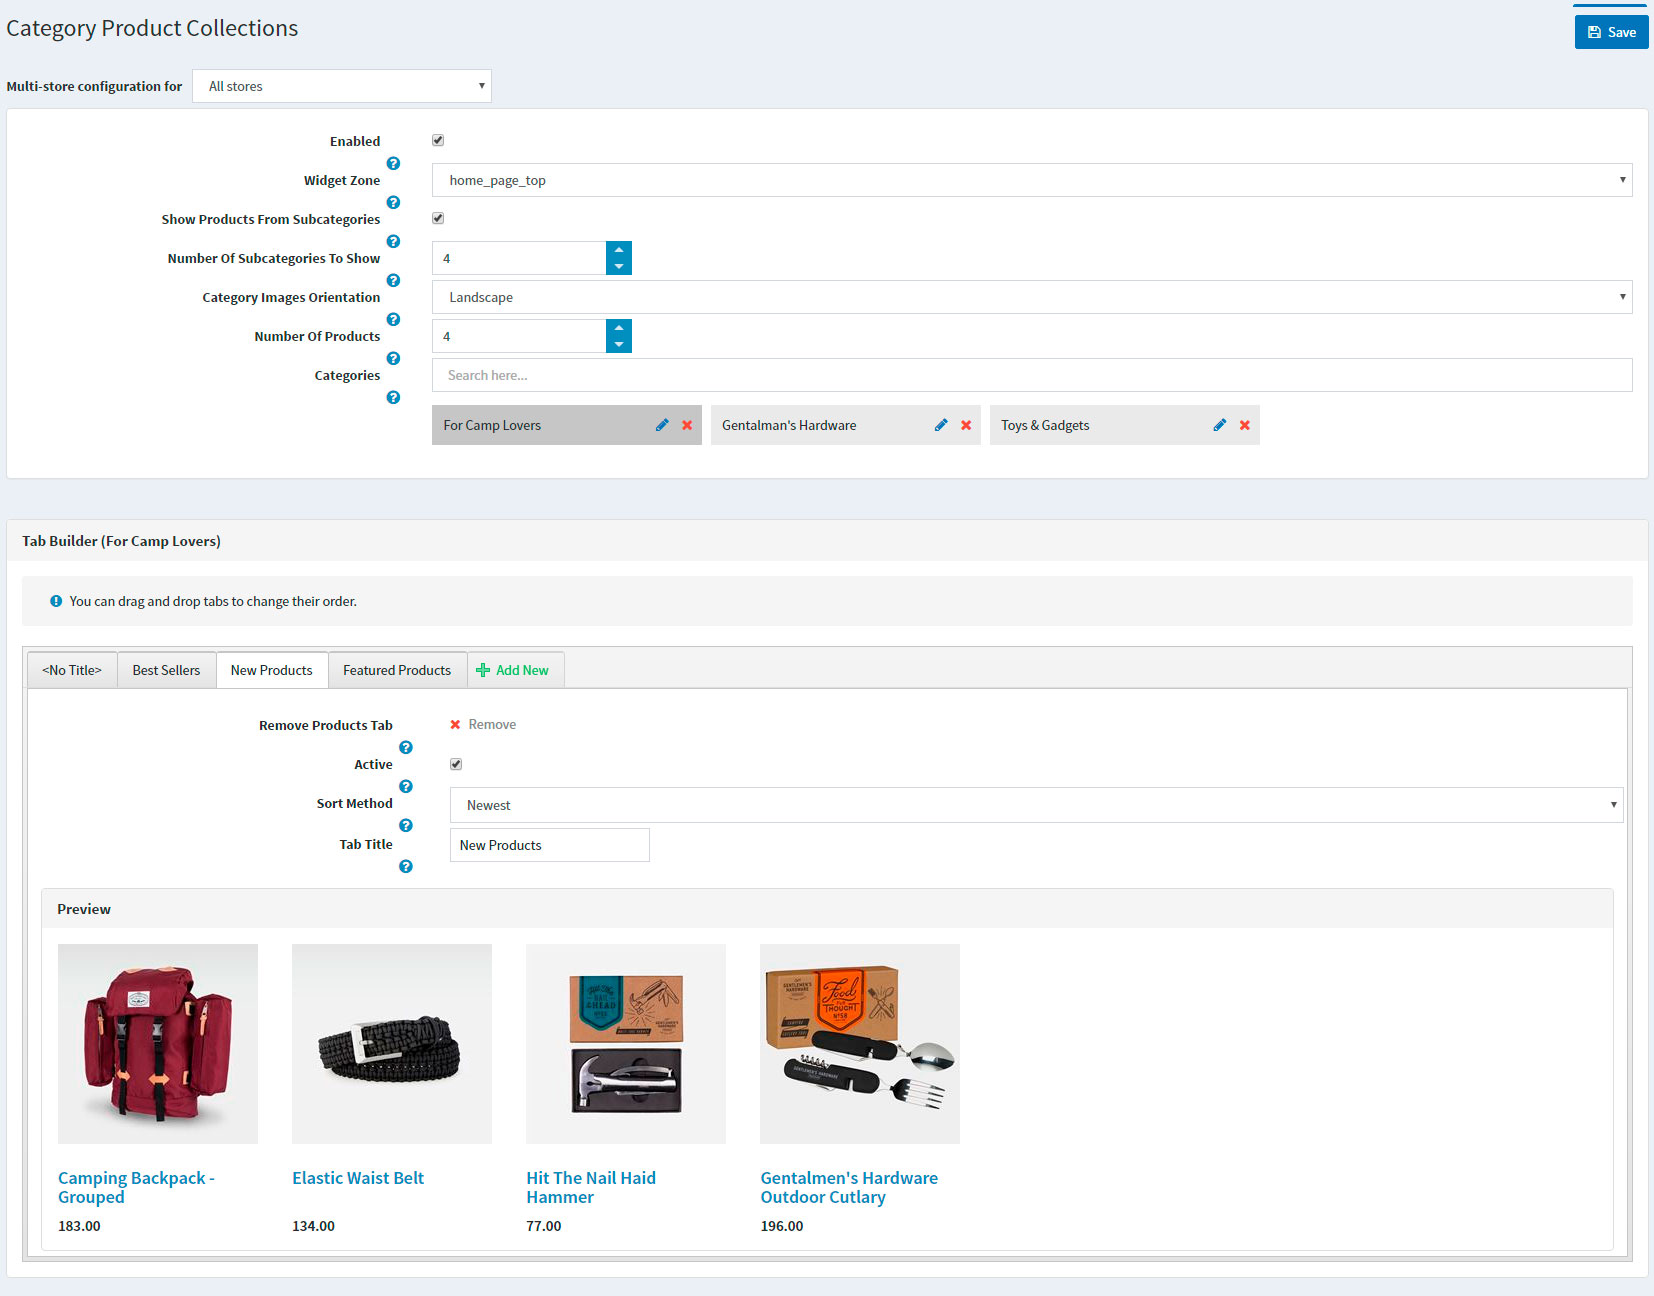
This will result in a nice ordered way to show your best products from a category on your home page:
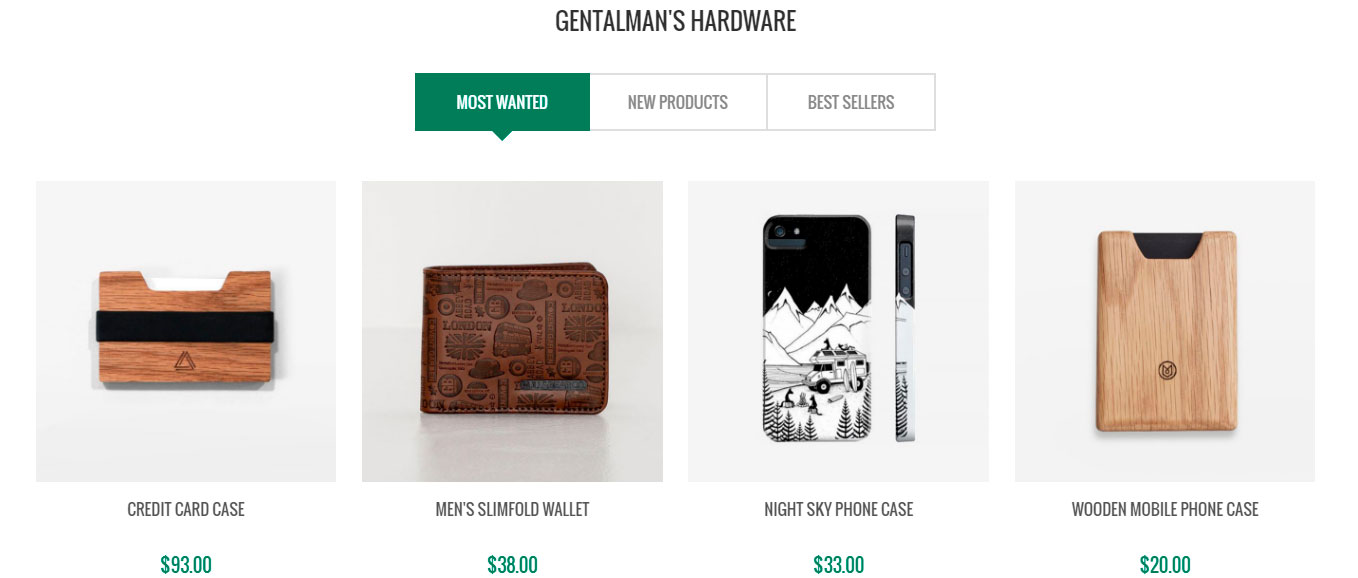
You can use the custom product collections to display products on the home page and order them in tabs depending on many criteria(e.g. Most Wanted, Best Sellers, Custom criteria, etc).
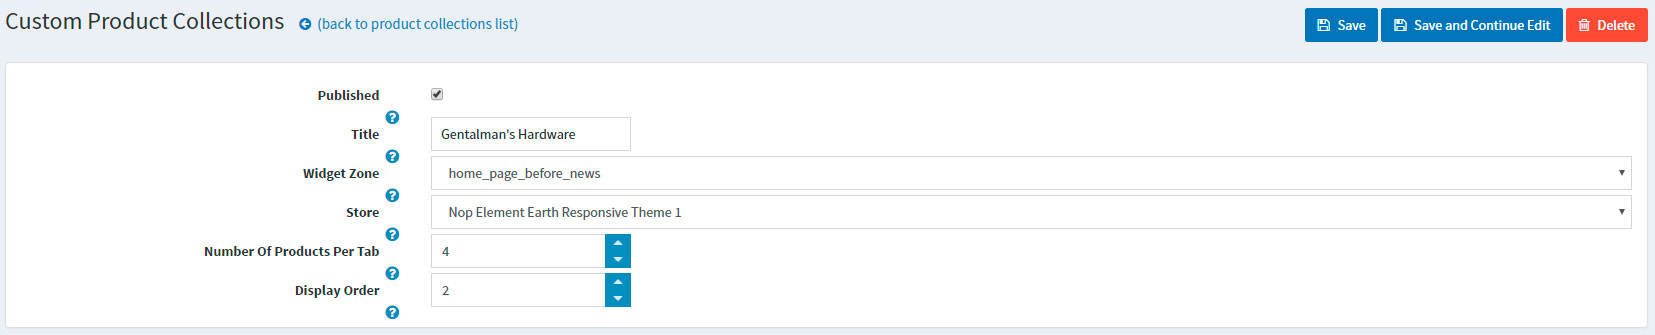

This will result in a nice ordered way to show your best products on your home page:
The next thing on your list when configuring the Home Page should be configuring your Blog.
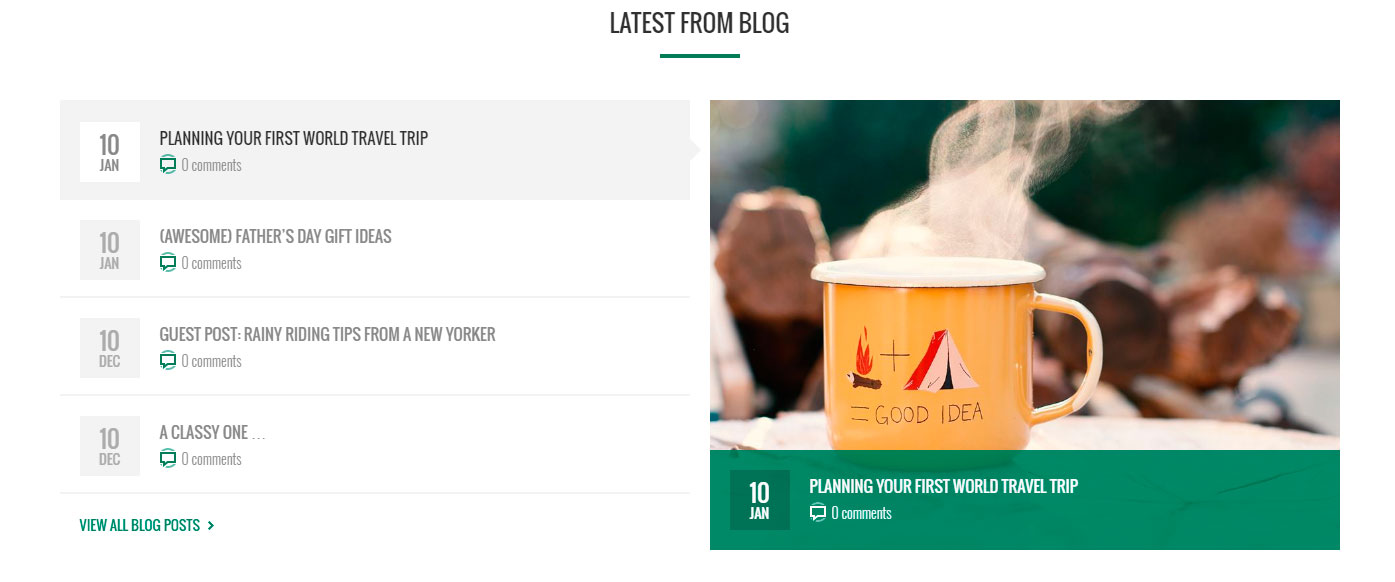
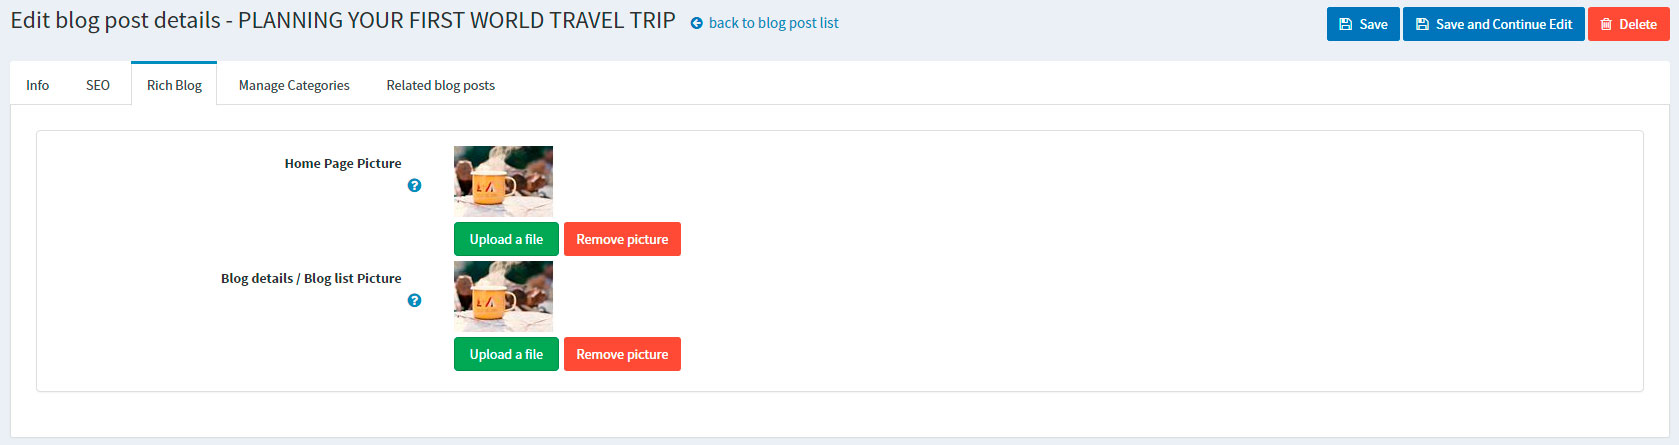
You can upload images for your blog in Administration -> Content Managment -> Blog -> Blog Posts -> Edit Blog Post -> Rich Blog Tab .
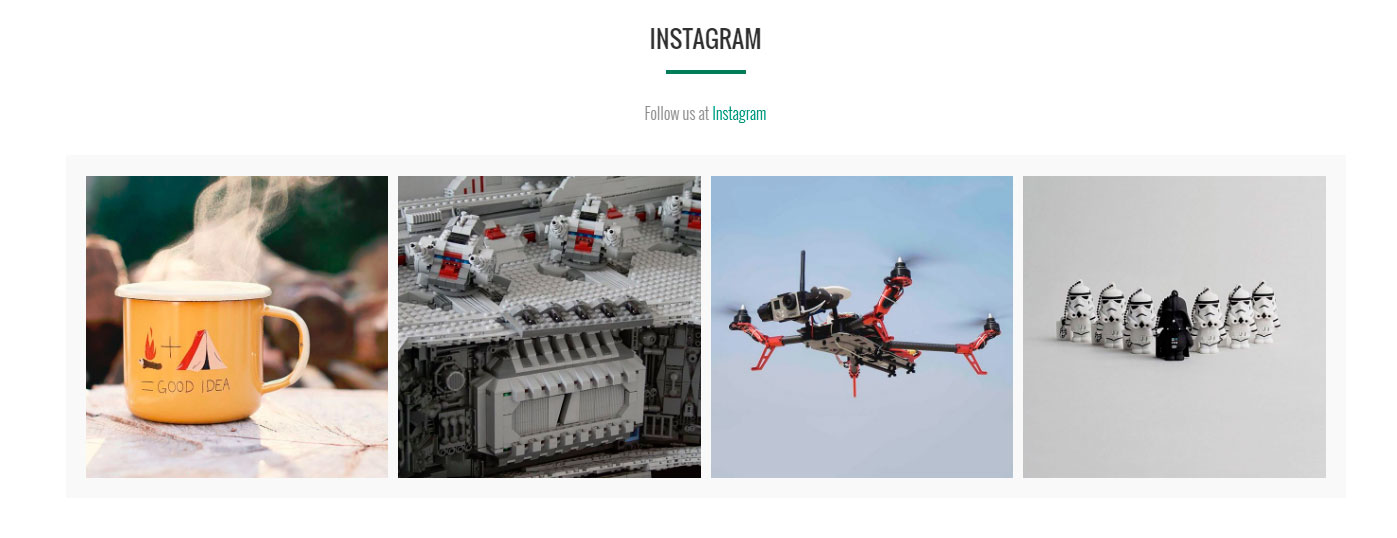
You can finish configuring the home page by enabling the Nop Social Feed Plugin. Thanks to our plugin you can get social feed directly from your social media accounts. Facebook, Twitter, Instagram, Google Plus and Pinterest are the available social media you can choose from. They are all well integrated on the Poppy Home Page as well as on the Social Page you can enable from the Social Feed Plugins Administration.
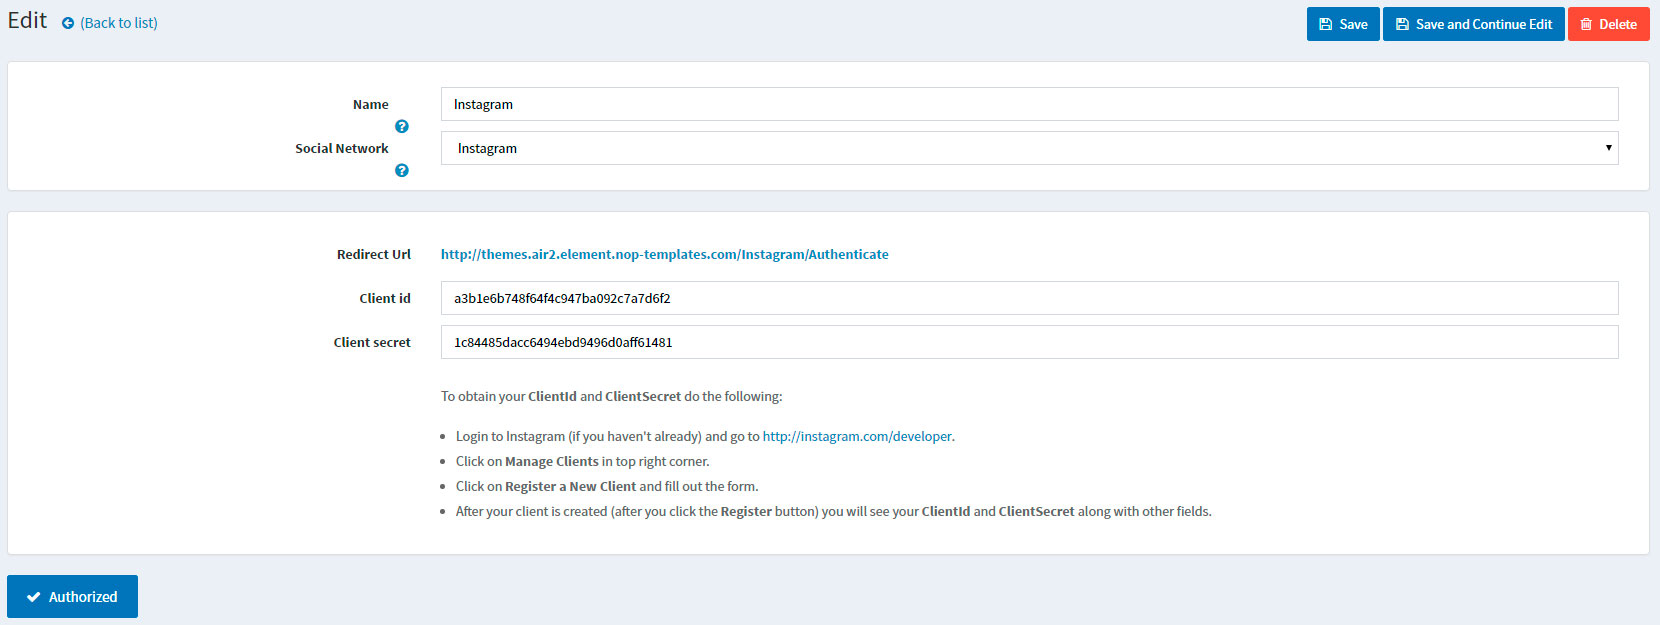
Let`s have a look at the configuration of the Instagram Social Feed:
You will need to go to Administration -> Nop-Templates -> Plugins -> Social Feed -> Configure Social Networks and add a new social network, and configure it. You can learn more about configuring your Social Networks in the Nop Social Feed Documentation.
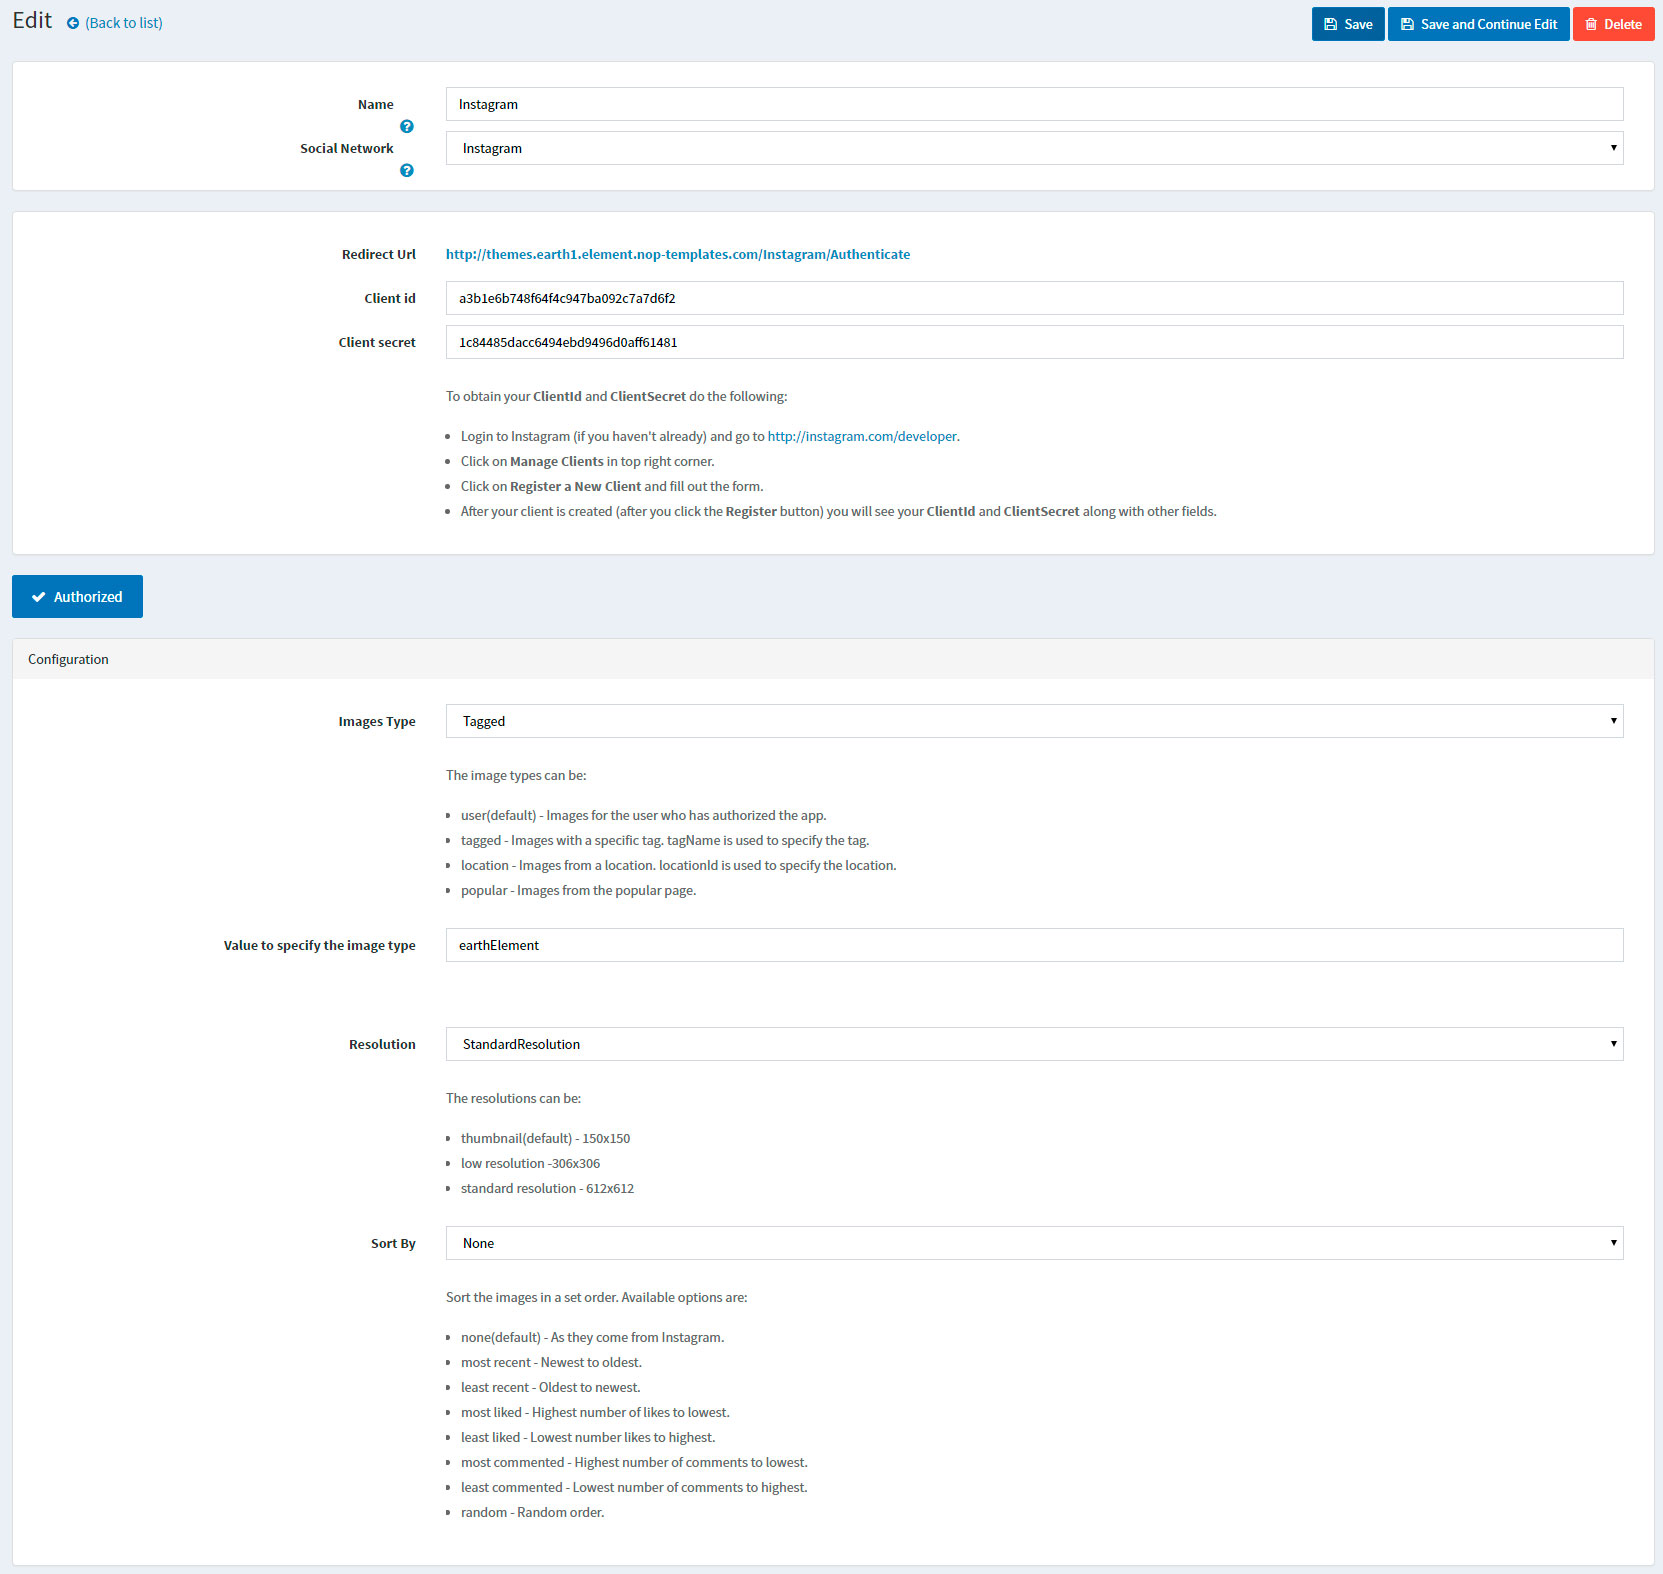
The next thing you will need to do is showing your social feed on your home page. This can be done from Administration -> Nop-Templates -> Plugins -> Social Feed -> Manage Social Feeds. Here, you would also need to add a new Social Feed. Give your Social Feed a name and choose your Social Network (in this case Instagram) and save. You can find more information about the settings here in the Nop Social Feed Documentation.
After that, you will need to choose your widget zone and your Social Feed set up is ready. In this case, the widget zone is "instagram_default".