With the Nop Store Locator plugin you can get your stores found in the blink of an eye. This powerful plugin uses the official Google Maps interface and is perfect for stores, dealers, distributors and much more.
When Nop Store Locator is enabled and you add your store locations, a new button will appear at your menu (All Shops). If you hover it you will see a drop down containing all your shops. If you click it you will go to a All Shops page where you will see a list of all your shops and a map showing all your store locations.
If you click on a store location you will be redirected to a page containing the information for the specific store location, containing a map showing your store location and a description.
To enable Nop Store Locator go to Plugins -> Nop Store Locator -> Settings.
Settings
- Header Menu Integration - Choose where to show the Store Locator in the main menu. This will provide menu item with all available shops in it. Choose "None" if you do not want to show the Store Locator in the menu.
- Home Page Integration - Choose where to show the Store Locator map on the Home page. It will include only the shops that have checked the "Show On Home Page" setting. Choose "None" if you do not want to show the Store Locator on this page.
- Contact Us Page Integration - Choose where to show the Store Locator map on the Contact Us page. Choose "None" if you do not want to show the Store Locator on this page.
- Units System - Set the default measure units system (kilometers or miles). This setting allows the switch between metric and imperial units (1 mile ~ 1.609344 kilometers).
- Default Distance Radius - Set the default distance radius that will be pre-filled in the search input.
- Google API Key - If your domain was not active prior to June 22nd, 2016, you need to obtain your own key from here:
https://developers.google.com/maps/documentation/javascript/get-api-key - Default Shop Image - Set the default shop image to be shown when the shop does not have images.
- All Shops Page Image Size - Set the shops image size for the All Shop page.
- Shop Details Page Image Size - Set the shops image size for the Shop Details page.
- Custom Map Styles [JSON Format] - Set custom styles for the Google Map in your store. This should be written in JSON format.
Go to Google Maps Styling Wizard: https://mapstyle.withgoogle.com/.
Customize colors, roads, labels of the map.
Click on Finish and copy the JSON from the pop-up.
Manage Shops
In Manage Shops section you could add new store locations. Just click the Add New button to add new store location. You could also Edit or Delete you store locations by clicking the respective buttons.
Manage Shops - Settings
From this tab you could show, sort and enter information about your store location.
- Visible - If checked the store location will be visible in the public site. This setting allows you to have multiple store locations that are not visible for your customers but could become visible at any time.
- Show On Home / Contact Us Page - Check the setting to show the store on the home page / contact us map.
- Shop Tags - Shop tags are keywords that this shop can also be identified by. Enter a comma separated list of the tags to be associated with this shop.
- Display Order - This determines the order in which your store locations are shown. With this setting you can choose the order of your store locations at the All Shops page or All Shops dropdown at the menu.
- Name - This is the name of your shop in the menu and in the All Shops page.
- Short Description - The short description is shown on the all shops page and also in the marker on the map.
- Full Description - The full description is shown on the shop page.
Manage Shops - Map Location
From this tab you can enter you store location by coordinates (Latitude, Longitude) or you could find your store on the map, using the comfortable interface of Google maps.
To map your store using the map you can:
- Search address - With this option you can go to almost every address in the world just for a few seconds.
- Street View - You have street view so you can easily find the exact location of your store.
- Map store location - You can easily map your store location by dragging and dropping the red marker on the desired location. The Latitude and Longitude fields will be filled automatically with the coordinates of the red marker.
Manage Shops - Picture
From this tab you can add multiple pictures for your shop. To add pictures click the Add New button.
By clicking the Add New button a popup will appear from which you can:
- Upload your photo by clicking the Upload a file button and select the desired picture.
- Visible - You could choose if your newly uploaded image will be visible for your customers.
- Display Order - With this setting you can choose your shop pictures ordering on the shop page.
- Alt - With this setting you can specify the alternate text of your picture.
From this tab you could also Edit or Delete already uploaded pictures by clicking the respective buttons.
Manage Shops - SEO
- Define the following SEO parameters:
- In the Meta keywords field, enter the required category meta keywords. These are a brief and concise list of the most important themes of your page. The meta keywords tag takes the following form:
<meta name="keywords" content="keywords, keyword, keyword phrase, etc.">
-
In the Meta description field, enter a description of the category. The meta description tag is a brief and concise summary of your page's content. The meta description tag is in the following format:
<meta name="description" content="Brief description of the contents of your page.">
-
In the Meta title field, enter the required title. The title tag specifies the title of your Web page. It is code which is inserted into the header of your web page and is in the following format:
<head>
<title> Creating Title Tags for Search Engine Optimization & Web Usability </title>
</head> -
In the Search engine friendly page name field, enter the name of the page used by search engines. If you enter nothing then the category page URL is formed using the category name. If you enter custom-seo-page-name, then the following custom the URL will be used:
- In the Meta keywords field, enter the required category meta keywords. These are a brief and concise list of the most important themes of your page. The meta keywords tag takes the following form:
Creating Pickup Points
The shops created using the Store Locator plugin can be used as pickup points in the checkout. In order to achieve that functionality, you will have to do the following things
-
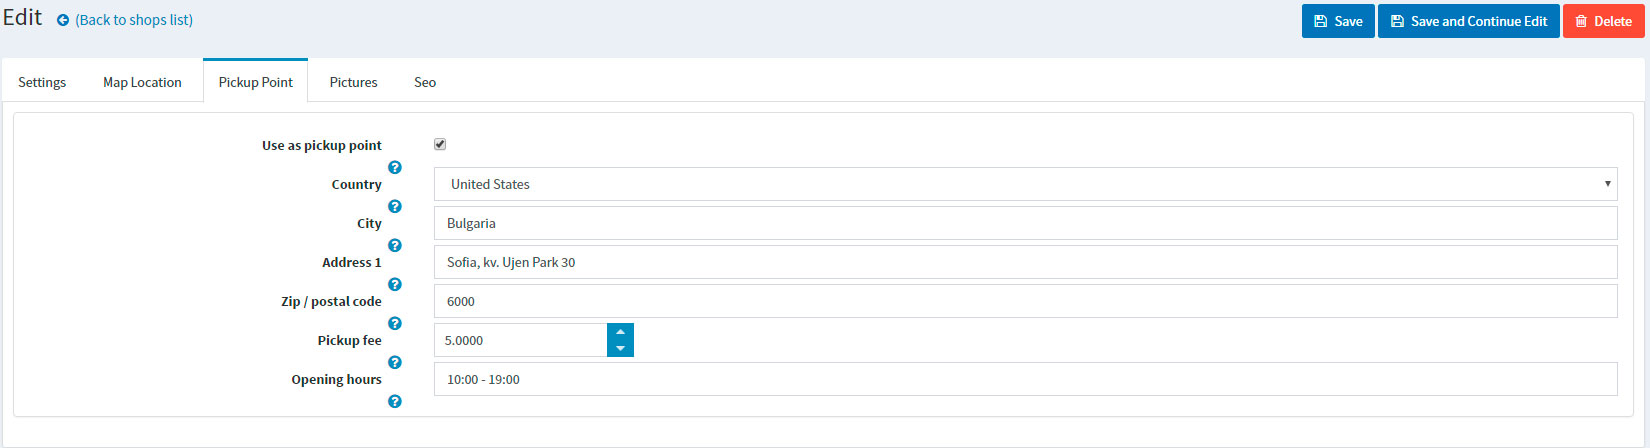
Set your shop to be a pickup point.
In order for your shop to be a pickup point you will need to go to Administration -> Nop-Templates -> Plugins -> Store Locator -> Manage Stores -> Pickup Point Tab and check the Use as pickup point setting. After that, you will need to enter the information of your shop.
-
Enable the Store Locator pickup provider
You will need to enable the Store Locator pickup provider so your clients can use the shops set as pickup points in the checkout process. You will have to go to Administration -> Configuration -> Shipping -> Pickup Points. Then you will have to edit the Store Locator pickup provider.
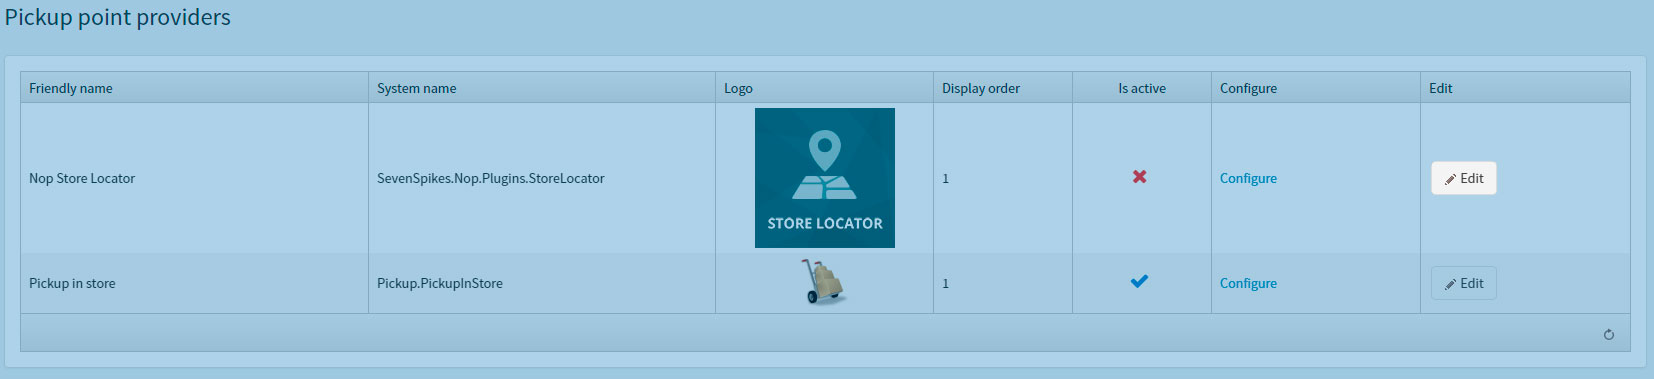
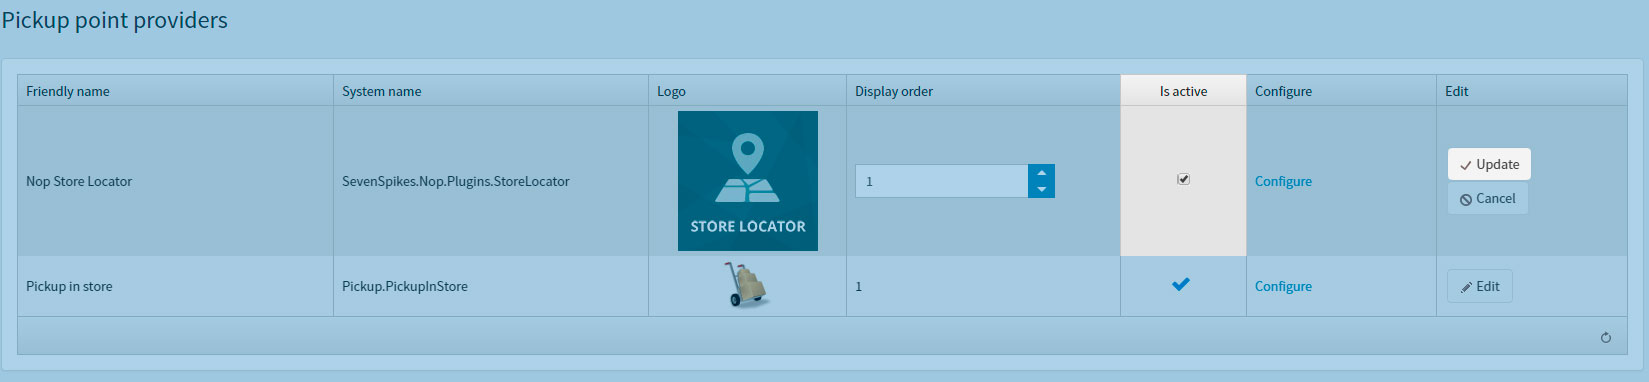
Then simply check the Is Active checkbox and update.
PUBLIC - HOME / Contact Us Page INTEGRATION
By choosing Home Page or Contact Us page integration you will have a map on the specific page. The map shows only the shops with "Show On Home/Contact Us Page" setting checked.

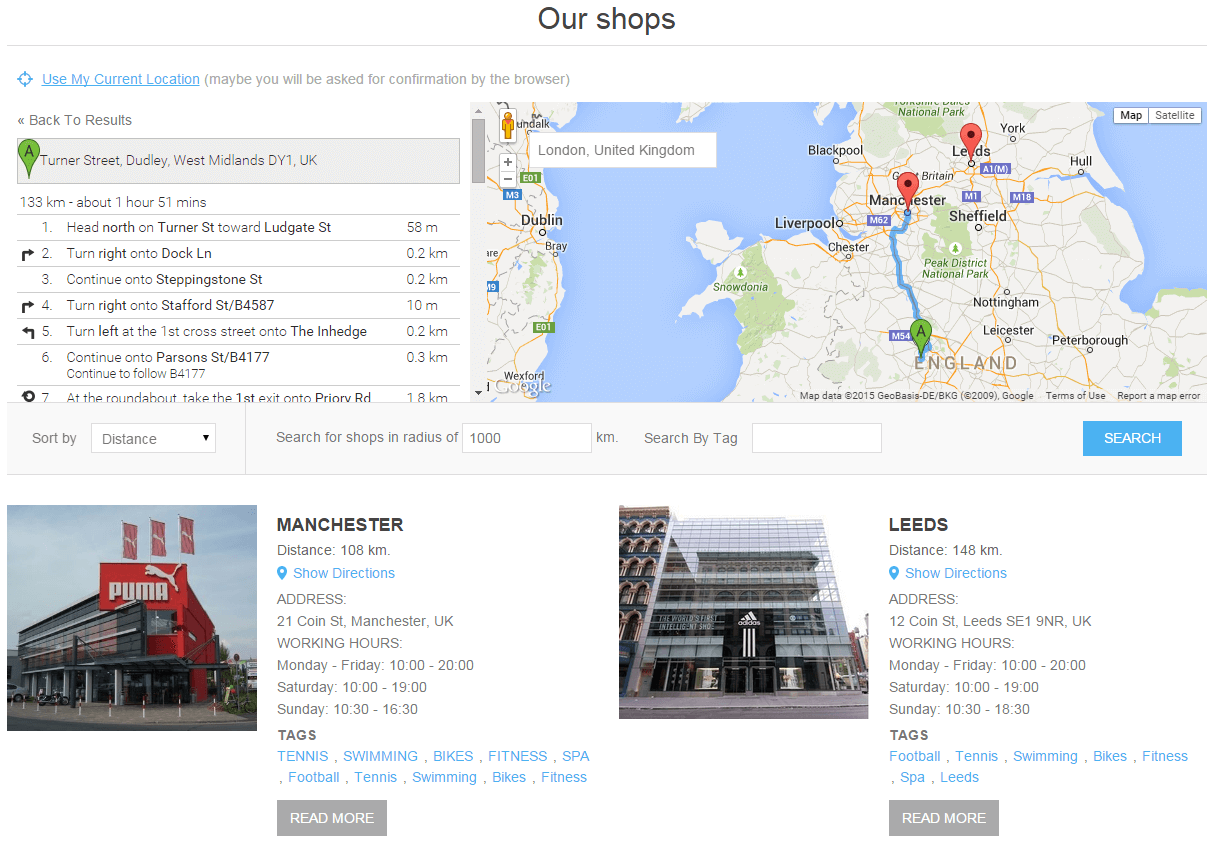
PUBLIC - ALL SHOPS PAGE
This page displays all shops that are marked as visible from the administration. It shows GoogleMaps map, with markers that correspond to each shop location. The plugin can both take the user location via browser`s GeoLocation feature or by the search in the GoogleMaps` search box. Once the user select his location (by one of both ways) a customer`s marker is displayed on the map. Also for each shop is calculated the distance to it from the user location.
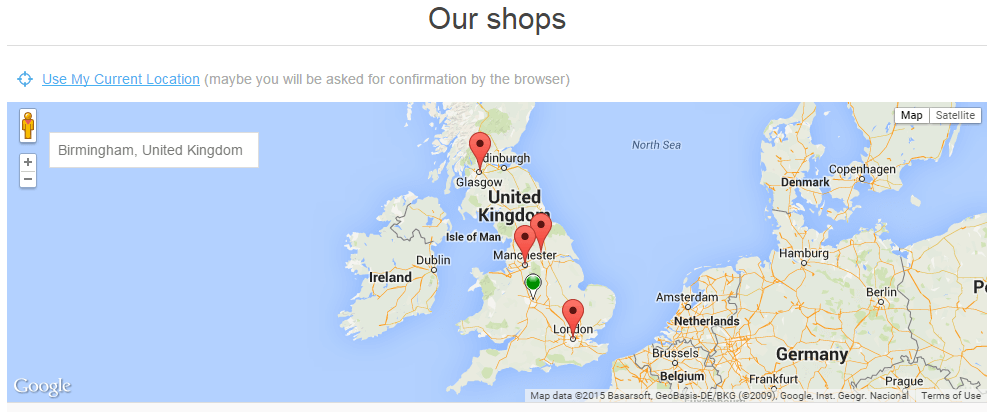
- Customer marker - This marker is with specific icon, distinguishable from the shop markers. It is draggable - this means that you can drag-and-drop it anywhere on the map. This will automatically update the distance to each shop.
- Shop markers - Each marker is placed exactly on the shop location. When it is clicked, a popup appear with the short description of the shop. Also the shop in the list become active.
- Shops - Each shop has Title, Short Description and Read More link. In addition to this it shows Distance to customer and Show Directions link. Clicking this link shows Navigations both on the map and beside it - with detailed instructions.
- Radius Filter - this filter narrows down the set of shops to these which are within the set radius of kilometers. The filter is applied only when the Search button is clicked.
- Tags Filter - this filter narrows down the set of shops to these which are marked with the specific tag. The filter is applied only when the Search button is clicked.
- Sorting - Customers are able to sort the shops by three different criteria: Distance, Name or the Display Order. The shops order is dynamically updated.
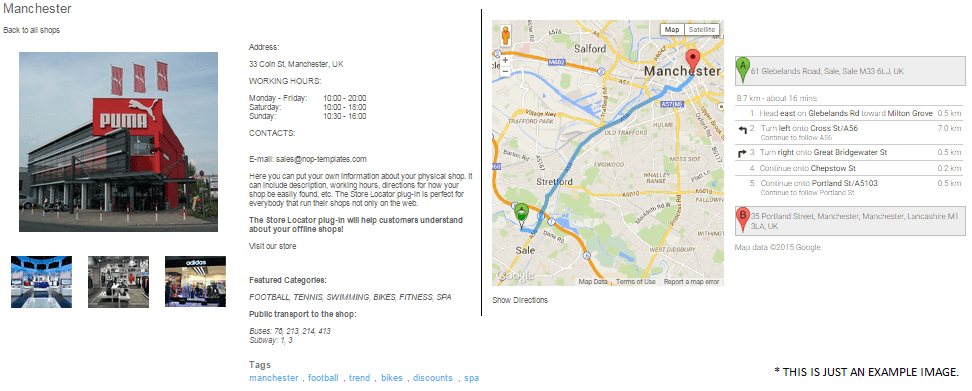
PUBLIC - SHOP DETAILS PAGE
This page contains detailed shop information - full description and gallery with images. Also a map is available, again with the functionality to show navigations to the customer. The gallery uses the default nopCommerce JS gallery - Magnific Popup.