Follow these steps in order to configure your home page like the Pacific Beauty Theme Demo.
You need to have in mind the following options when setting up your store's home page. Please have a look at the different elements you can display on the home page:
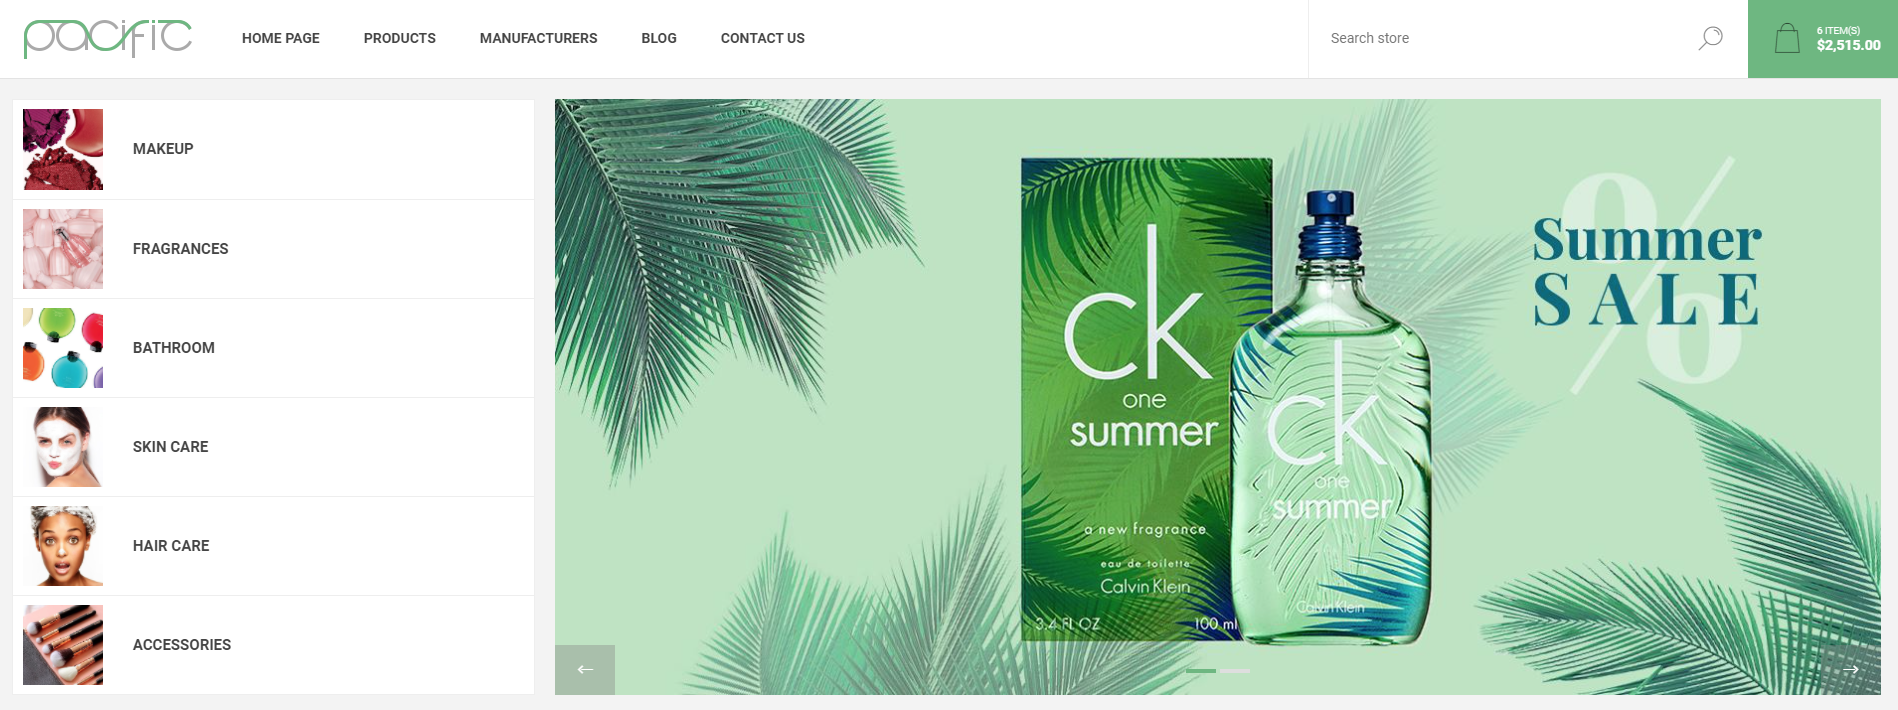
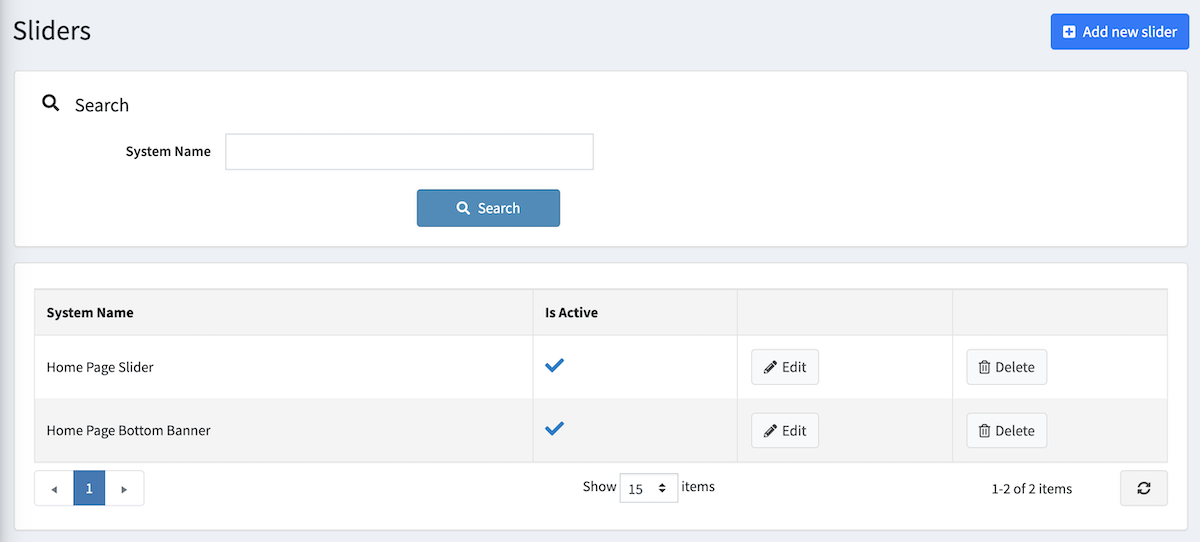
Home Page Slider
You can create a Slider using our Nop Anywhere Slider plugin as shown below.
First, you would have to create a new slider under Nop-Templates -> Plugins -> Anywhere Sliders -> Manage Sliders:
Once you create the slider, additional tabs will appear. Under the Slides tab, you can add the desired images/HTML to the slider.
You can either select Picture if you want to have images added as slides. In that case, you can add separate images for mobile devices if needed.
Since 4.3, you also have an option Content, that allows you to add your own custom HTML code in the slide, instead of a picture.
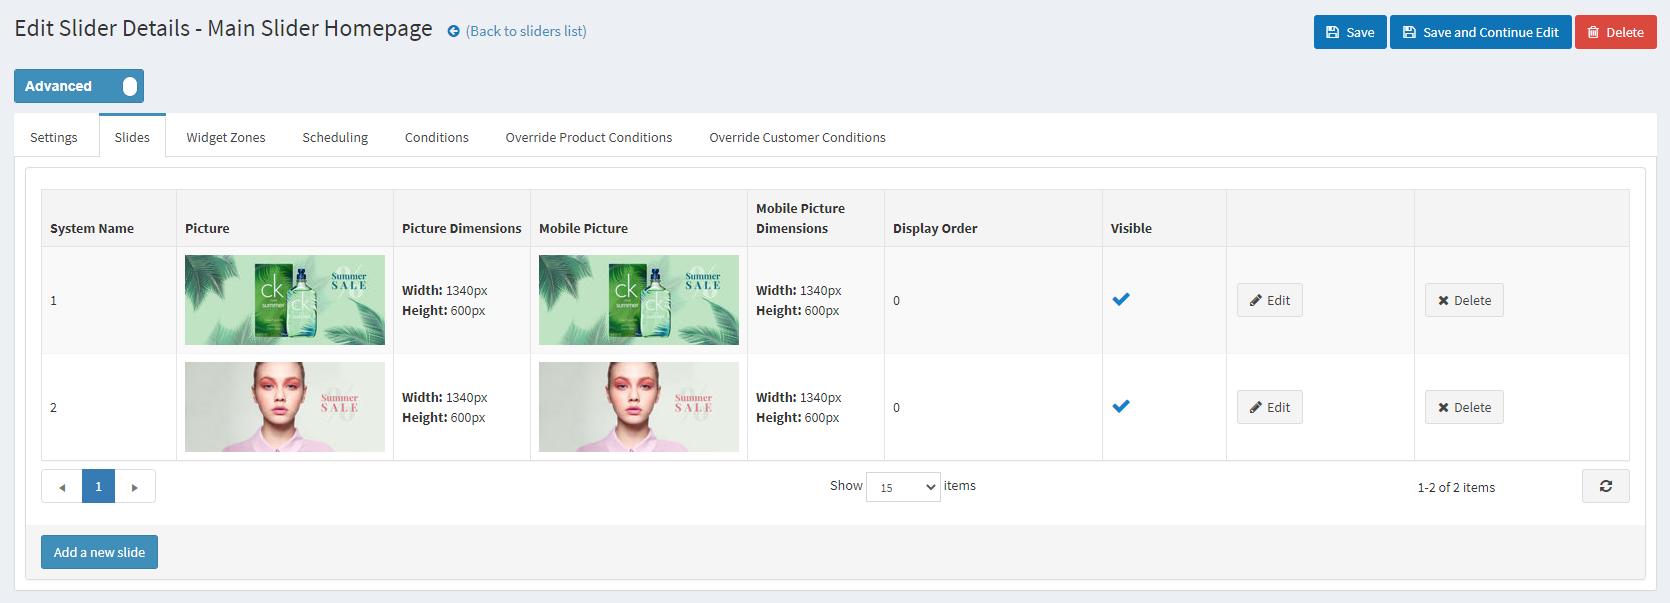
Finally, after you have added your slides, you need to map the slider to the "home_page_main_slider" widget zone in order to display it on the home page.

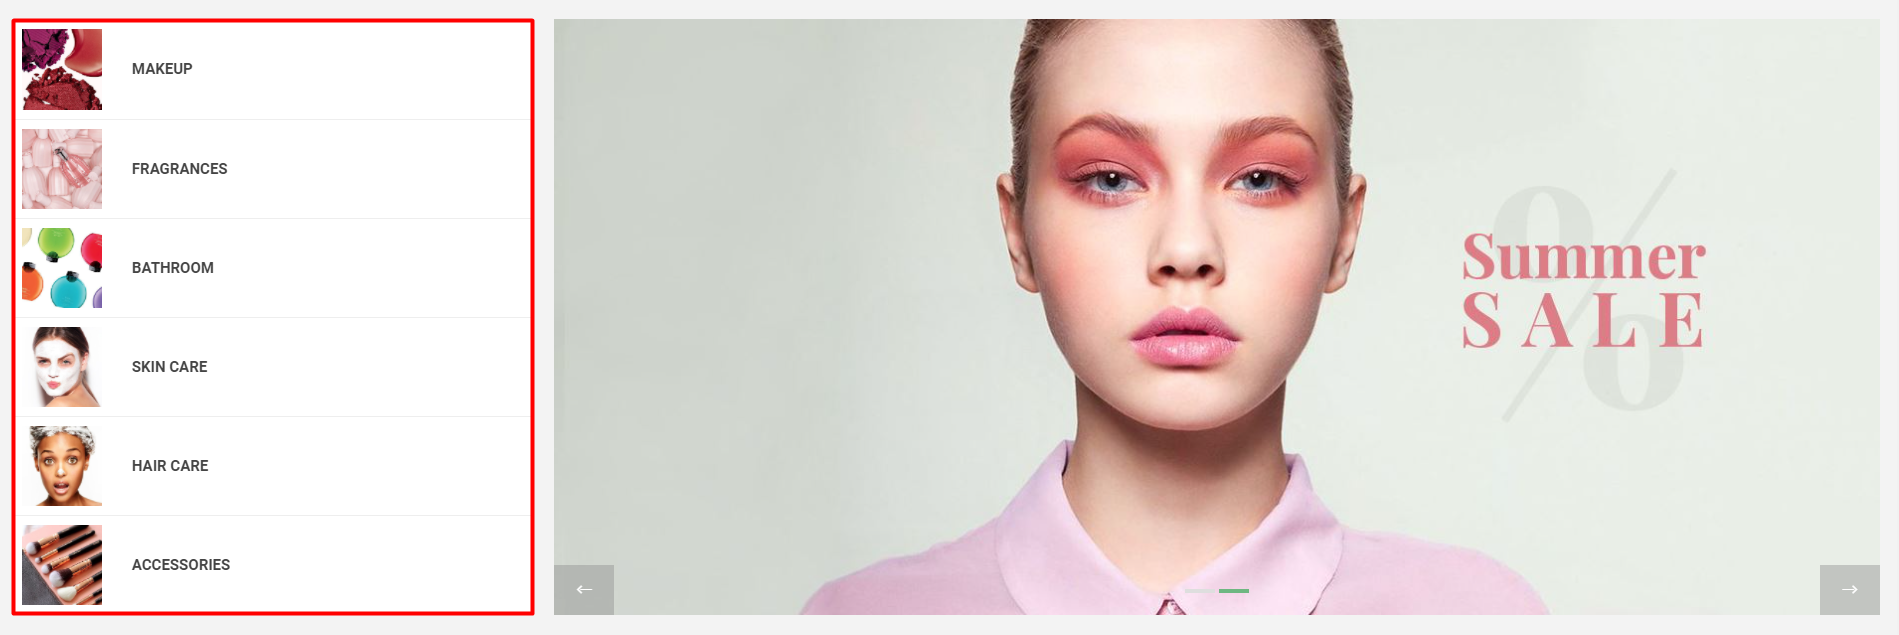
Featured Categories
The categories on the left side of the homepage slider are the featured categories. In order to display them there, you need to go to Administration -> Catalog -> Categories -> Edit the category in question -> Enable Show on home page. All the categories that have the option enabled will be displayed this way:
Menu Navigation
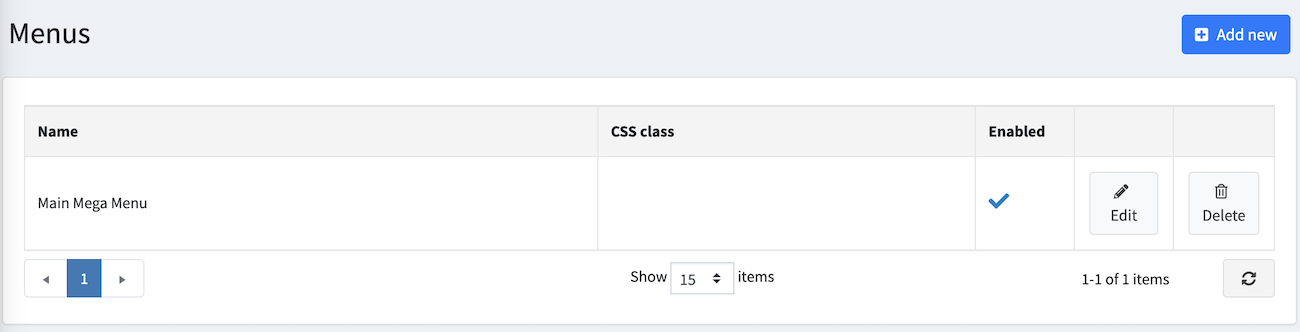
The Nop Mega Menu plugin, that is shipped with the Pacific Theme, provides you with the ability to create your own templates for the menu navigation of your store. In order to create your own Mega Menu you will need to go to Administration -> Nop-Templates -> Plugins -> Mega Menu -> Manage Menus and add a new Mega Menu.
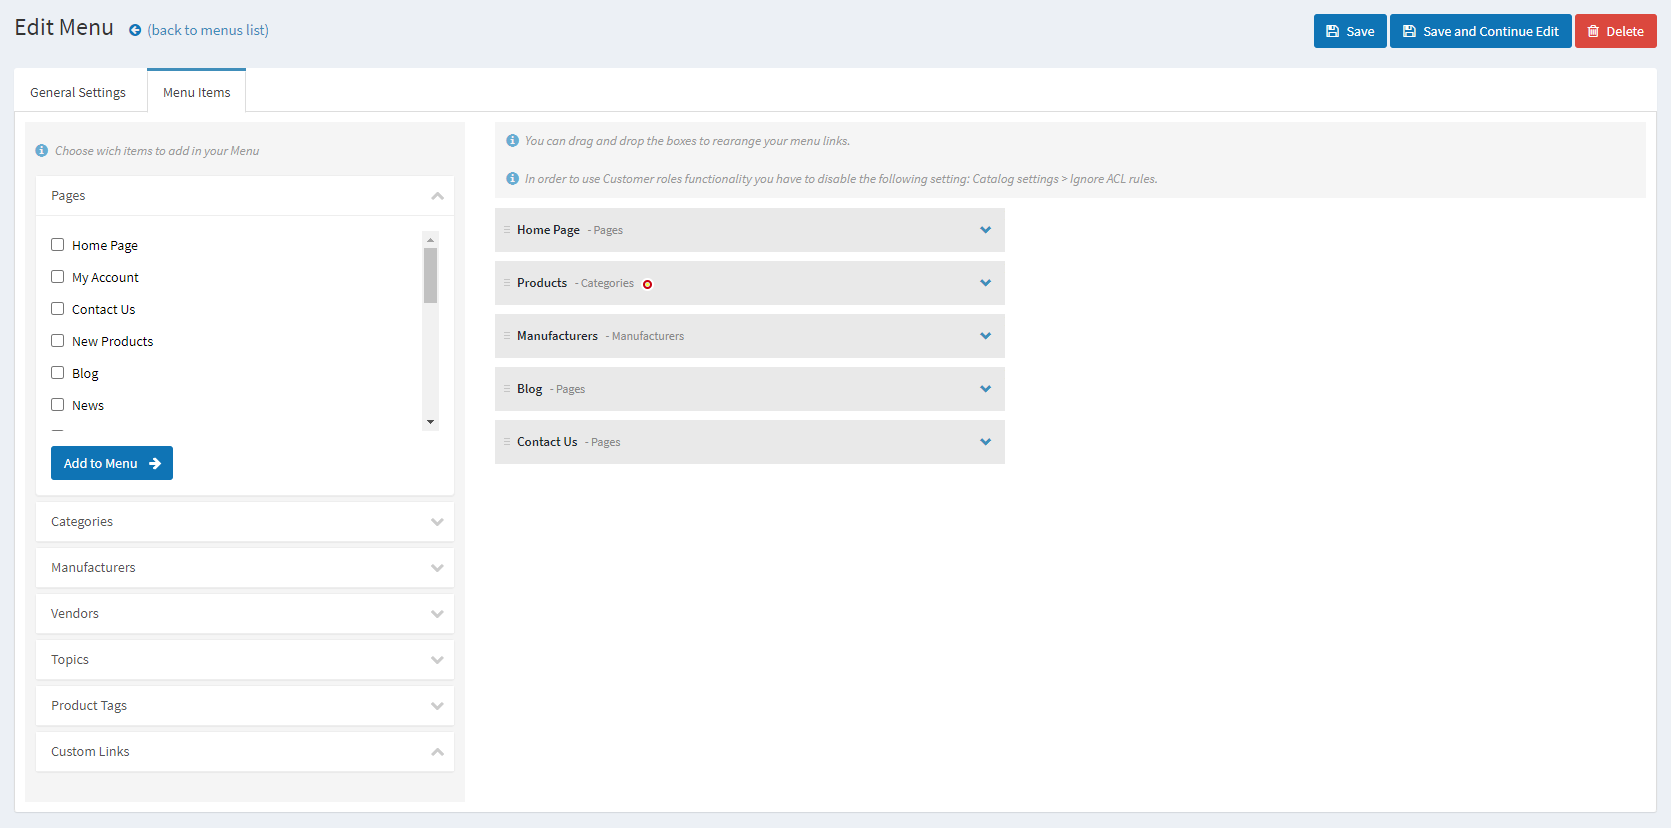
After creating your Mega Menu you will need to configure your Menu Template. The Nop Mega Menu is a very powerful and simple to use tool. You can arrange, nest and even edit Menu Items as shown in the image below. You can find more information on how to configure your Mega Menu in our Documentation.
Featured products and banners
Moving on to the Featured Products section of your Home Page. This is a nice way to show your best products on your Home Page.
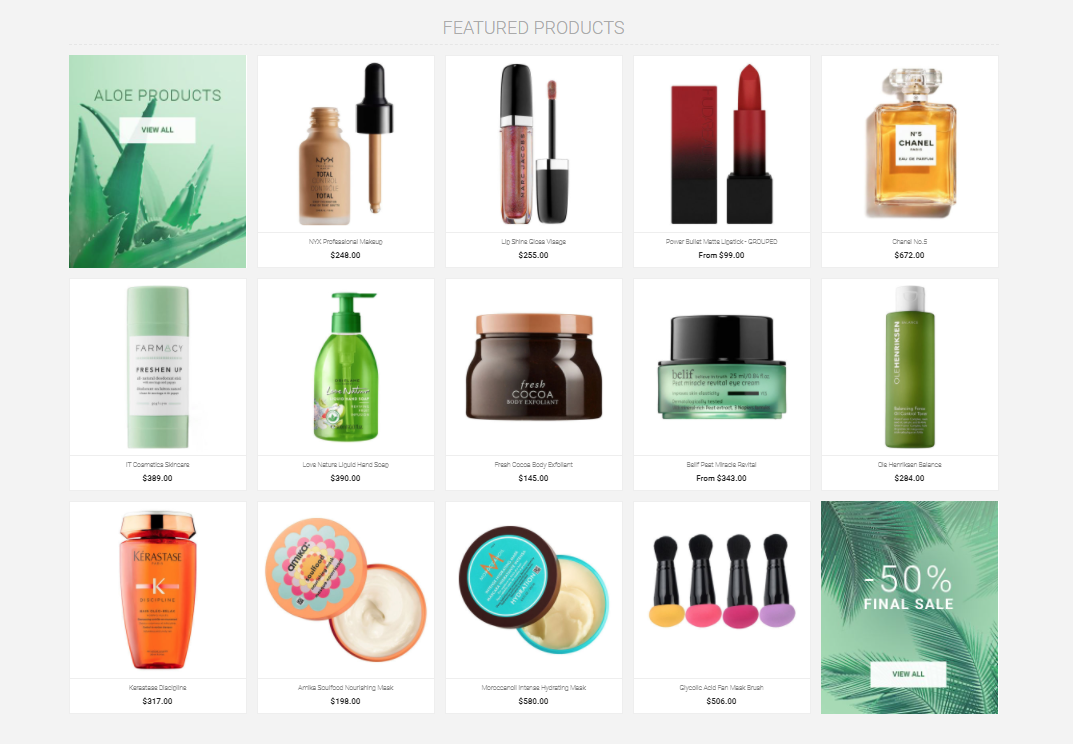
Just like with the Featured Categories, you just need to enable the Show on home page option for the products you wish to appear there.
The two banners that you see on our demos are added through the Anywhere Sliders Plugin. Those are simple sliders assigned to the zones home_page_featured_products_banner_first and home_page_featured_products_banner_last.
Sale of the day
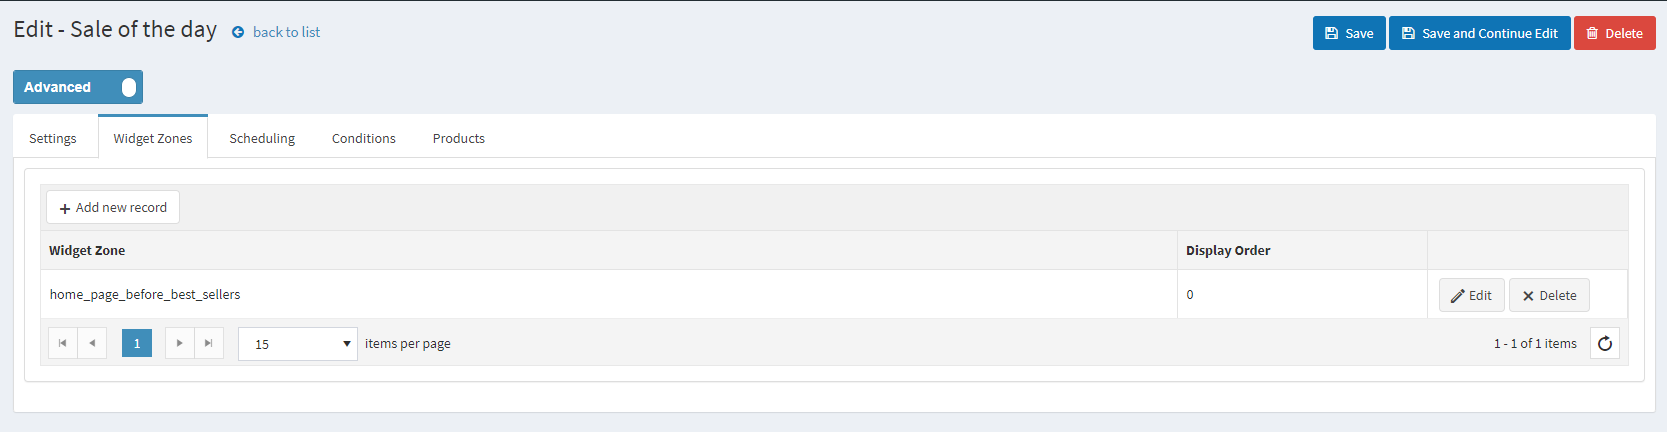
The sale of the day section is created with our Sale of the day plugin. Go to Administration -> Nop-Templates -> Plugins -> Sale of the day -> Manage offers -> Add new. Once the offer is created and saved, go to the Widget Zones tab and add a new record - home_page_before_best_sellers.
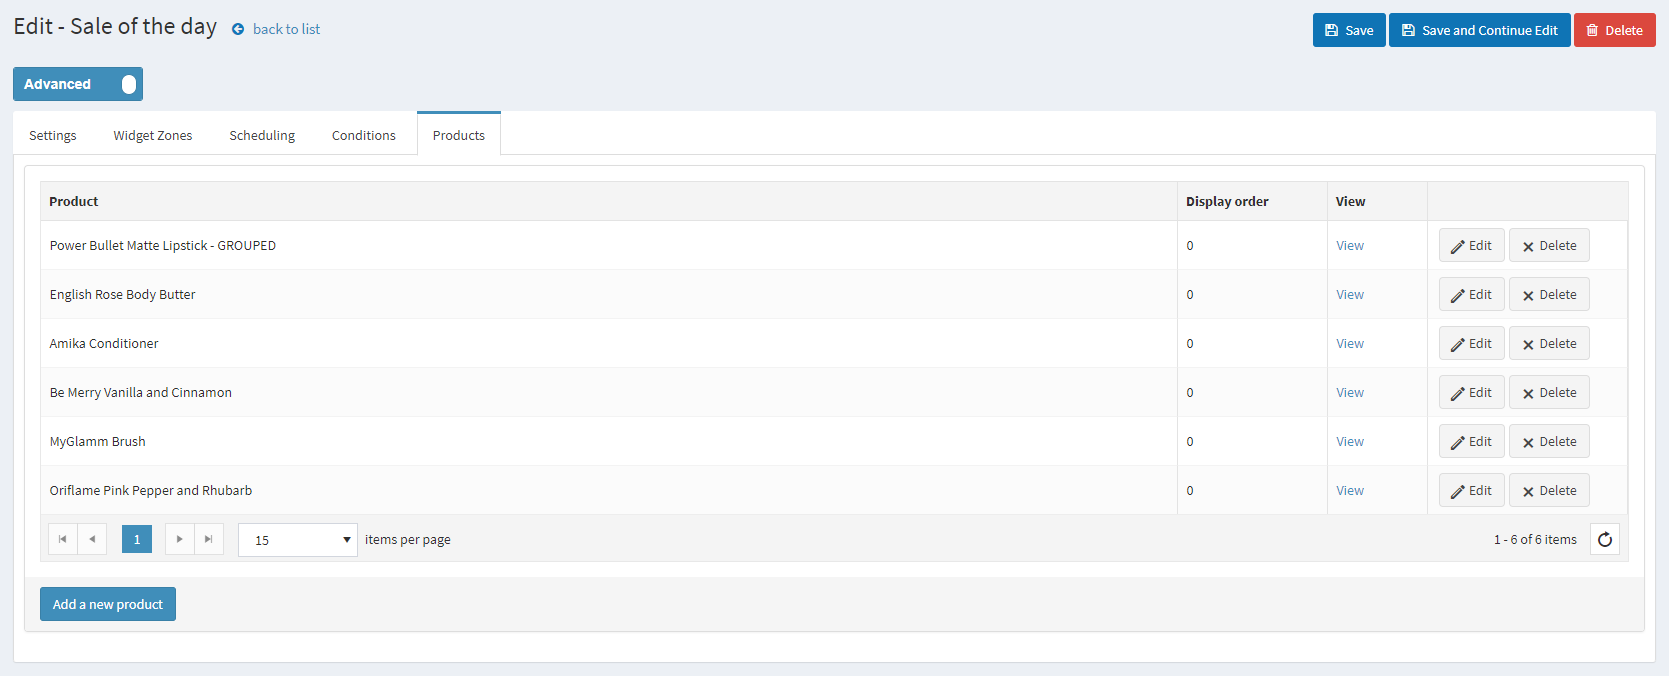
Now all you need to do is add the products that you wish to appear under the Products tab:
As with some of our other plugins, you have the option to schedule the sale offer or to set conditions.
Smart Product Collections
The Skin care and Makeup collections are made using the Smart Product Collection plugin. We use Category Product Collections in our demo.
In order to create such a collection you will need to go to Administration -> Nop-Templates -> Plugins -> Smart Product Collections -> Category Product Collections -> assign the plugin to a widget zone (home_page_before_news in our case).
Set the Number Of Products to 6 and from the Categories field select the categories, for which you want to have a collection created.

Now that you have added categories, you can edit each of them, by clicking the pencil icon next to each of them. This will open the Tab Builder:
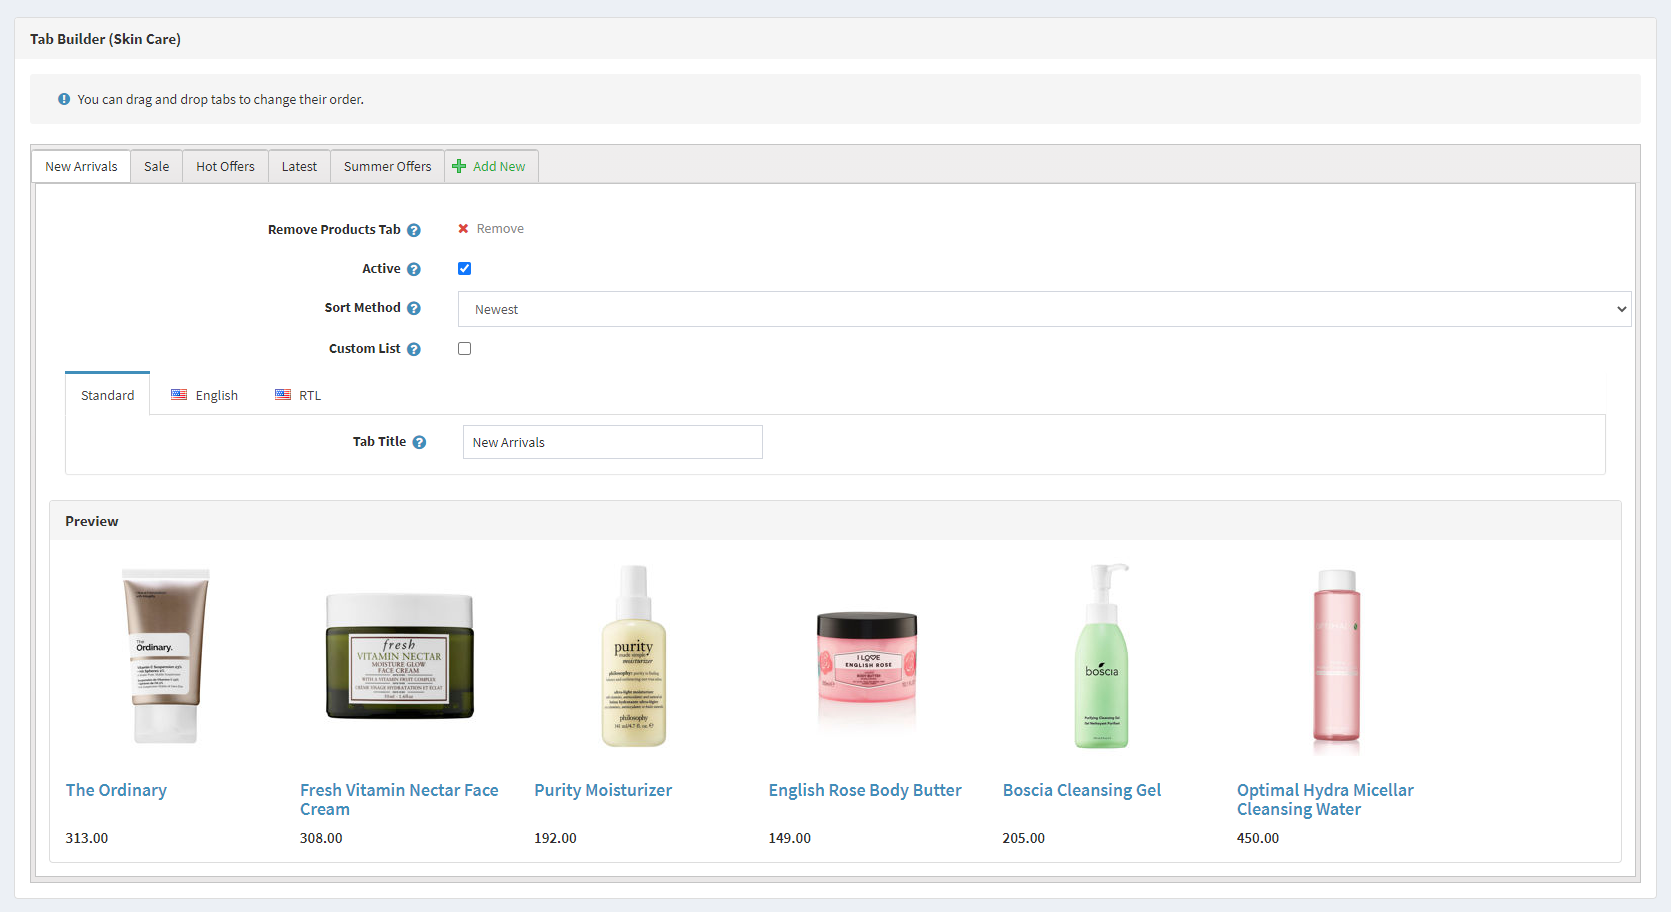
The Tab Builder allows you to add or edit different tabs for the collection. In our demo, we have added 5 tabs, each with a different sorting method. Of course, you can also set to have a Custom List, which will allow you to add and manage the order of the products manually for the tab in question.
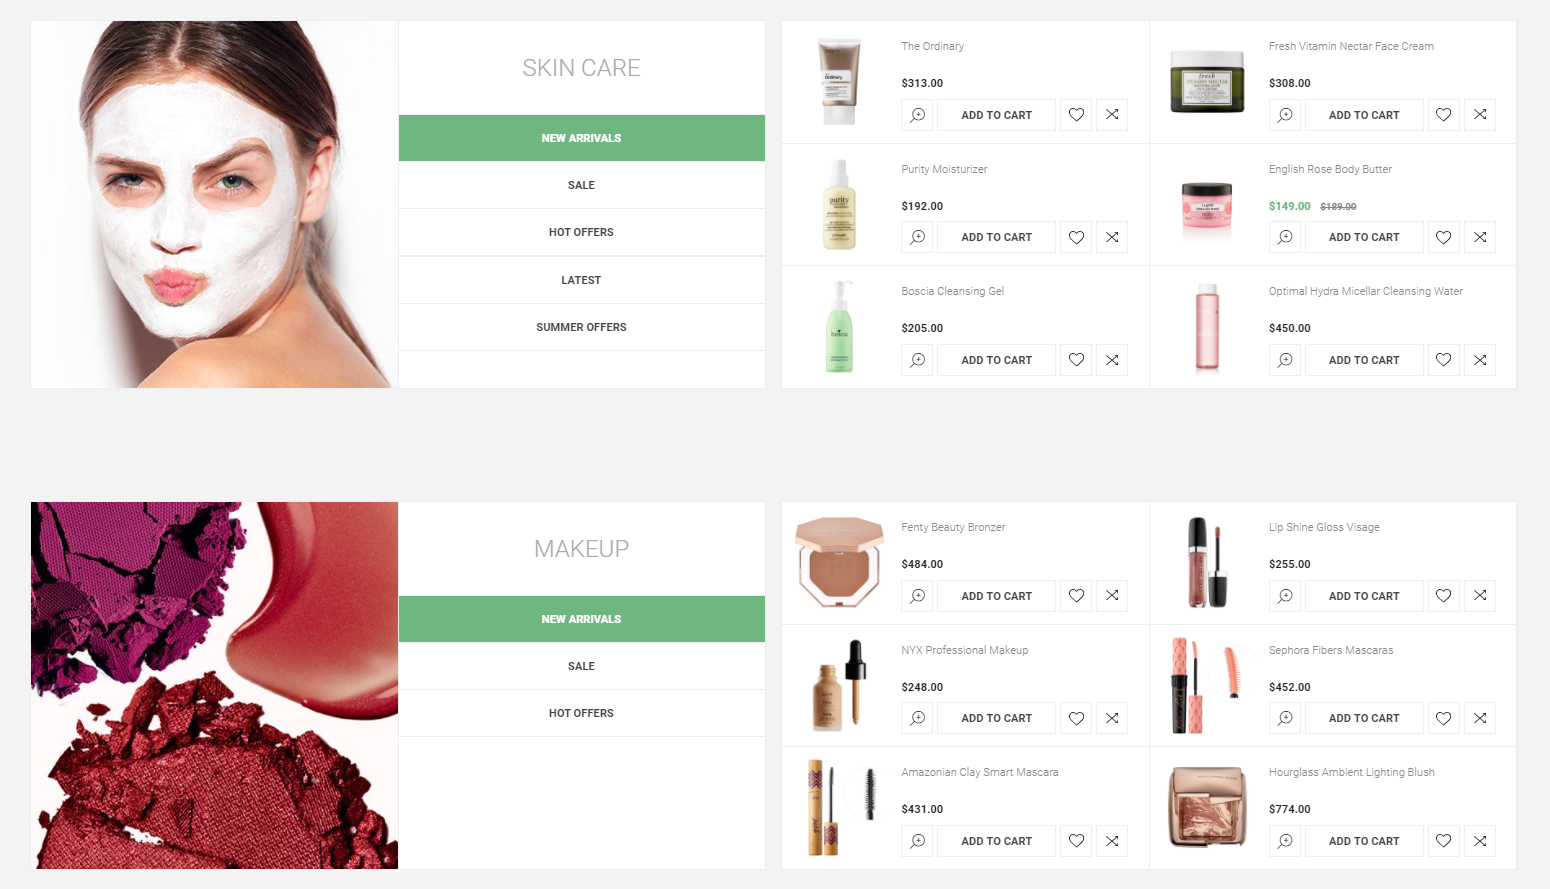
Setting up the plugin results in a nice product collections section.
Blog
The Rich Blog plugin gives you the functionality to show your blog posts on the home page and assign pictures to them.

If you want to show the blog posts on your home page you will need to follow these instructions.
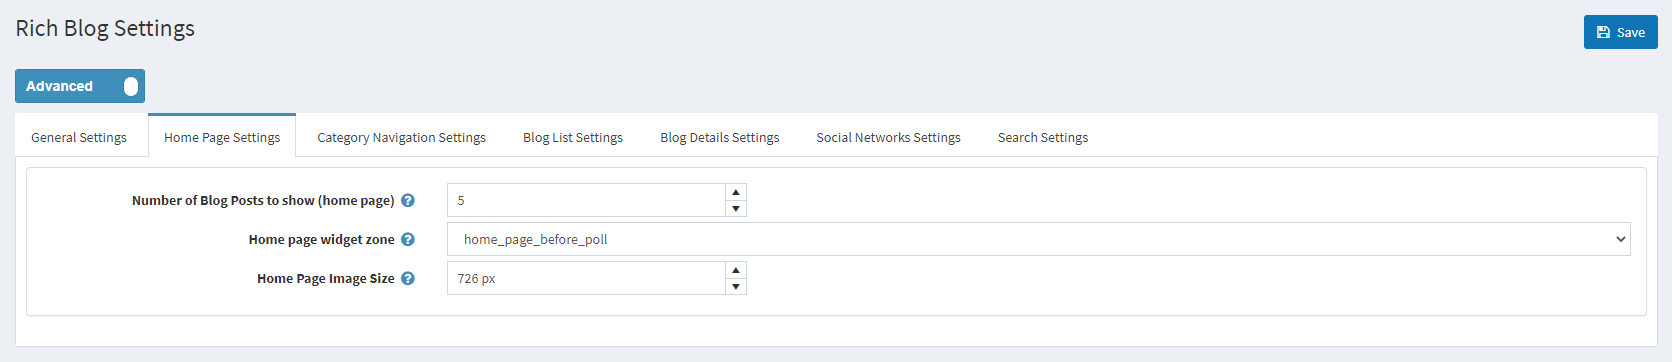
Map the blog to the "home_page_before_poll" widget zone from the Home Page Widget Zone setting in Administration -> Nop-Templates -> Plugins -> Rich Blog -> Settings -> Home Page Settings.
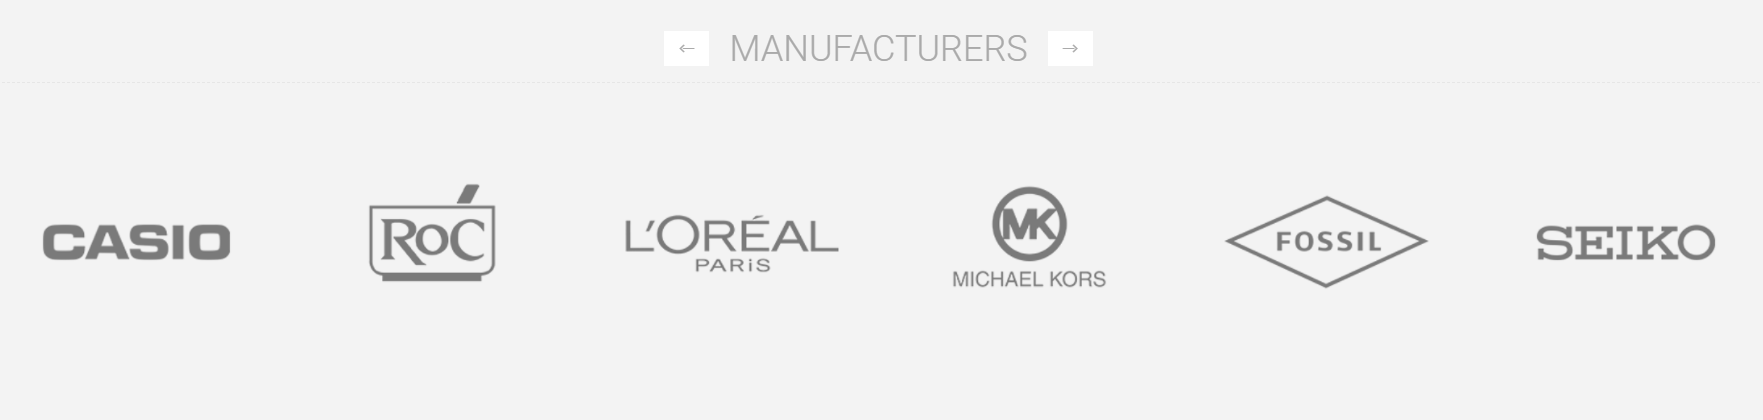
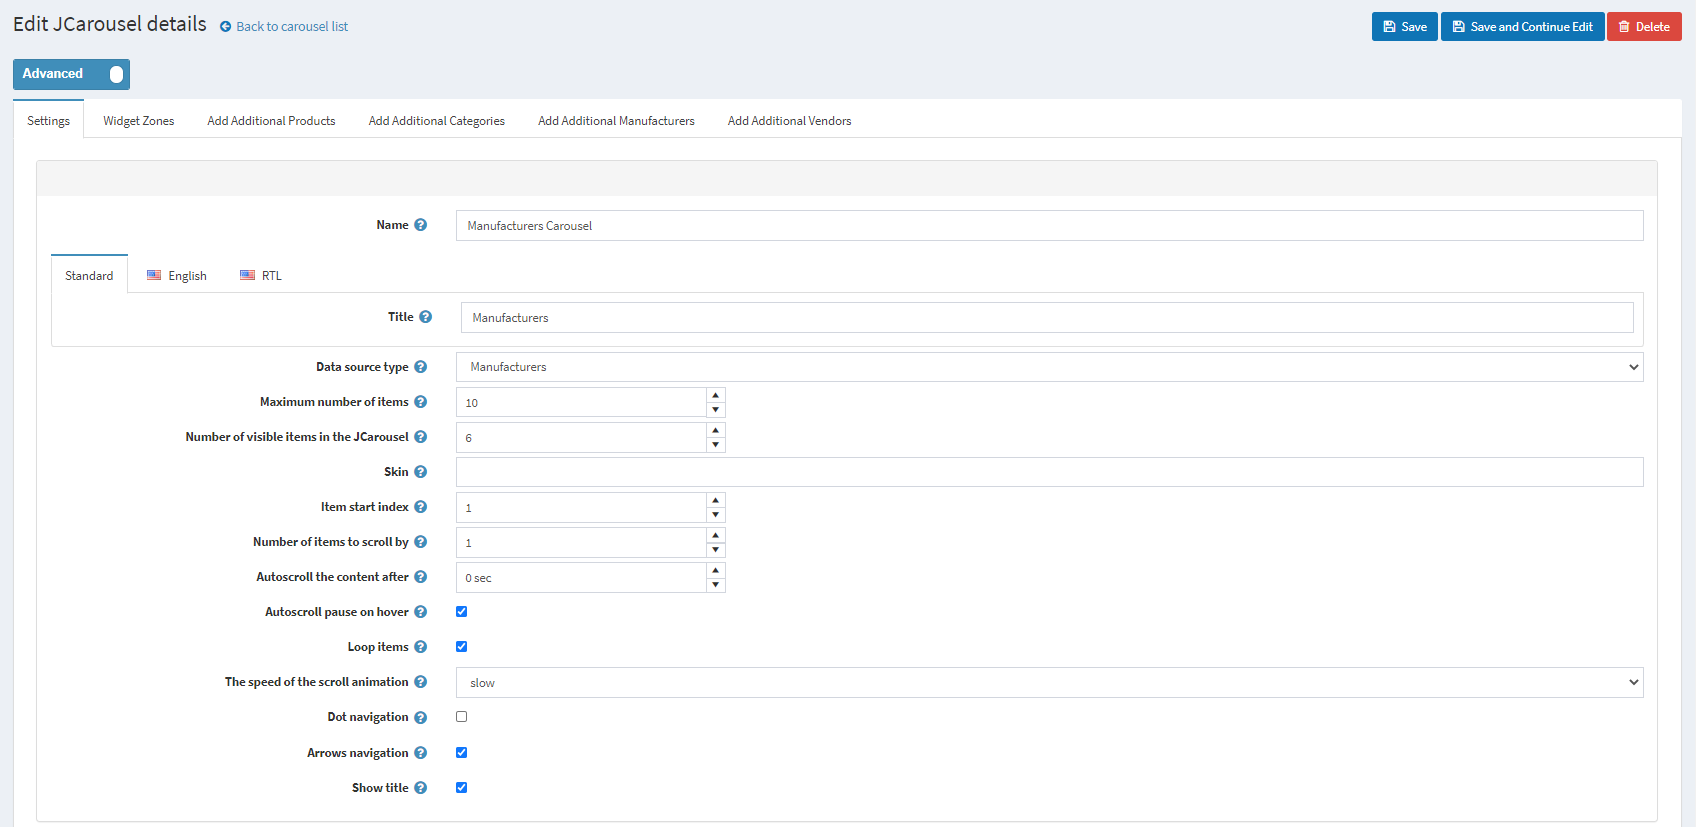
Manufacturers Carousel
The last element on the home page is the Manufacturers's Carousel. It is created using the JCarousel plugin.
Create a new carousel from Administration -> Nop-Templates -> Plugins -> JCarousel -> Manage JCarousels.
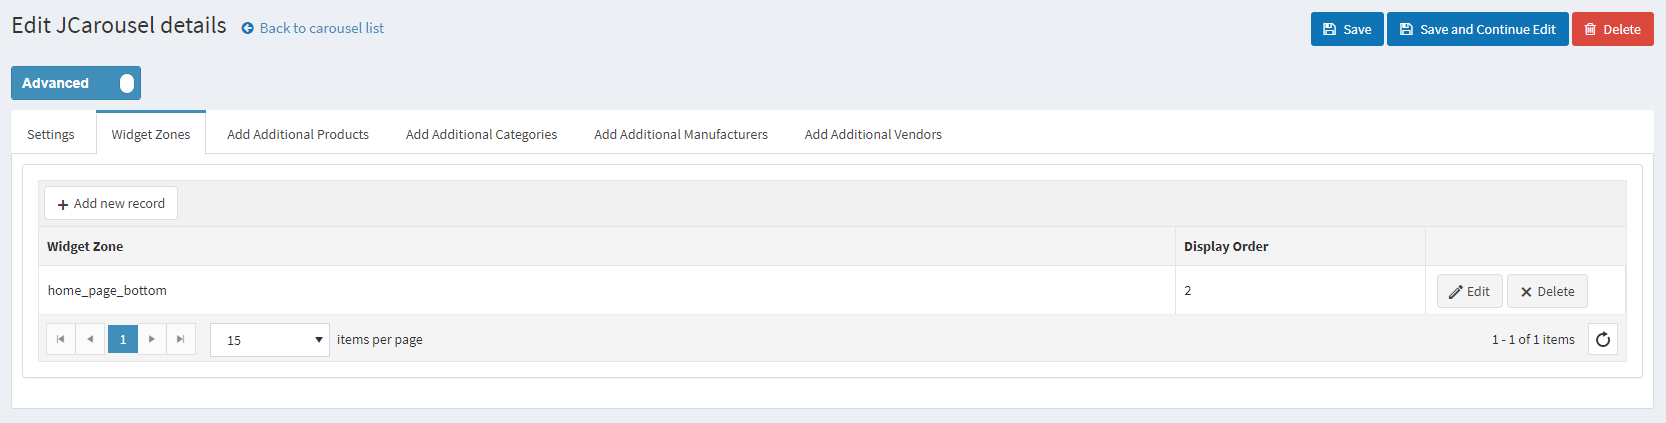
And assign the carousel to the "home_page_bottom" widget zone from the Widget Zones tab
After a save the carousel will show on the bottom of your home page.