The main purpose of the Nop Help Desk plugin is to provide fast and comfortable two-way communication between the customer and the store owner, or the people assigned by him to answer the raised questions. The plugin provides powerful way for discovering and reporting your products pros and cons. Also the flexibility of separating the tickets between departments, which can be responsible for different parts of the managment of you shop. For example you can have support, sales, design, production, etc. and all these under the hood of the Nop Help Desk plugin.
Live DEMO - see how the Nop Help Desk plugin would look like in your public store.
Admin DEMO - see the plugin administration.
Working with the Nop Help Desk is as easy as configuring a few settings from the administration of the plugin.
Please read the following steps for more information on how to configure the Nop Help Desk.
General Settings
These settings could be found in almost every plugin. They are responsible for showing the plugin in your public store and enabling your customers to use its functionality.
- Enable Help Desk - Specify whether to enable the widget for the Nop Help Desk Plugin, thus enabling or disabling the plugin. This is a store specific setting and can be set per store if you are running multi-stores.
- Enable Captcha - Specify whether to have captcha on New Ticket page.
- Is Product Field Required - Specify whether the product field is required field.
- Show Staff Signature - If checked, the staff signature will be shown in the end of each message.
- - Specify which days will be consider as working days ( This will be used when calculating the due in working hours ).
- Working Start Hour - Specify which hour will be consider as a start working hour( This will be used when calculating the due in working hours ).
- Working End Hour - Specify which hour will be consider as a end working hour( This will be used when calculating the due in working hours ).
- Default Selected Status - Specify the default status of ticket, when it is created.
- Max Ticket Products - Specify how many products the user will be able to choose from the multi select control.
- Preview Attachments In Browser - Choose wether you want to preview the attachments in the browser or directly download them.
- - Specify the remaining hours before the ticket expires.
- Close Tickets Automatically After - Specify how many days after the last reply the tickets will be closed automatically.
- Account Navigation Widget Zone - The widget zone where the help desk will appear in the account navigation menu.
- Order page widget zone - The widget zone where the help desk button will appear on order details page. "None" means that the button won't be visible.
- Default Email Account - The email account from which the emails are going to be sent.
- Send Email To Store Owner On Submit Ticket - Specify whether and email will be send to the store owner when a ticket is submitted.
- Send Email On Reply - Specify whether an email will be sent when a ticket is answered.
- Send Email On Closing Ticket Automatically - Specify whether an email will be sent when a ticket is closed automatically by the system(scheduled task).
- Maximum size of file to attach - The maximum size of a file you can attach. This setting should not exceed the Maximum size of the attached files setting value.
- Maximum size of the attached files - The maximum size of all the attached files. This setting should not exceed the maxRequestLength in your Web.Config. You will need to increase the maxRequestLength if this setting exceeds it. You can learn how to do that from the following article.
Creating a ticket department
You can create as many departments as you want. They will serve you to separate the incoming tickets into logical divisions, which are responsible for specific tasks.
In order to create a new department go to Plugins -> Nop Help Desk -> Ticket Departments. Click on the Add new ticket department button.
Ticket department - Settings tab
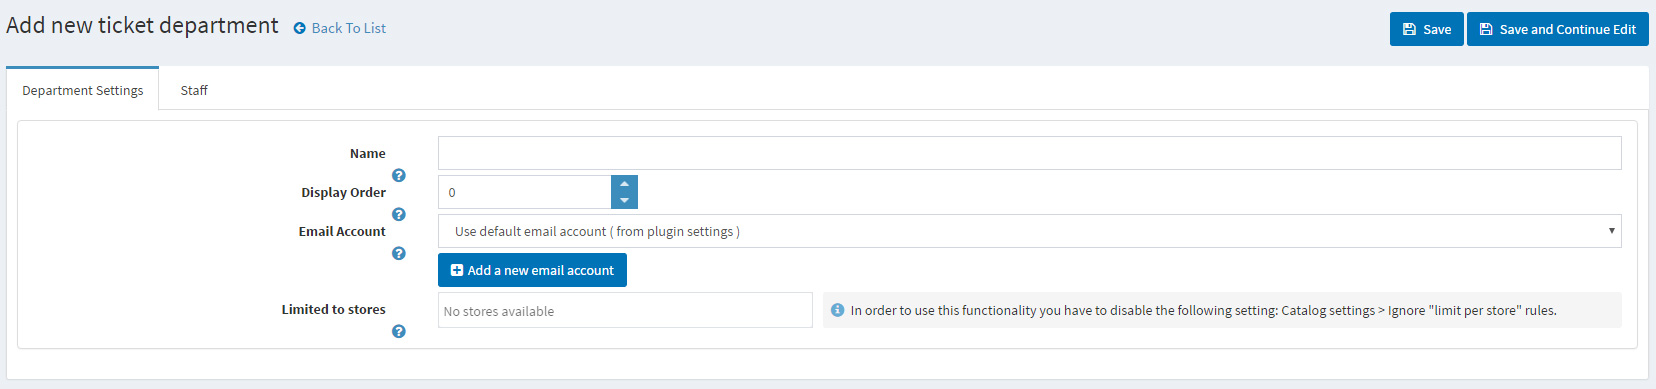
The Ticket department settings tab, contains general settings for the current department.
- Name - This is the name of the ticket department and is a required field.
- Display Order - The display order of the department. 1 represents the first item in the list.
- Email account - The email account from which the emails from this department will be send. If you choose the default email account, then the email account from the general settings will be used.
Ticket department - Staff tab
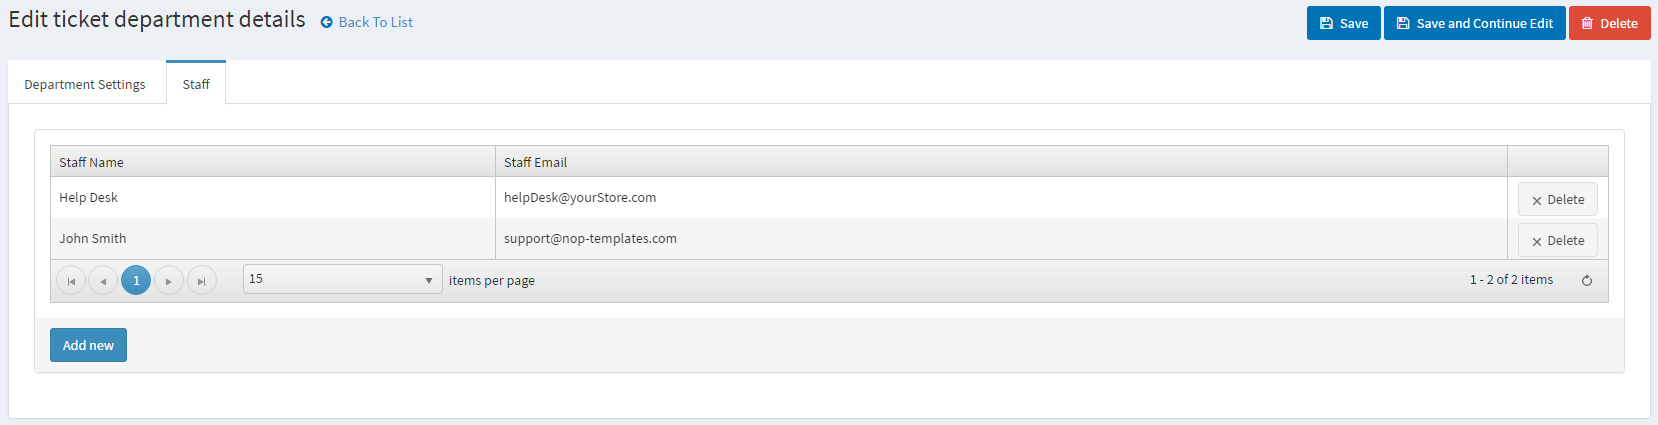
From this tab you can assign customers to the current department. This means that only these customers will have access and will be able to manage the tickets of this department.
Creating a ticket attribute

You can create as many attributes as you want. The attributes are very powerful tool for additional separation or/and filtering of the tickets.
In order to create a new attribute go to Plugins -> Nop Help Desk -> Ticket Attributes. Click on the Add new ticket attribute button.
Ticket attribute - Settings tab
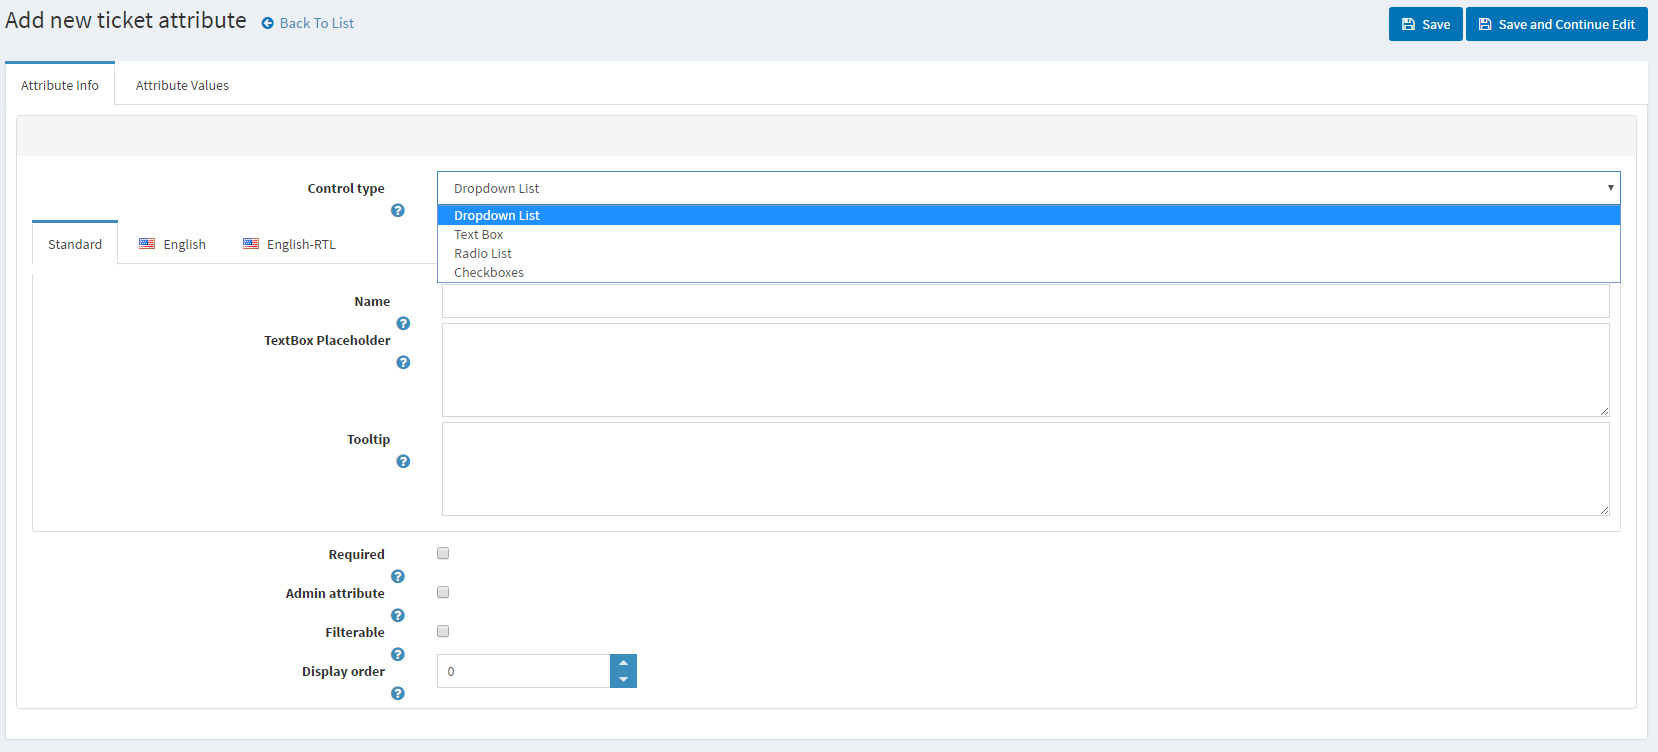
The Ticket attribute settings tab, contains general settings for the current attribute.
- Control type - Choose how to display your attribute values.
- Name - The name of the custom ticket attribute.
- Tooltip - Specify whether there will be a tooltip on the element ( when hovering ).
- Required - When an attribute is required, the customer must choose an appropriate attribute value before they can continue.
- Admin attribute - Specify whether this attribute is visible only to staff users.
- Filterable - Specify whether the staff users would be able to filter by this attribute on Manage Tickets page.
- Display order - The ticket attribute display order. 1 represents the first item in the list.
Ticket Attribute - Attribute Values tab
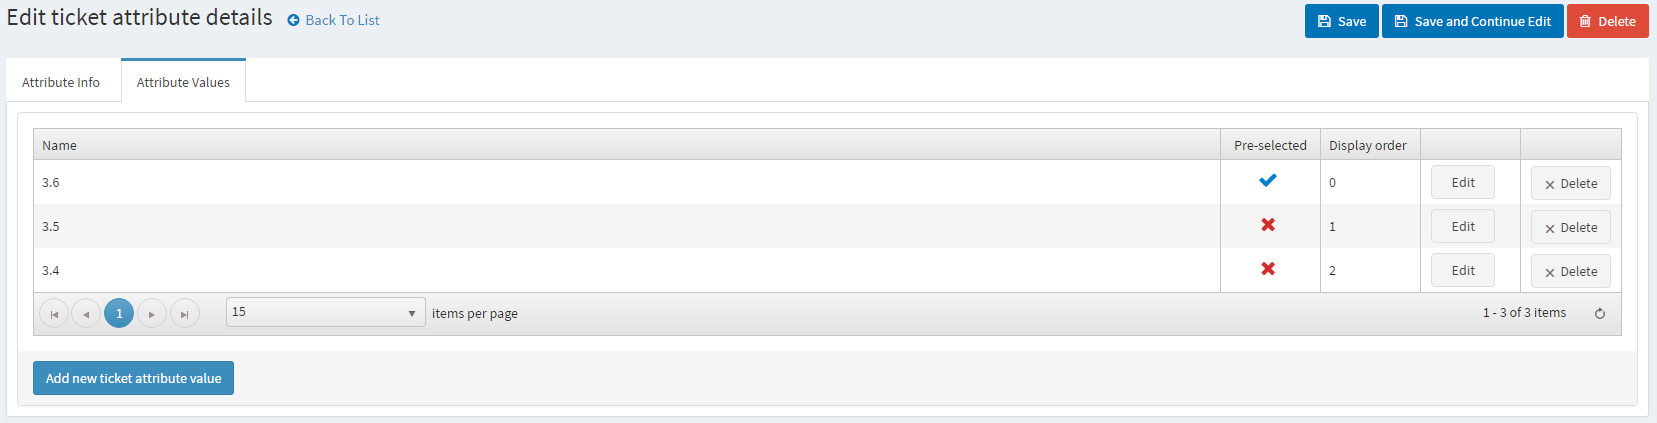
From this tab you can create values for the current attribute.
Public part
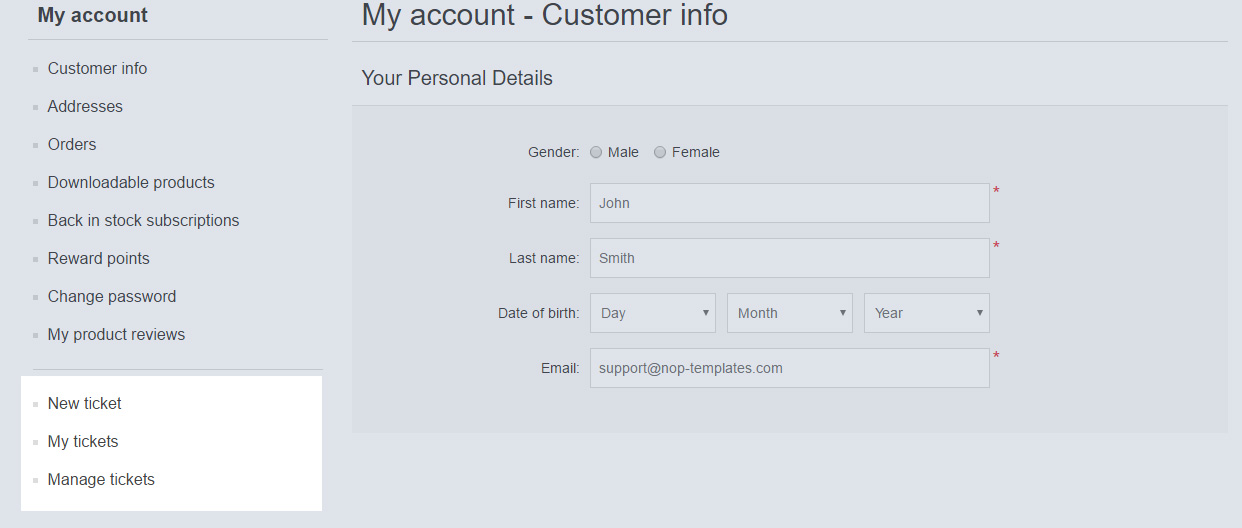
The plugin is integrated as widget in the MyAccount navigation menu. It provides 3 links: New Ticket, My Tickets and Manage Tickets. Each link points to a new page as described below.
Public part - New Ticket page
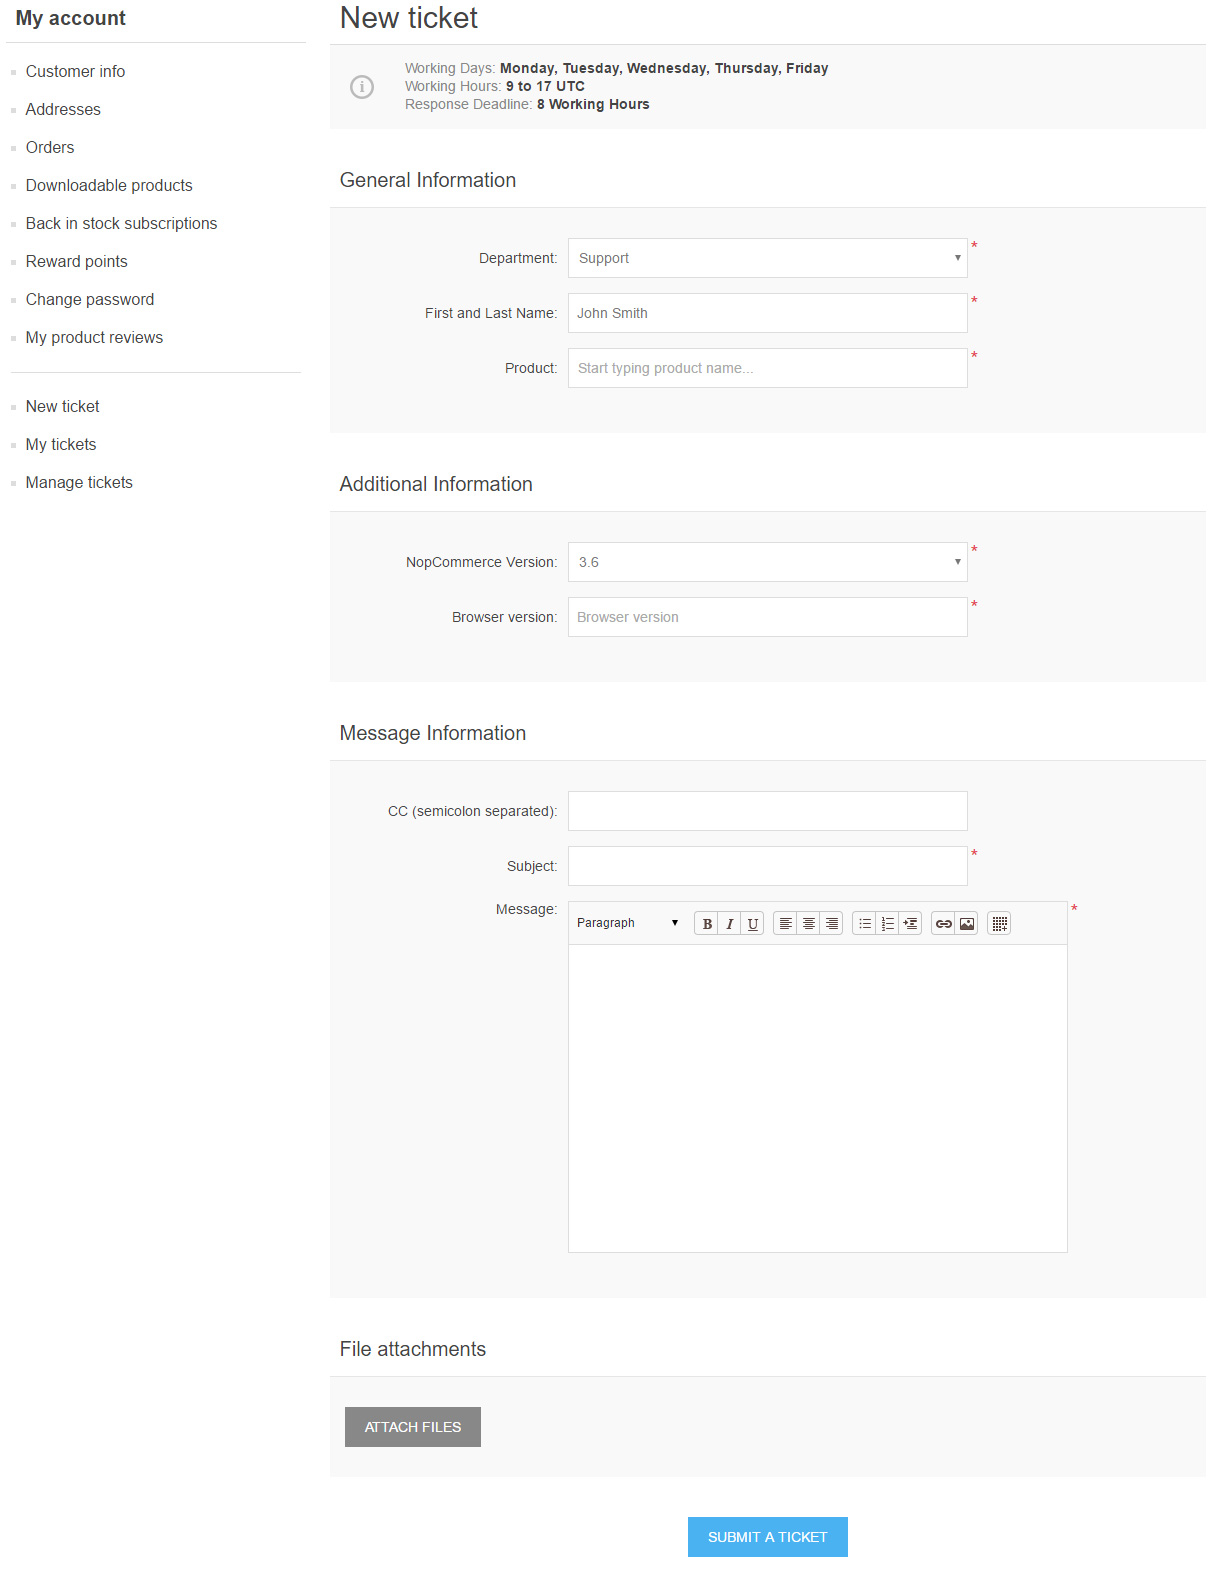
The page is divided in 4 main sections. The first one is General Information:
- Department - the customers has to choose the department, which will handle their request. The ticket will be proccessed by the department's staff.
- First and last name - the customer name. This field is prepopulated with customer's full name / if available /.
- Product - the customers is able to assign product(s). This field has auto-complete. ( Note: The field could be skipped if the setting Is Product Field Required is disabled ).
The second section is Additional Information. It contains all available custom ticket attributes, which are not marked as 'Admin attribute'.
The third section is Message Information:
- CC - in this field the customer can add multiple recipients / semi-colon separated /. They will receive the same emails about this ticket as the customer - if the setting for this is enabled ( Send Email On Reply ).
- Subject - the subject of the ticket.
- Message - the message of the ticket.
The fourth section is File Attachments. Here the customer can upload as many file attachments as he wants.
Public part - My Tickets page
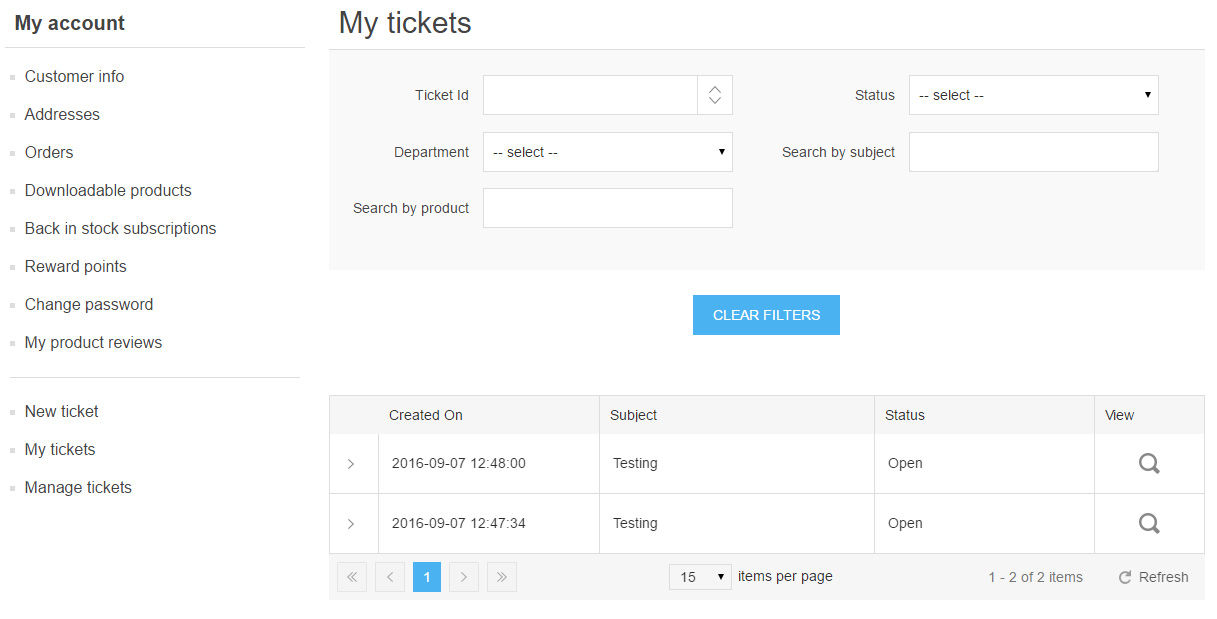
In the page the customer will find all tickets that he submitted. There are available filters, by which the customer can filter his own tickets.
Public part - Manage Tickets page
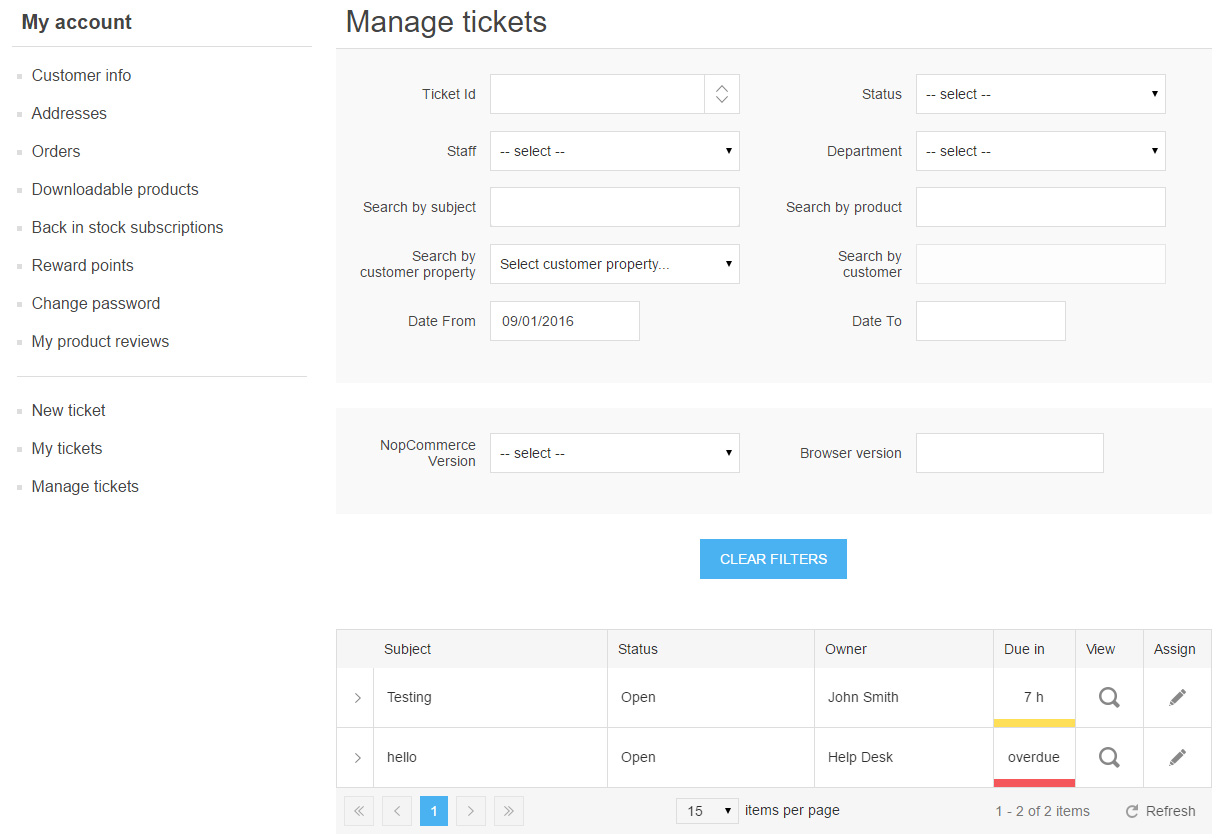
If the customer is assigned to at least one ticket department, then he will see an additional page where he can manage the tickets in these departments. Similar to My Tickets page, here are also a lot filters which could help the customer to filter and manage the tickets.