Integration
Once the Nop Categories Header Menu plugin is installed you need to integrate it in your web site - Widget or Manual.
1. Widget Integration
If your are working with the default nopCommerce installation and you have not done any modifications to the nopCommerce default views,
you can use the Widget support of the Nop Categories Header Menu plugin. To enable this option, from the Admin panel:
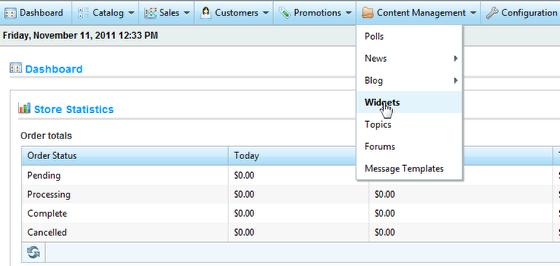
a) Go to Content Management -> Widgets
b) Find the Nop Categories Header Menu widget
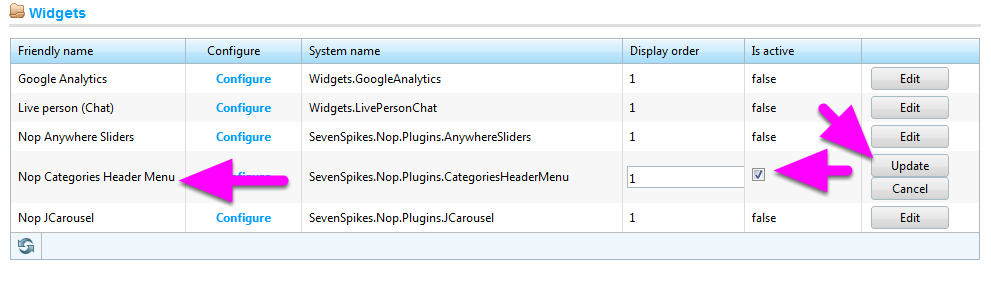
Find the Nop Categories Header Menu widget, click Edit, check the Is active and click Update.
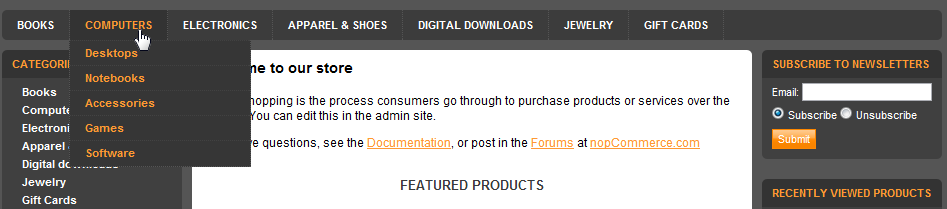
c) Nop Categories Header Menu on your Home Page on the DarkOrange theme
It will also be visible on every page in your nopCommerce web site.
Note that by default the Nop Categories Header Menu is styled for the default nopCommerce Dark Orange theme and the default nopClassic theme.
If you want to remove the menu then go in the Admin panel and Delete the Widget you just added in the previous step.
If you want to change the location of the Nop Categories Header Menu or change the styling then please read the Manual Intergration guide for more information.
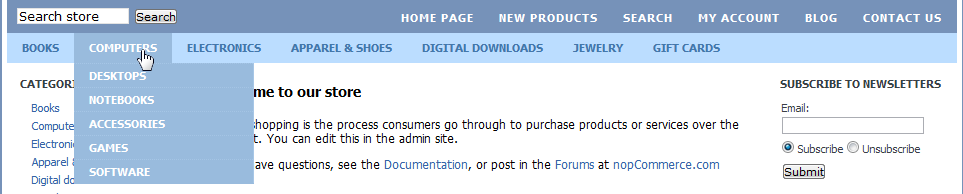
d) Nop Categories Header Menu on your Home Page on the nopClassic theme
2. Manual Integration
If you have done modifications to your NopCommerce installation, for example you have a custom pages\views, or you want to change the location of the menu then
you need to integrate your Nop Categories Header Menu manually.
a) Open the view where you want to place Nop Categories Header Menu i.e the _Root.cshtml
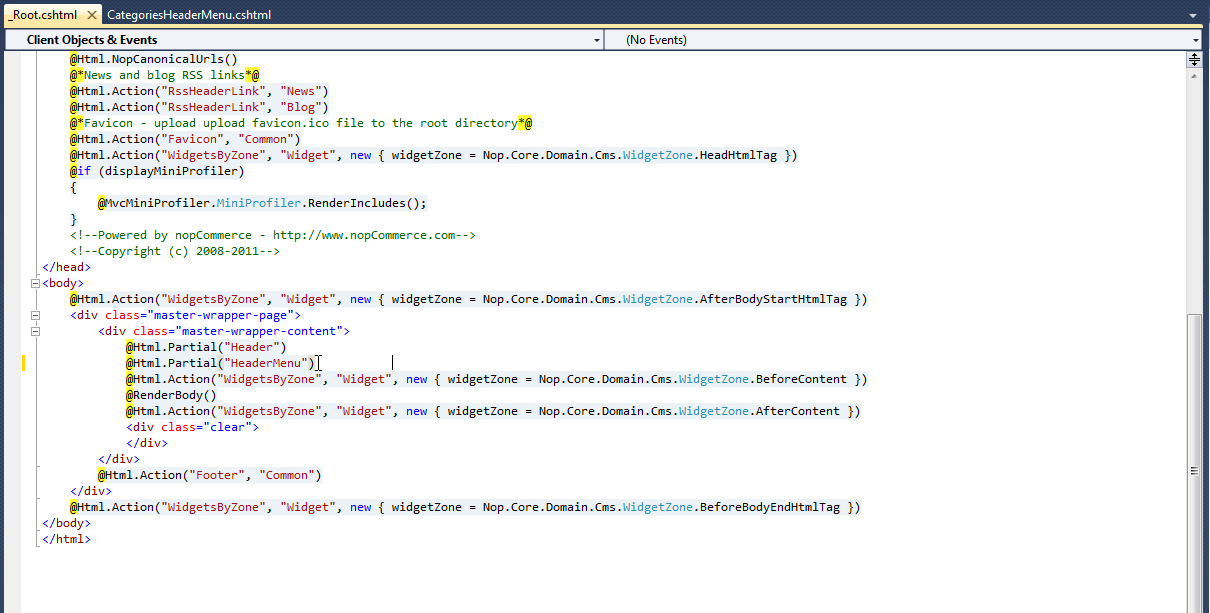
We chose _Root.cshtml because by adding it here the Menu will be visible on every page in your store.
b) Open your _Root.cshtml file in Visual Studio or a text editor and add the following code, wherever you would like the Nop Categories Header Menu to appear:
@Html.Action("CategoriesHeaderMenu", "CategoriesHeaderMenu")
For example:
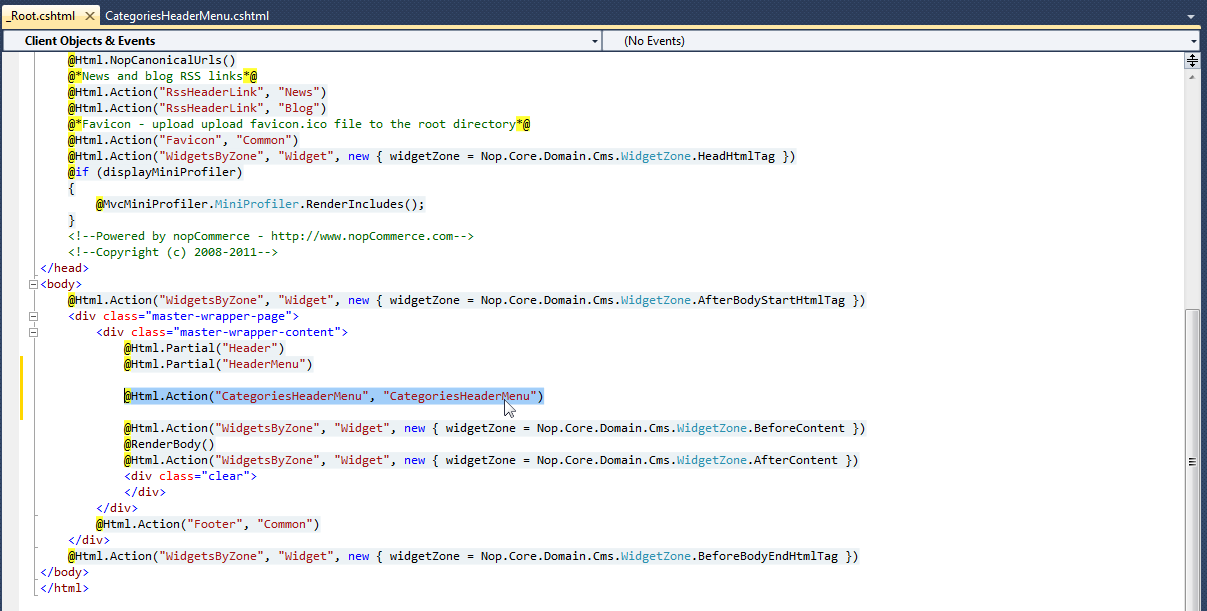
Your Nop Categories Header Menu should now be successfully integrated.
Please note that you can manually integrate the Menu in whichever view you want. But if you change the location of the Menu you will probably have to style it by modifying its CSS file or Razor view.
You can find and modify the Razor view CategoriesHeaderMenu.cshtml file in the Views folder of the Plugin folder.
You can find and modify the CSS file jquery.superfishmenu.css in the Styles folder of the Plugin folder.