Working with Nop Categories Header Menu
Once the Nop Categories Header Menu plugin is installed and integrated you might want to set the various settings.
1. Settings - show only selected top level categories based on their Show on home page setting.
If you have too many categories and they don't fit in the header menu you have the option to choose, which top level categories to be shown. You need to enable the Show Home Page Top Level categories Only setting. Once enabled you can go to the Top Level category that you want to show and enable the Show on home page setting.
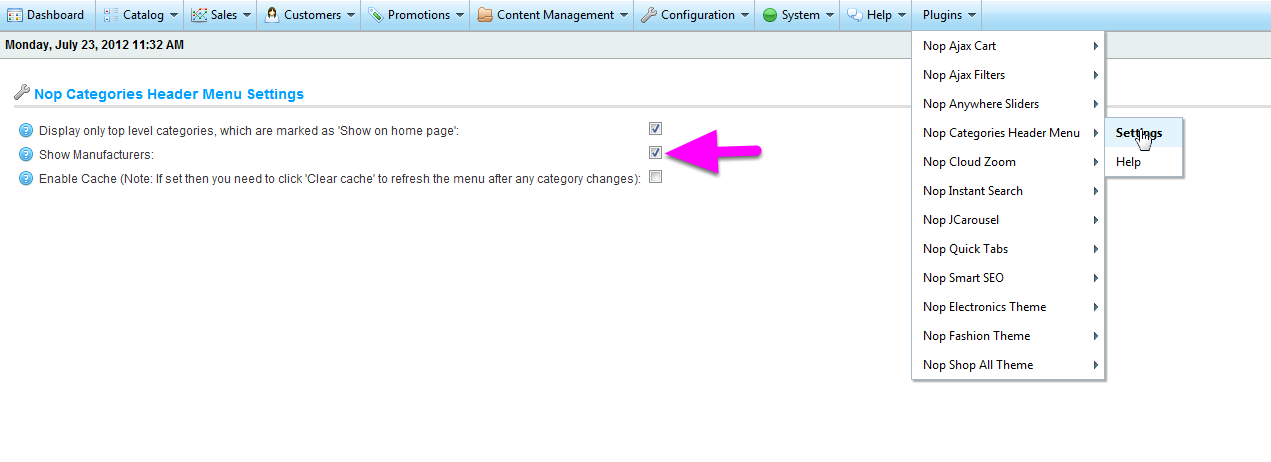
a) Go to Plugins -> Nop Categories Header Menu -> Settings

Check the Show Home Page Top Level Categories Only checkbox and Save the settings.
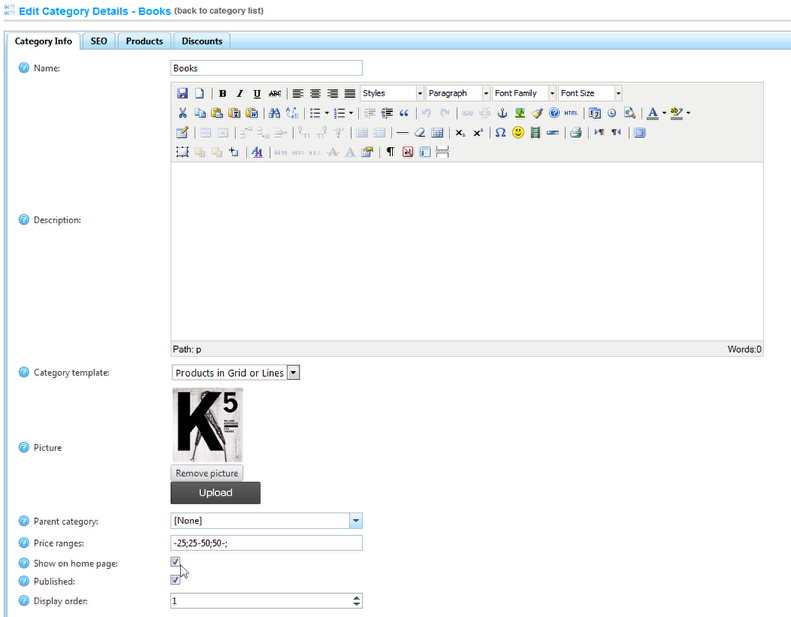
b) Go to a Top Level category and enable Show on home page if you want the category to be shown in the Header Menu
2. Enable Cache - enables caching and greatly improves prerformance but don't worry if your newly added categories don't appear as you need to clear the cache
Check the Enable Cache checkbox and Save the settings.
3. Show Manufacturers - a list of manufacturers is shown in your Nop Categories Header Menu plugin
4. Adding links to other topic pages i.e About Us

You can easily add links to other pages in the Header Menu by modifying the Razor view file.
You can find and modify the Razor view CategoriesHeaderMenu.cshtml file in the Views folder of the Header Menu plugin folder.
SevenSpikes.Nop.Plugins.CategoriesHeaderMenu\Views\CategoriesHeaderMenu.cshtml
For example you can add a link to About Us topic page. You just need to uncomment the code by removing @* and *@ around it.
You can also add links to other pages or completely remove the categories by commenting @Html.Raw(Model.CategoriesHtml)
You can change the place of the manufacturers just by moving the code part of code shown above to a different place.