CONFIGURING THE HOME PAGE
Follow these steps in order to configure your home page like the Venture Two Theme Demo.
You need to have in mind the following options when setting up your store home page. Please have a look at the different elements you can display on the home page:
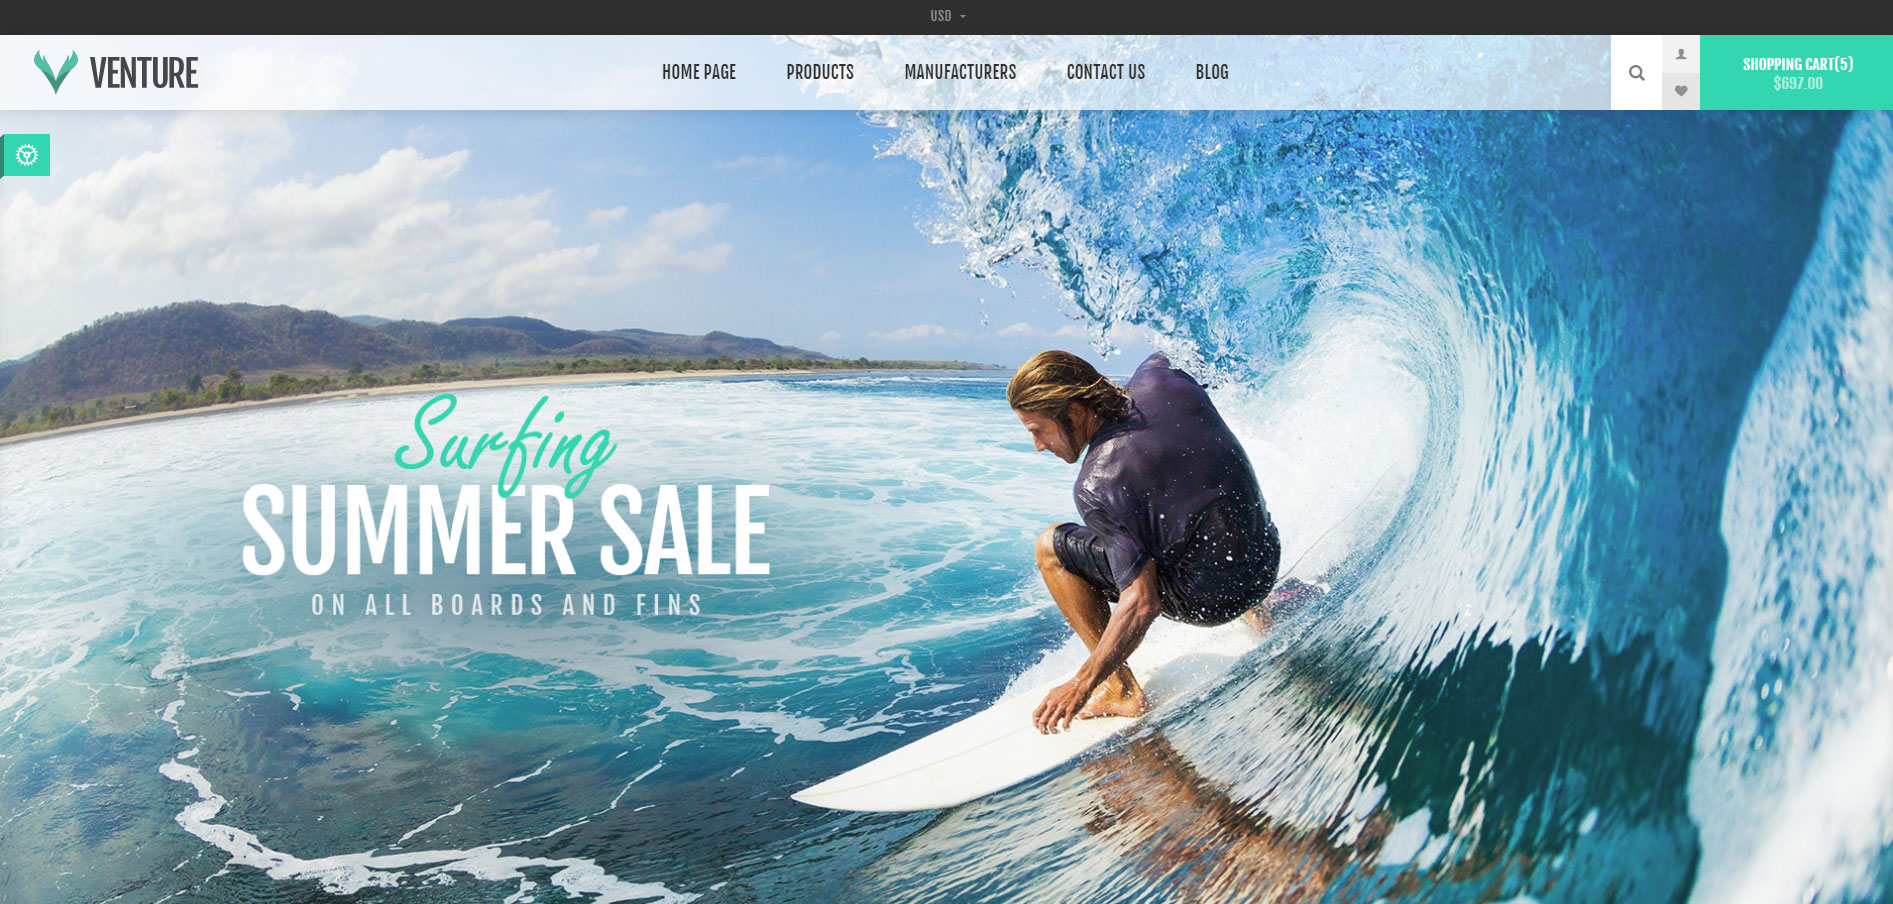
The first thing you see when you open the home page of the store is the Home Page Slider:

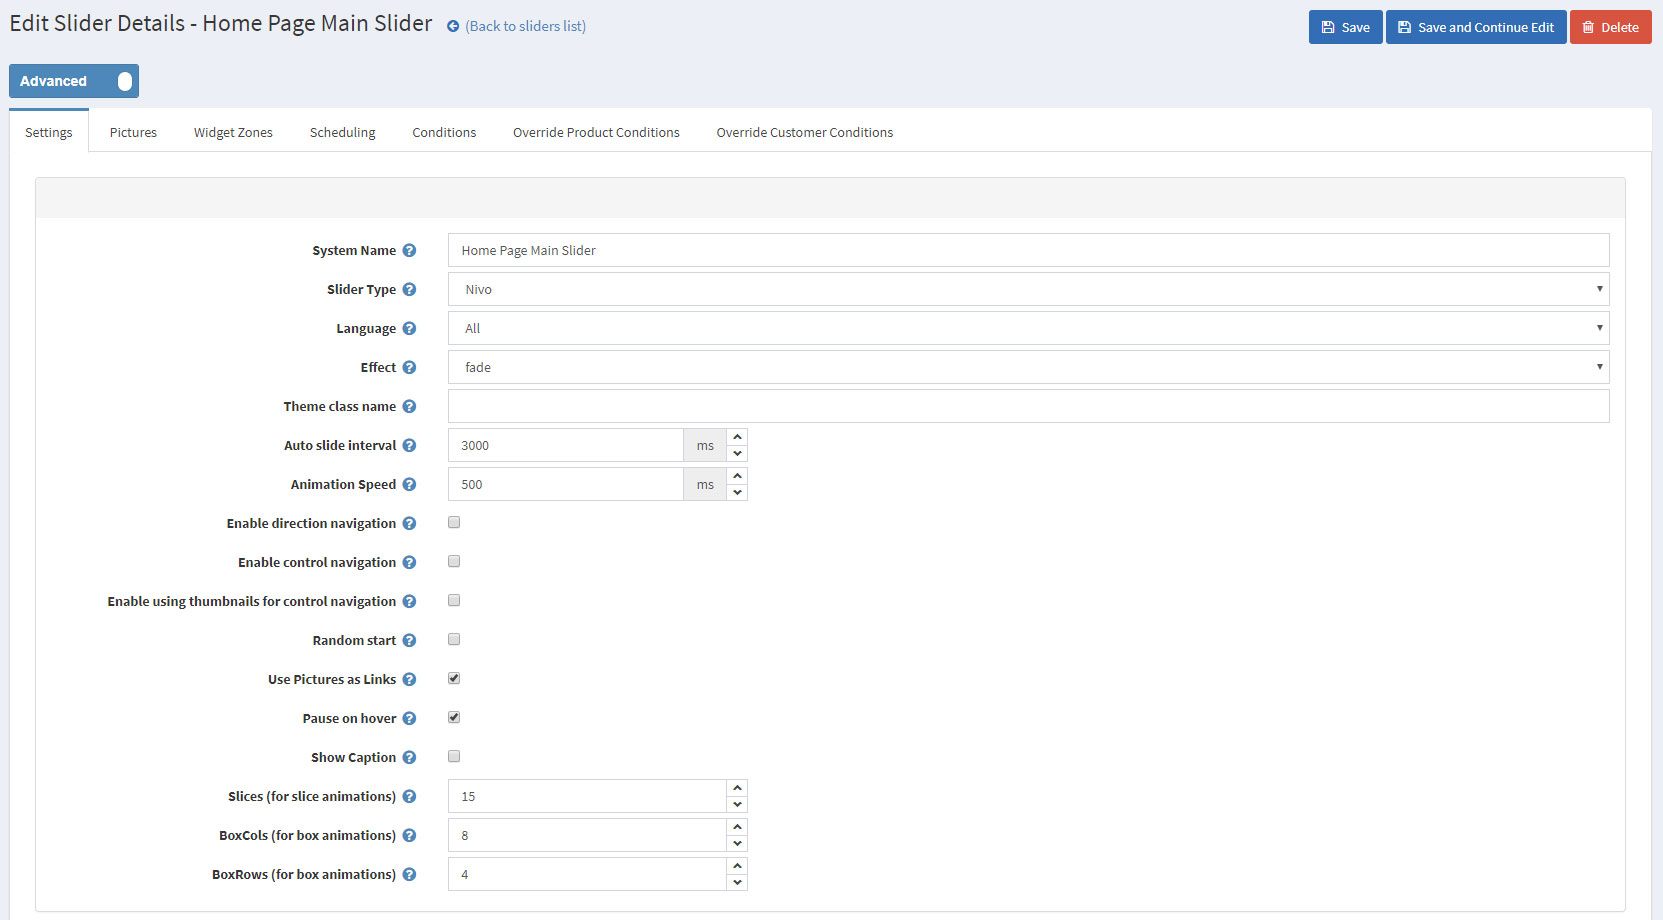
The slider is achieved by creating a new slider in Administration -> Nop-Templates -> Plugins -> Anywhere Sliders -> Manage Sliders with the following settings.
After that, upload your slider pictures in the Pictures tab.

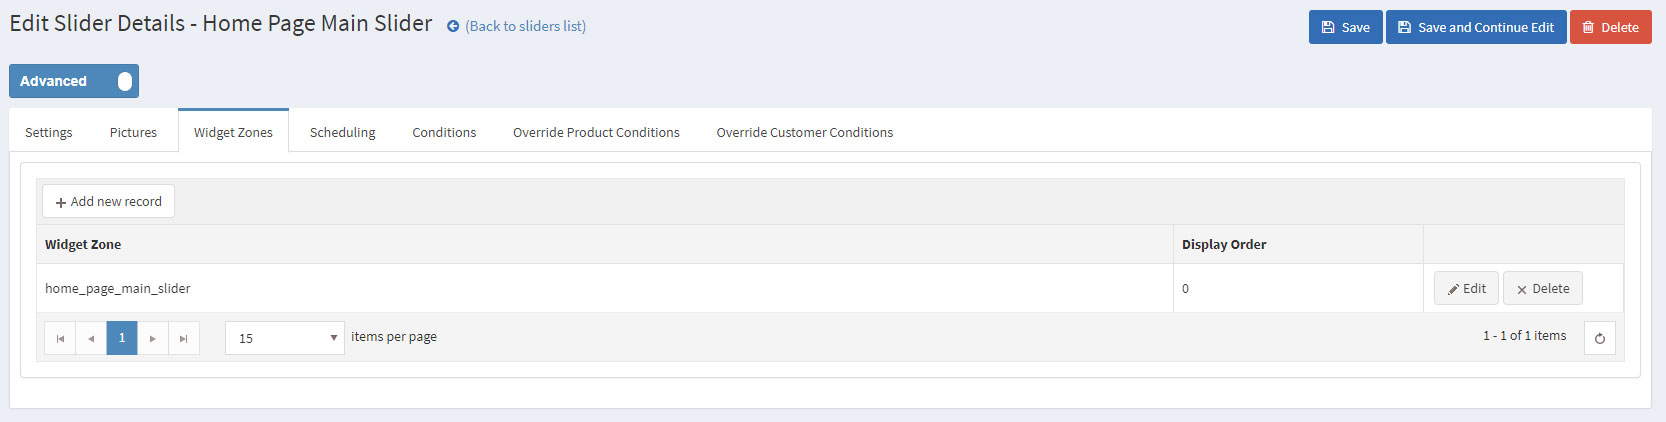
And choose "home_page_main_slider" widget zone from the Widget Zones tab.
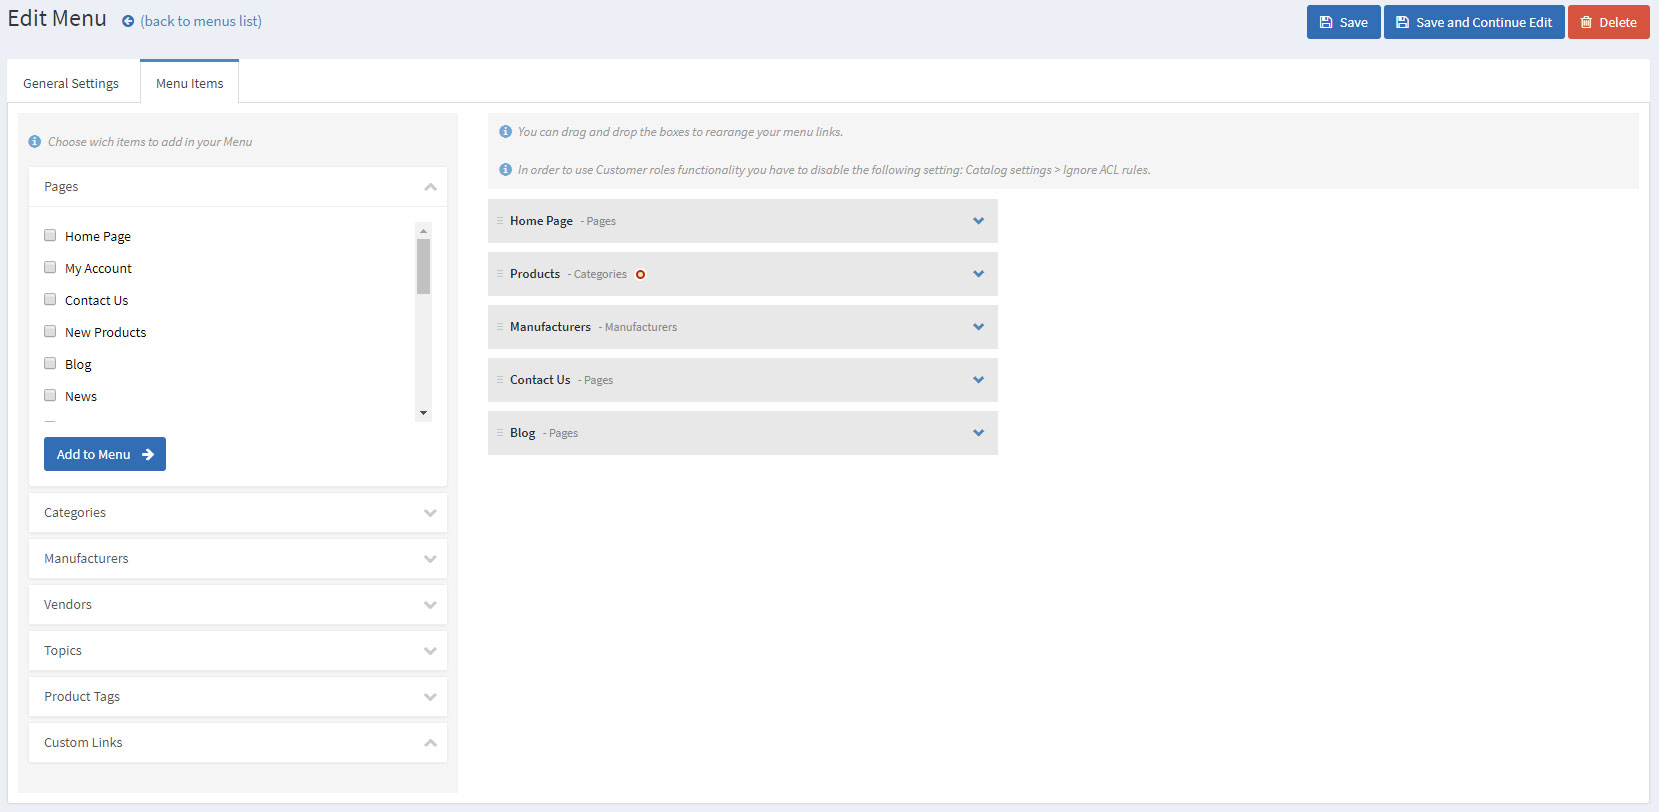
The Nop Mega Menu plugin, that is shipped with the Venture Theme, makes it possible to create your own templates for the menu navigation of your store. In order to create your own Mega Menu you will need to go to Administration -> Nop-Templates -> Plugins -> Mega Menu -> Manage Menus and add a new Mega Menu.

After creating your Mega Menu you will need to configure your Menu Template. The Nop Mega Menu is a very powerful and simple to use tool. You can arrange, nest and even edit Menu Items like shown in the image below. You can find more information on how to configure your Mega Menu in our Documentation.
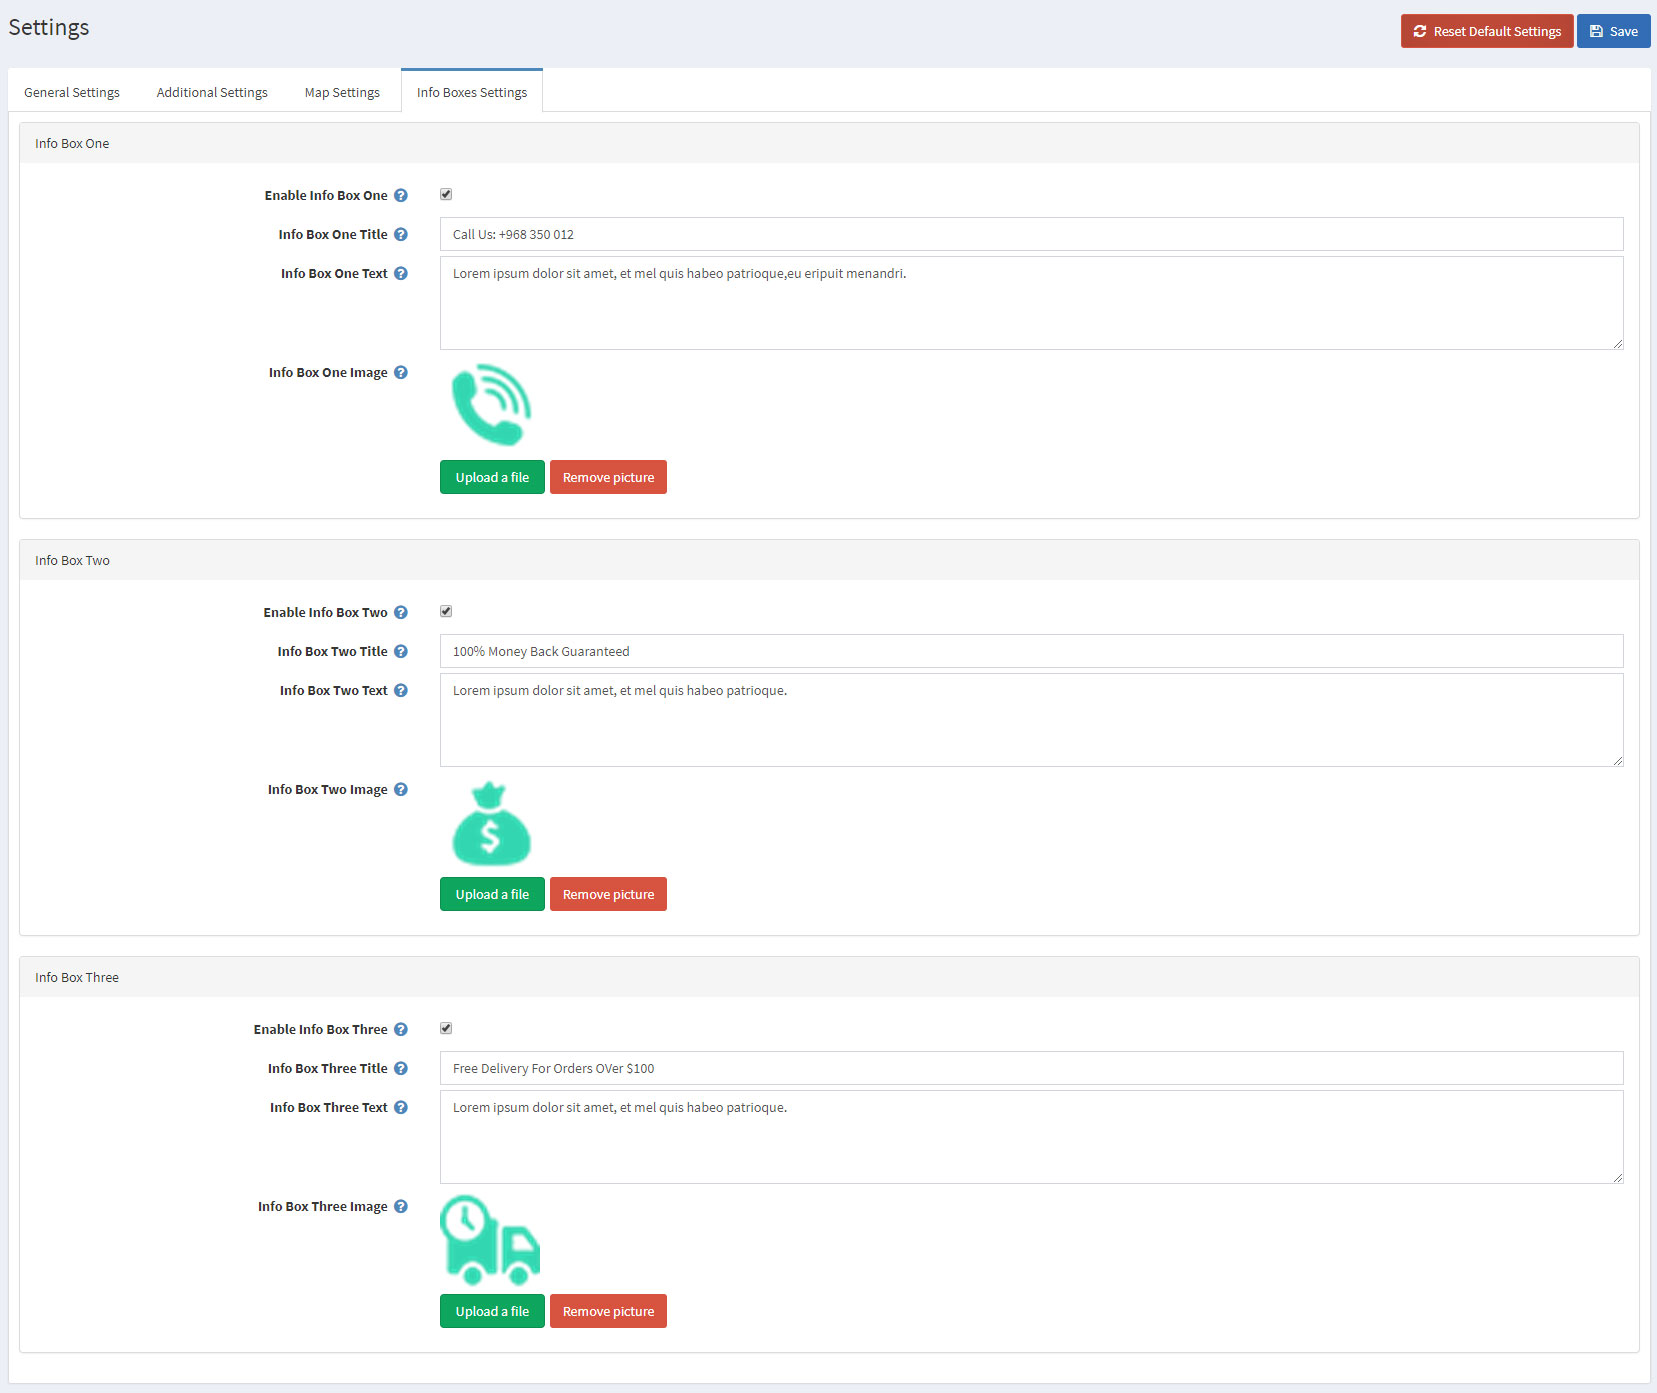
Just below the main slider are the Info Boxes.

You can configure the Info Boxes by going to Administration -> Nop-Templates -> Themes -> Venture -> Settings -> Info Boxes Settings.
Moving on to the Featured Categories.

You can make a category featured by going to Administration -> Catalog -> Categories -> Edit Category and check the Show on home page setting.
Next elements on the home page are the Featured Products
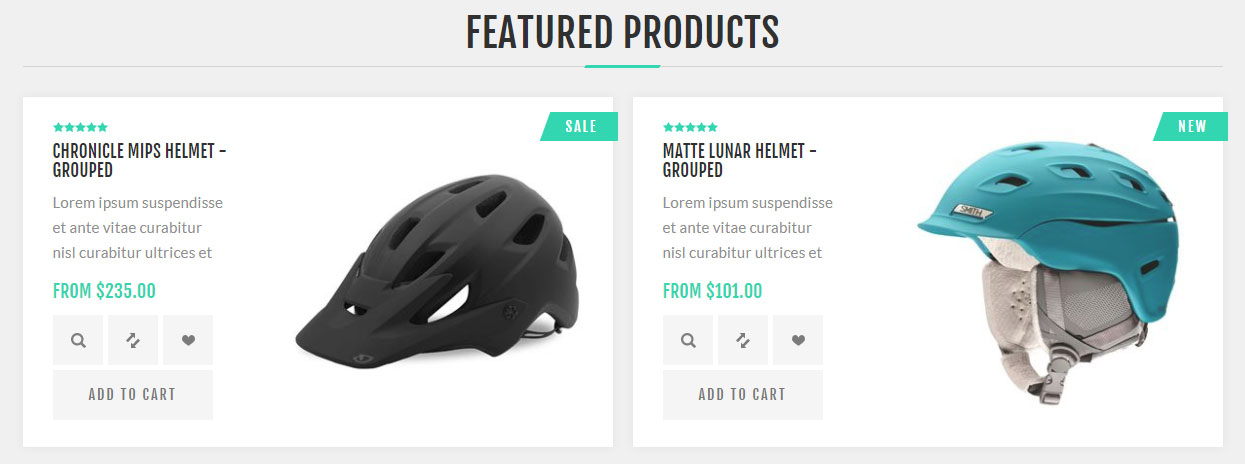
You can make a category featured by going to Administration -> Catalog -> Products -> Edit Products and check the Show on home page setting.
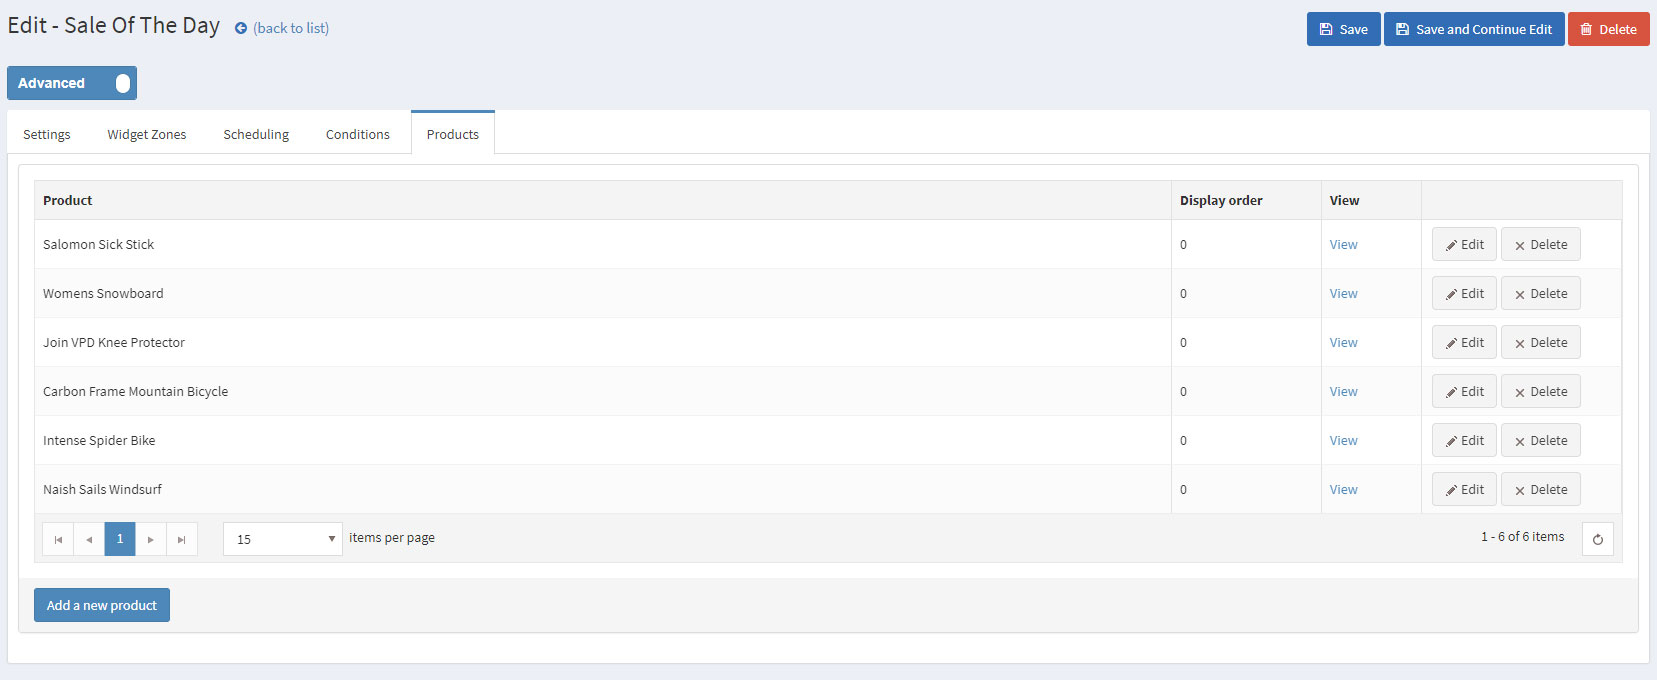
The Sale of The Day plugin comes right after the section with your featured products. The plugin will allow you to make a selection of your best offers and to display them on your website home page.
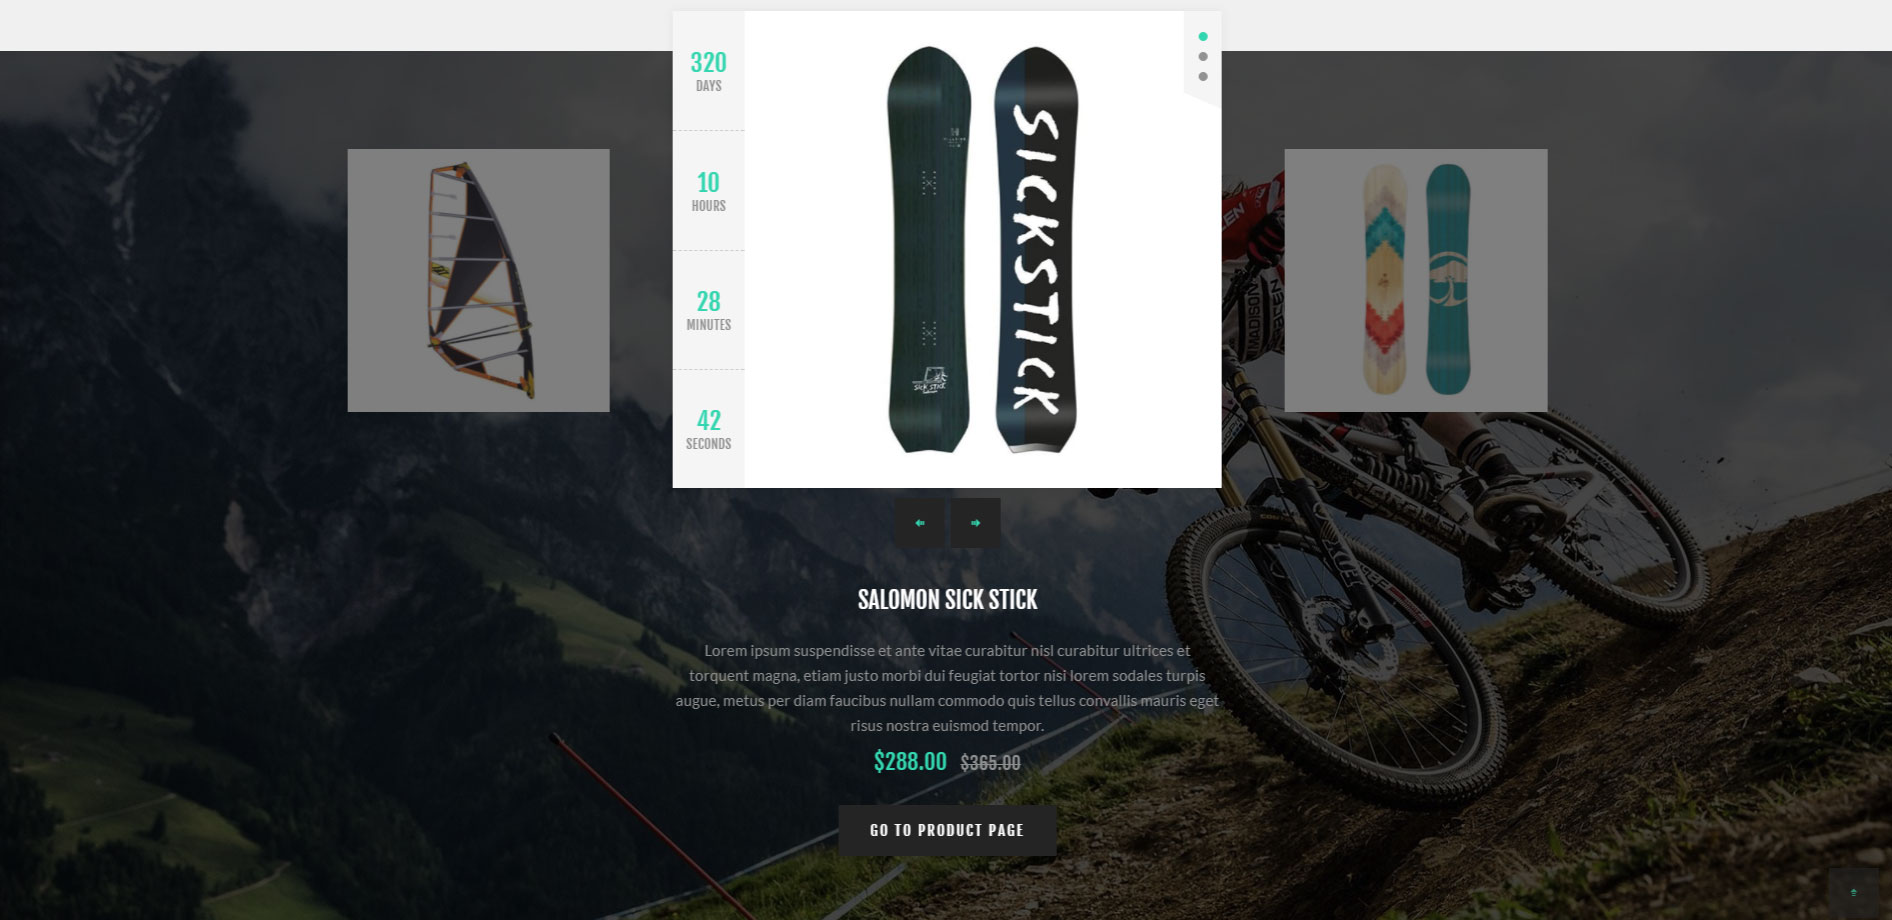
You can configure the Sale of The Day plugin by going to Administration -> Nop-Templates -> Plugins -> Sale of The Day -> Manage Offers and creating a new offer with the following settings:
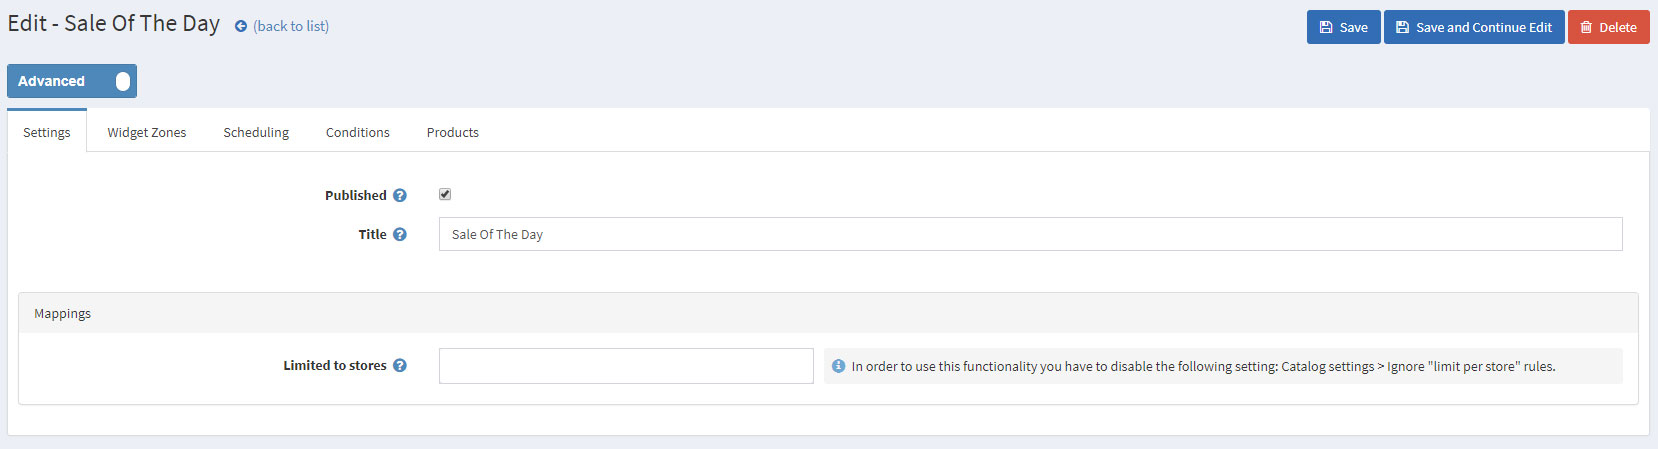
The last thing you need to do is add products from the Products tab.
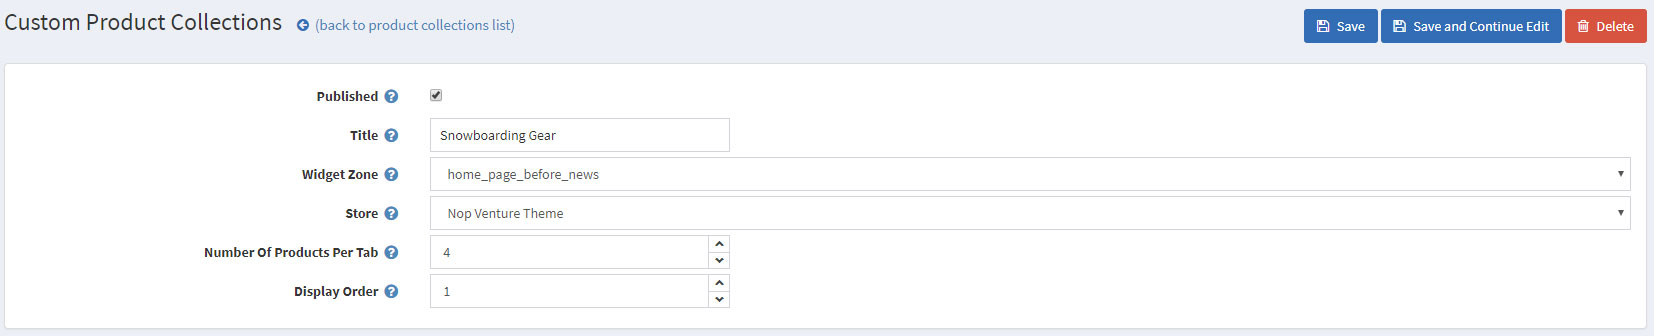
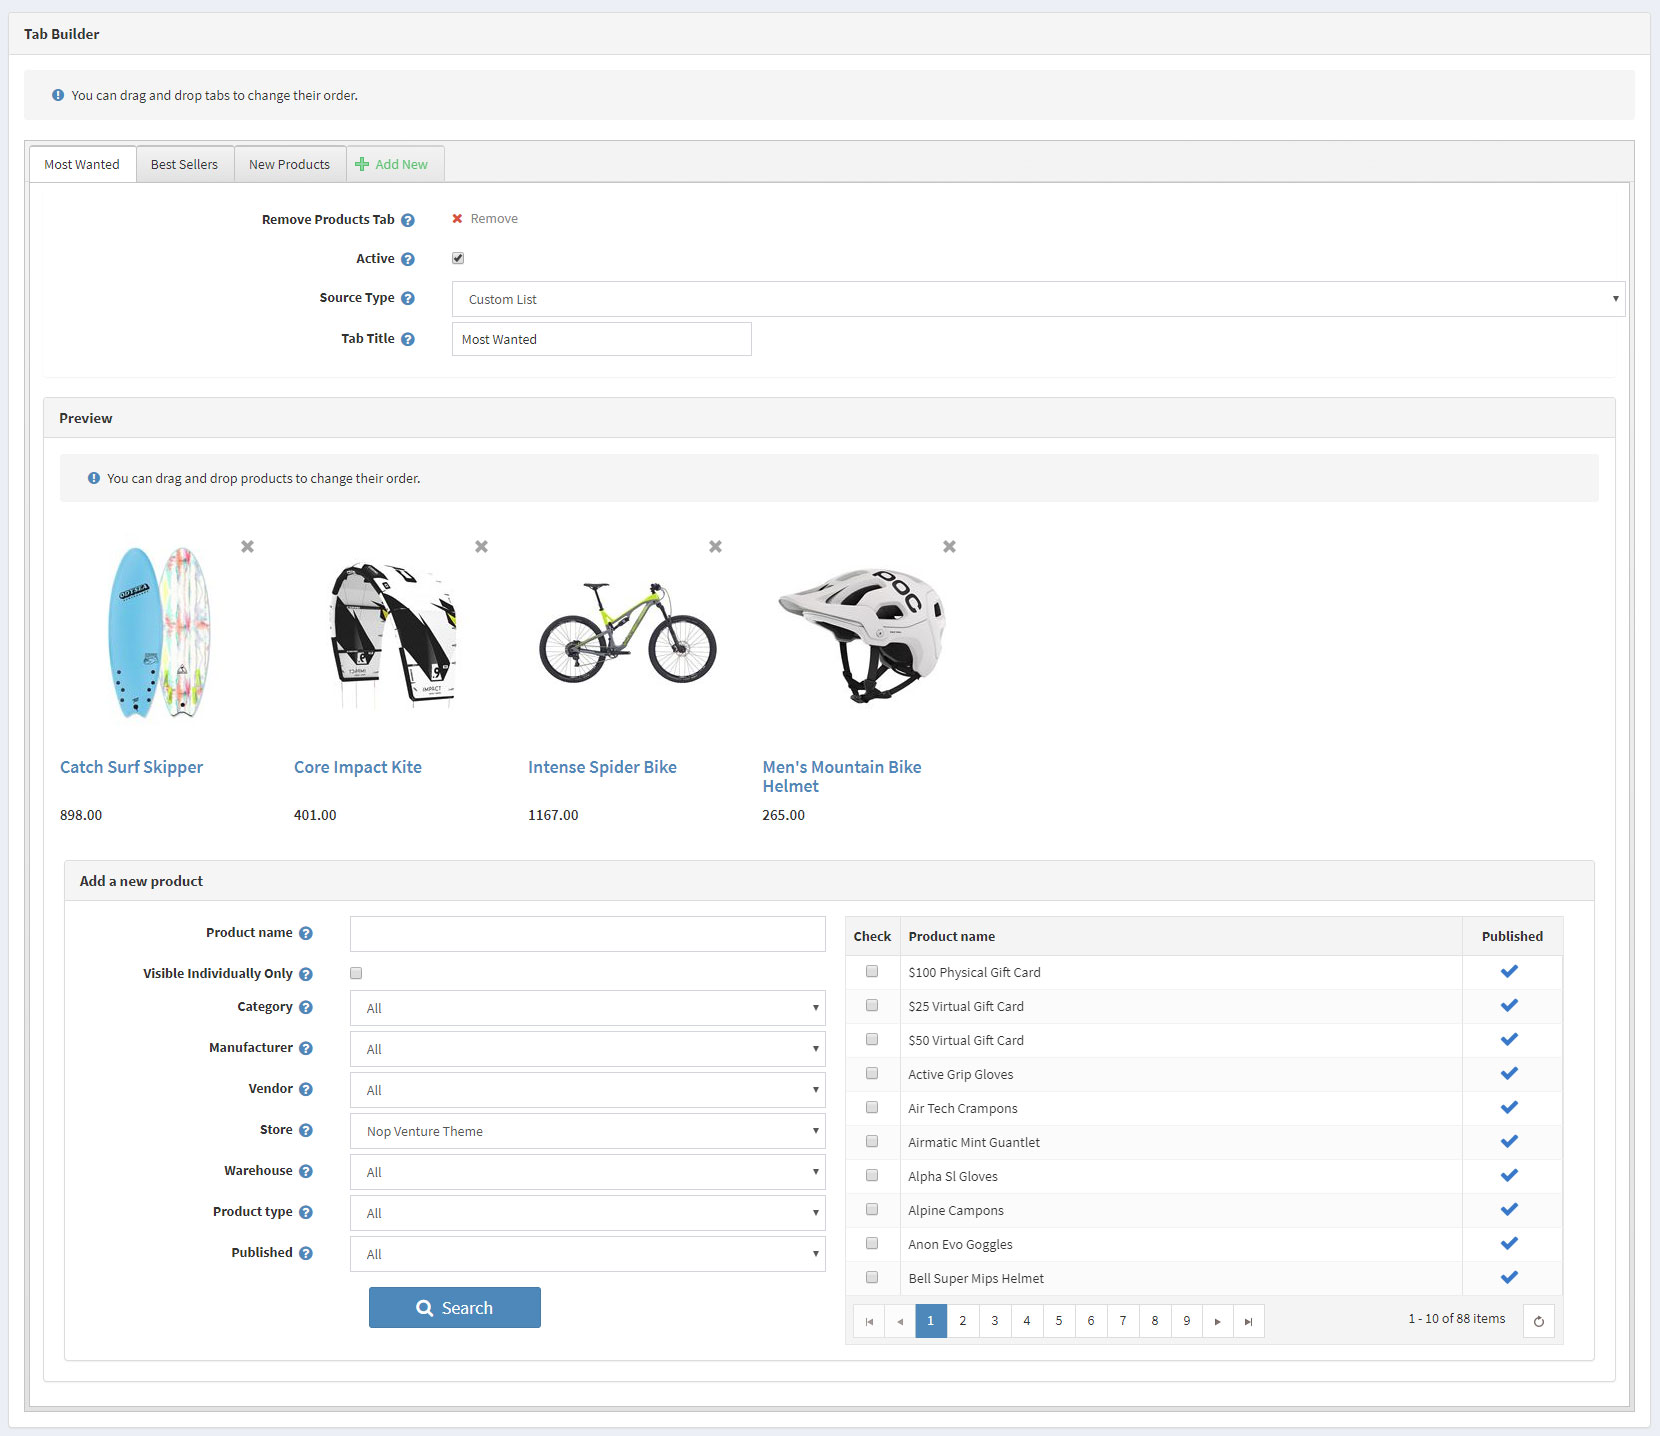
Moving on to the Smart Product Collection plugin. Using this plugin you can show your best products on your home page and group them accordingly in categories. There are two types of Smart Product Collections: Category Product Collections and Custom Product Collections.
You can use the custom product collections to display different lists of products on your home page order them in tabs depending on many criteria(e.g. Most Wanted, Best Sellers, etc).
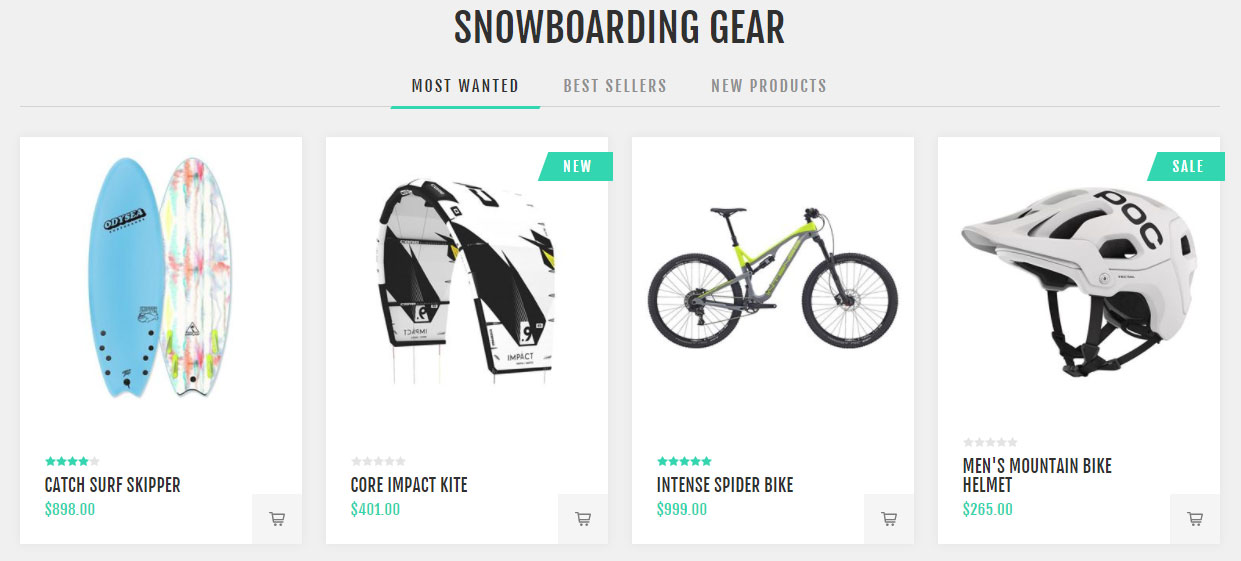
This will result in a nice ordered way to show your best products on your home page:
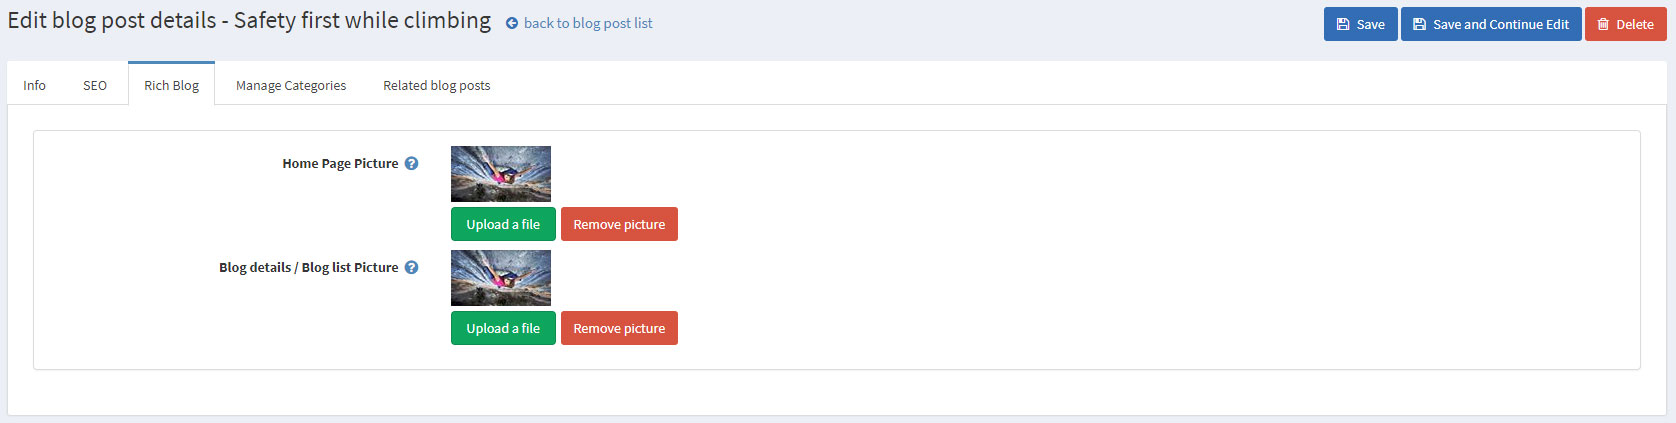
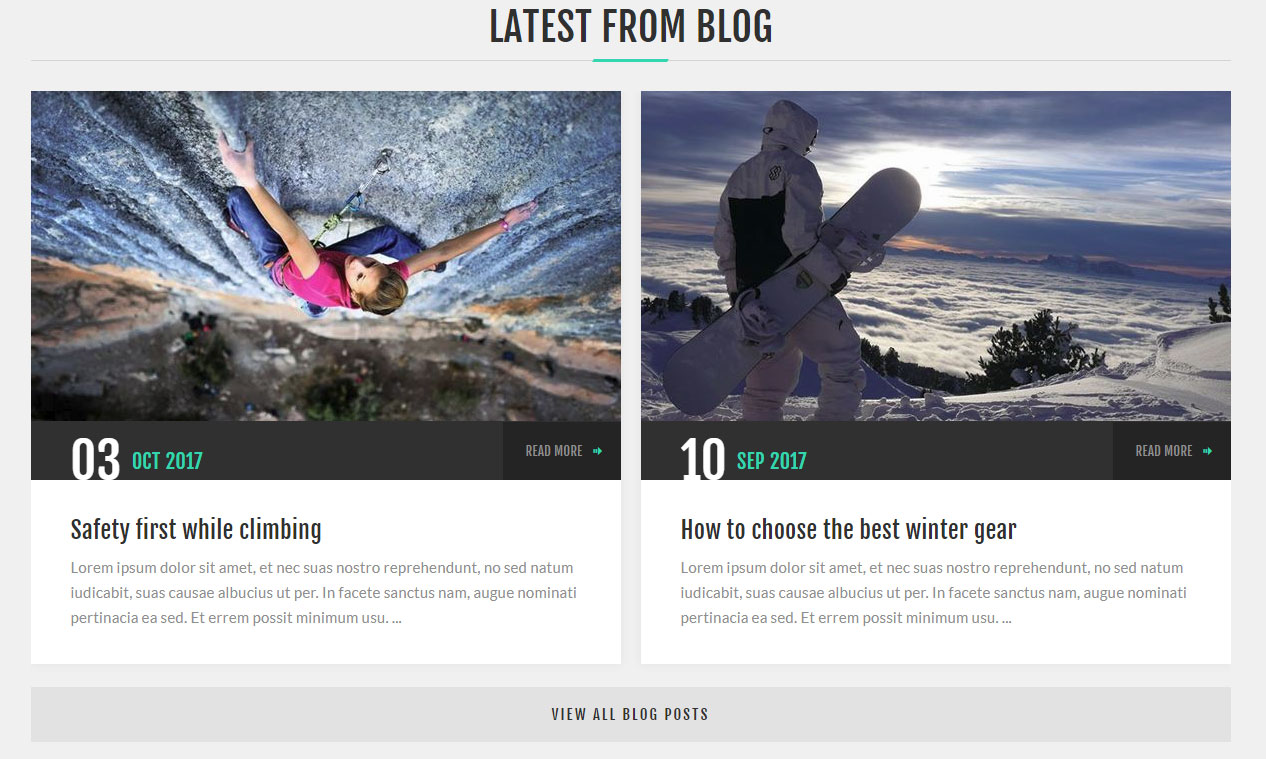
Using the Rich Blog plugin you can show a number of your blogs on your home page alongside with their image and a short description for them.
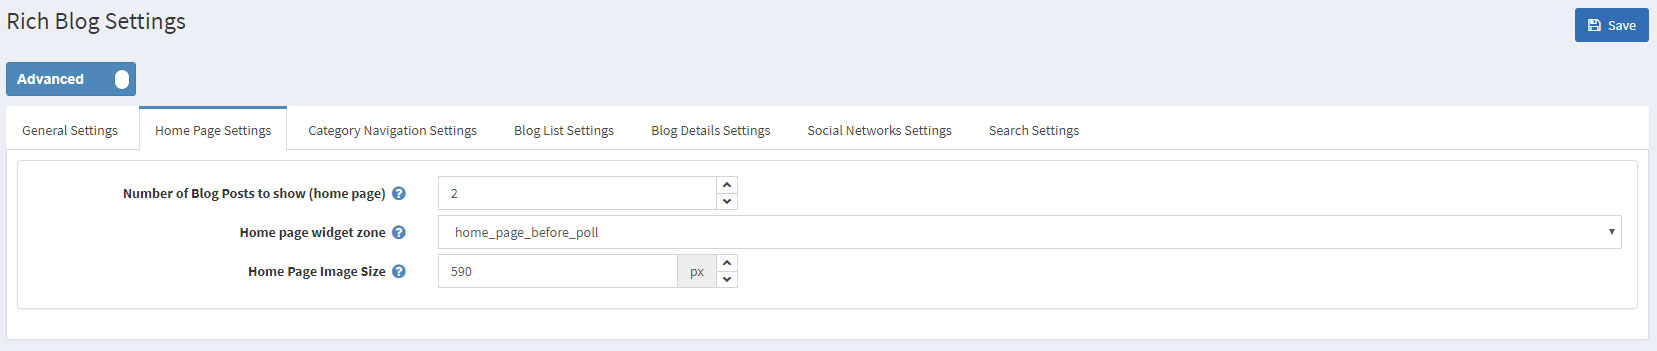
You can configure the Rich Blog from Administration -> Nop-Templates -> Plugins -> Rich Blog -> Settings -> Home Page Settings.
You can upload images for your blog posts from Administration -> Content management -> Blog -> Blog Posts -> Edit Blog Post -> Rich Blog.