Run sales the same way any brick and mortar store does! With the Nop Sale Campaigns plugin you can create your own campaign for the products you like, for the period of time you wish to, with just a few clicks from the admin panel.
Live DEMO - see how the Sales Campaigns would look like in your public store.
Admin DEMO - see the plugin administration.
Working with Sales Campaigns information. General information on how to setup your campaigns.
Creating a Sales campaign
You can create as many sales campaigns as you need.
In order to create a new sales campaign go to Plugins -> Nop Sales Campaigns -> Manage Sales Campaigns. Click on the Add new Sales Campaign button.
Creating a Sales campaign - settings
- Name - This is the name of the sales campaign and is a required field. It is needed, so that you can discern between your sales campaigns in the administration as you can have many sales campaigns.
- Add products to category - Specifies whether the products in this campaign will be mapped to a specific category. This is useful when you want to have a separate Sales category where all the products on sale will be shown.
- Category - From the category dropdown you can choose the desired category to which the products on sale will be mapped.
- Widget Zone - The widget zone on the product page where the sale campaign countdown timer will appear. Note: only the campaigns which have a schedule and an end date/time will have a countdown timer.
- Discount type - You can choose between 2 discount types: Percentage and Fixed amount.
- Discount - The value with which the products in the campaign will be discounted.
- Override cents - Specify whether the discounted product price will be overridden with the entered override value. Example: if the calculated price is 3.64 and you have specified override value 0.99 the final calculated price will be 3.99.
- Override cents value - Override the cents on the discounted prices of the products.
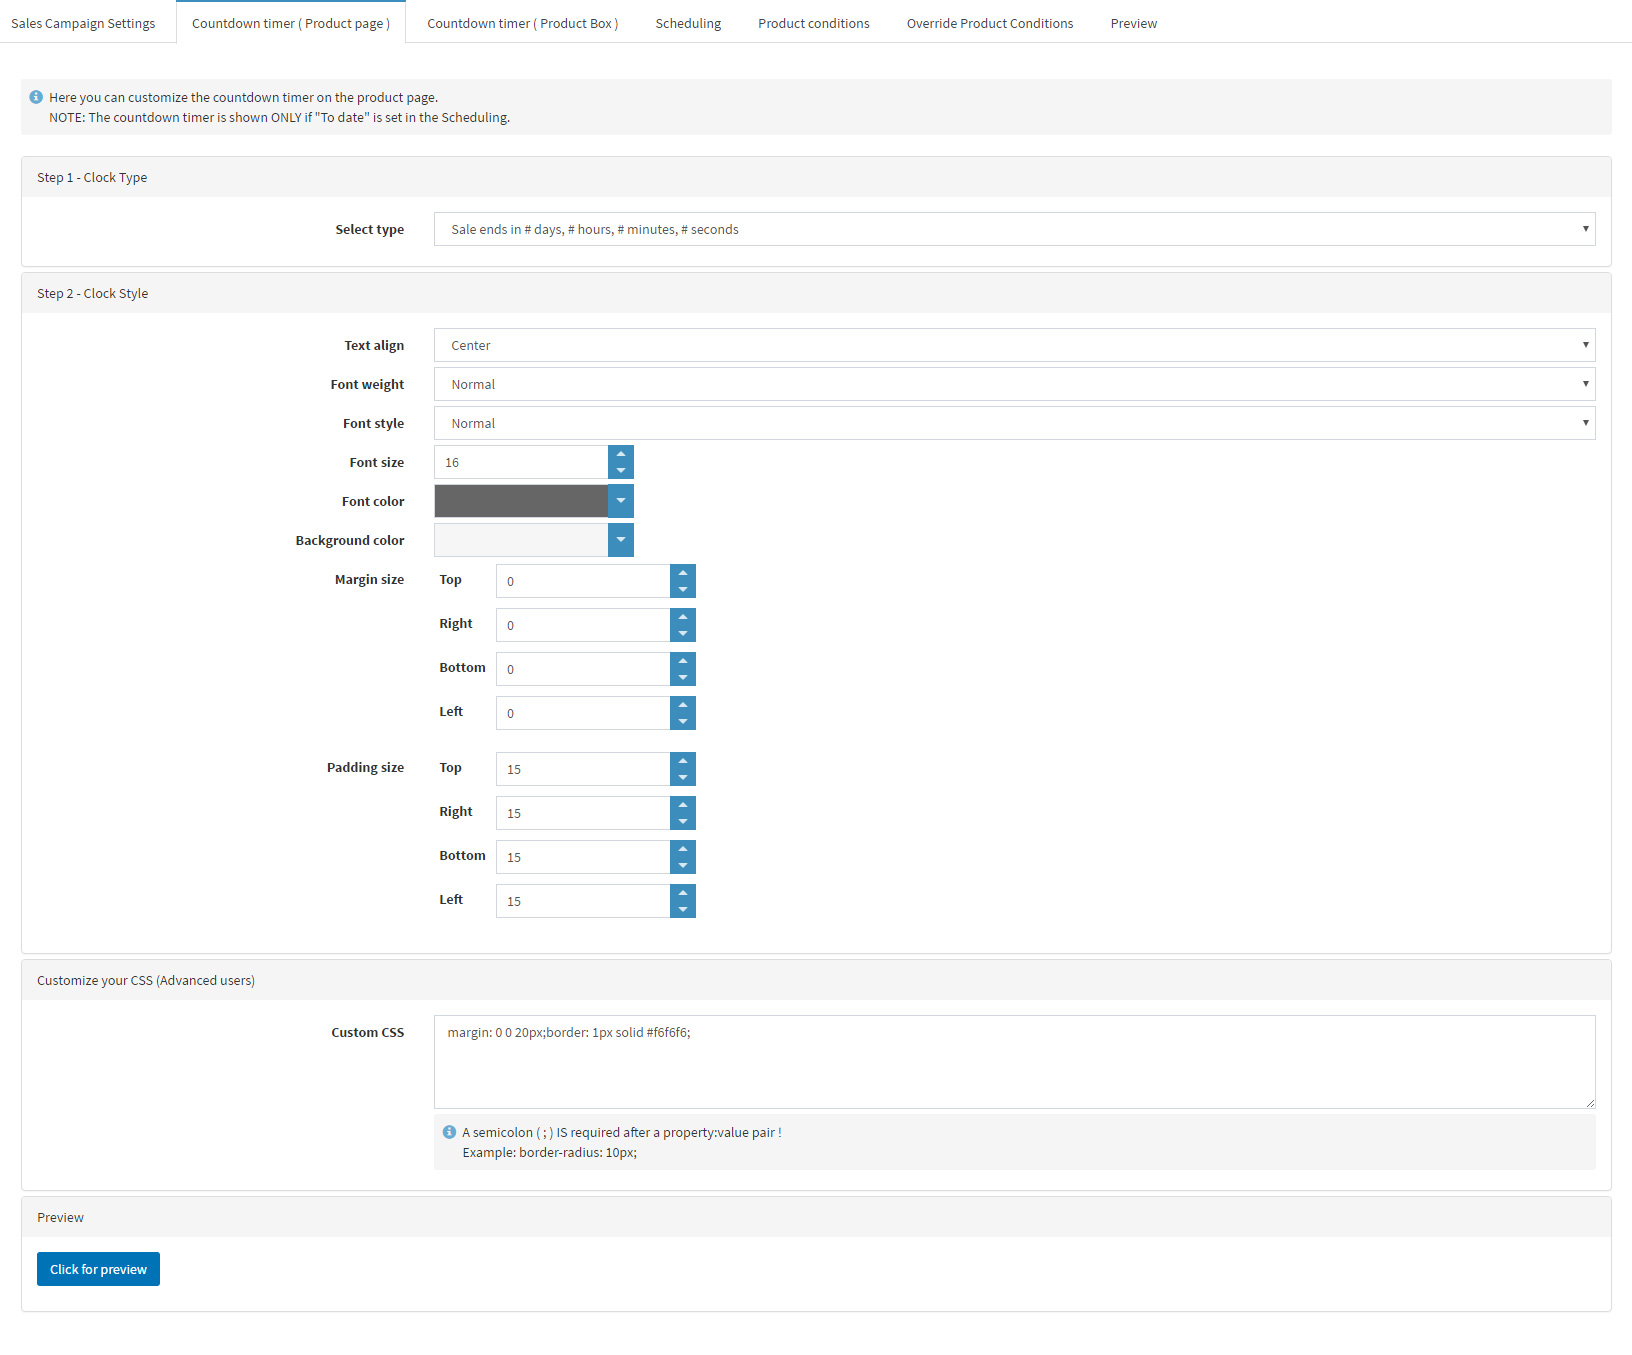
Countdown timer Product page
From this tab you can customize the countdown timer, which will appear on the product details page of every product in the campaign. Note that this is an optional feature.
By clicking the "Click for preview" button you can check how your countdown timer will look.
Countdown timer Product Box
From this tab you can customize the countdown timer shown in the product boxes and associated products. Note that this is an optional feature.
By clicking the "Click for preview" button you can check how your countdown timer will look.

Scheduling
From the Scheduling tab you can create a schedule for your campaign.
- From & To dates - the active period of the campaign.
- Schedule pattern - With the scheduling pattern you can specify how often and when exactly your campaign should run within the specified From & To dates. For example you can specify your campaign to run Every Monday or just on the weekends.
- From & To Time - With the From & To Time you can specify the exact time of the day when your campaign should run and stop. For example you can specify that your campaign should run Every Monday from 10 AM to 10 PM.
Using Conditions to select the products for the campaign
In this tab you need to specify which products will be discounted based on conditions.
For example we want to lower the price of all products from the Jewelry category.
To do this we need to do the following:
- Click Add Condition Group
- Add new record -> Choose Product -> Choose Category -> Choose Equal To -> Choose Jewelry category.
Narrow your products selection using conditions
Once we have already added our first condition we can narrow down our products even more:
Add new record -> Choose Product -> Choose Quantity -> Choose Less than -> 3
Now only products, which are in the Jewelry category AND have stock quantity less than 3 will be discounted by the sales campaign.
Exclude or include specific products using Override Product Conditions
If you want to exclude or include a specific product from/to the selected products by the conditions you need to specify them from the Override Product Conditions tab.
You can add a product override by following the steps:
- Click Add new record
- Optionally specify a category from the dropdown so you can easily find your products.
- Click Search
- Check which products you want to include/exclude.
- Click Save.
- Change the state of the override(by default it is Include).
Preview the products in the Campaign
In the preview tab you can see which products will be discounted and with how much.
See how it looks on product page in the public site
Remember, only sales campaigns which have scheduling with EndDate will have a countdown timer (otherwise they would not have an end date and there is no way to calculate when the sales campaign will end).
- This is how our countdown timer will looks like( remember that you can customize the look of the countdown timer as shown in one of the previous screenshots).
- As you can see the sales campaigns plugin has automatically adjusted the price of the product. This has been done for all products in the campaign. The price will be automatically reverted back to the original price when the campaign is over.