Working with the Nop Cloud Zoom
Please read the following steps for more information on how to configure the Nop Cloud Zoom
Working with the Nop Cloud Zoom is as easy as configuring a few settings from the administration of the plugin. When the plugin is installed it comes preconfigured with default values for the settings
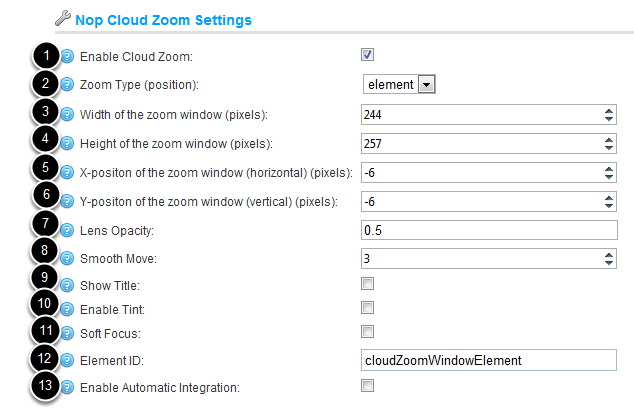
- Enable Cloud Zoom - Sets whether the Cloud Zoom is enabled. Even if you have integrated the plugin you can enable and disable it via this setting. The default setting value is false.
- Zoom Type - Specifies the position of the zoom window relative to the image being zoomed. Allowable values are 'left', 'right', 'top', 'bottom', 'inside' (for inner zoom) and 'element'. The default value is 'element'. Please refer to step 1) Zoom Types for more information about the zoom types.
- Width of the zoom window - Specifies the width of the zoom window in pixels (does not work with Zoom Type 'inside').
- Height of the zoom window - Specifies the height of the zoom window in pixels (does not work with Zoom Type 'inside').
- X-Position of the zoom window - With this option, you can fine tune the horizontal position of the zoom window (does not work with Zoom Type 'inside').
- Y-Position of the zoom window - With this option, you can fine tune the vertical position of the zoom window (does not work with Zoom Type 'inside').
- Lens Opacity - Specifies the opacity of the lens mouse pointer, where 0 is fully transparent and 1 is fully opaque. If Tint or Soft Focus are enabled, it will always be transparent. (does not work with Zoom Type 'inside').
- Smooth Move - Specifies the amount of smoothness/drift of the zoomed image as it moves. The higher the number, the smoother/more drifty the movement will be. 1 = no smoothing.
- Sow Title - When enabled gives you options for showing the title tag of the image. Please refer to step 2) Show Title for more information about the title options.
- Enable Tint - Enables the Tint property, which allows you to specify a tint color that will cover the image being zoomed. Please refer to step 3) Tint for more information about the tint options. (does not work with Soft Focus or Zoom Type 'inside').
- Soft Focus - Enables a subtle blur effect to the image being zoomed. (does not work with Tint or Zoom Type 'inside').
- Element ID - When Zoom Type ' element' is selected, this option allows you to set the ID of a <div> element, that is going to contain the zoom window. If the Element ID is not specified, the zoom window will appear in the lower right corner of the image being zoomed. Please refer to step 1) Zoom Types for more information about zoom type 'element'.
- Enable Automatic Integration - Sets whether Automatic Integration for the Nop Cloud Zoom is enabled. Please refer to the Integration section for more information on the Automatic Integration option. The default setting value is false.
1) Zoom Types
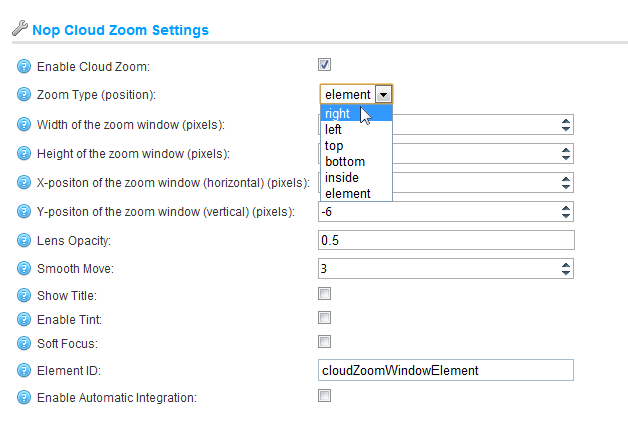
Specifies the position of the zoom window relative to the image being zoomed. Allowable values are 'left', 'right', 'top', 'bottom', 'inside' (for inner zoom) and 'element'.
2) Show Title
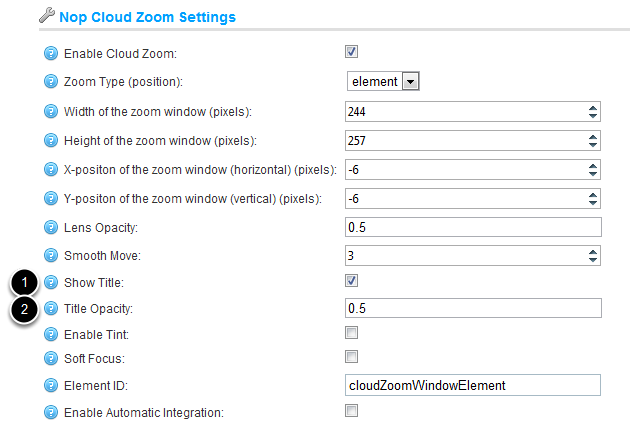
When Show Title is enabled, the Title Opacity option appears. With this option you can set the opacity of the title, where 0 is fully transparent and 1 is fully opaque. If Show Title is enabled and Title Opacity is set to 0 the title will not be visible!!!
3) Tint
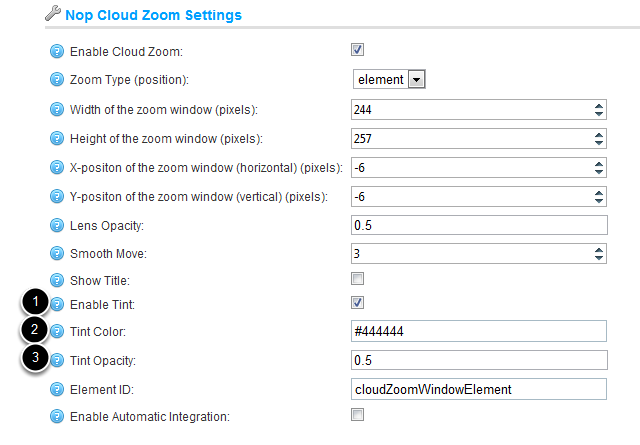
When Tint is enabled, the Tint Color and Tint Opacity options appear. In the Tint Color option you can specify a tint color that will cover the image being zoomed. The color's format is hexadecimal. In Tint Opacity option you can set the opacity of the tint color, where 0 is fully transparent and 1 is fully opaque. When Tint option is enabled the Soft Focus option is automatically hidden and vice versa.