
Multi-store support and multi-vendor support are two of the most prominent features nopCommerce offers out-of-the-box.
А month ago, we published an extensive guide to the multi-store feature in nopCommerce. We discussed what multi-store support is, which nopCommerce entities can be configured per store, how to set up multiple stores in nopCommerce, etc.
Today we will talk about multi-vendor support in nopCommerce. Here are some of the questions we will tackle: what is multi-vendor support? How to create a vendor? How to map a customer account to a vendor? How to manage vendor settings? How to edit vendor details, and more. Let’s dive right in!
What is multi-vendor support in nopCommerce?
The multi-vendor feature in nopCommerce allows merchants to create an online marketplace - a website where different people or businesses sell their products. Or, in other words, a website where products supplied by multiple independent vendors appear in a common store catalog.
Each vendor uploads their products to the marketplace. When a customer places an order for a product, the vendor who supplies the product receives an “Order placed” email. Then, the vendor ships the product on behalf of the merchant.
If a customer places an order that contains products from different vendors, each vendor gets notified by email. Then, each vendor ships only the product (or products) they supply. In this case, the items are shipped separately.
To sum up, running a marketplace allows you to sell online without keeping products in stock and taking care of shipments. Instead, you work with a network of dropshipping partners (aka vendors) that take care of the inventory and logistics.
One curious fact about the multi-vendor feature in nopCommerce is that nopCommerce is one of the two open-source e-commerce systems that support multi-vendor out-of-the-box. NopCommerce was also the first to offer this feature, which is not only pretty cool but also a fantastic USP (unique selling point) for nopCommerce.
What marketplace owners need to know about vendors in nopCommerce.
- In nopCommerce, a vendor is a customer who has been assigned a vendor role.
- You (aka the marketplace owner) can create an unlimited number of vendor accounts.
- You can map more than one user (i.e., customer) to a vendor account. However, you cannot assign the same user to more than one vendor account.
Note: you must create the vendor account before assigning customers to it. - A customer cannot be assigned both a vendor role and an administrator role (this is a default nopCommerce setting). In other words, vendors are not administrators of the marketplace. You (the online marketplace owner) are the administrator of the marketplace.
- You can give vendors restricted access to the admin panel of the marketplace. So they can manage their products and orders, as well as view sales reports, performance reports, etc.
To manage ACL (administration access control) for the vendor role, go to Configuration → Access Control List.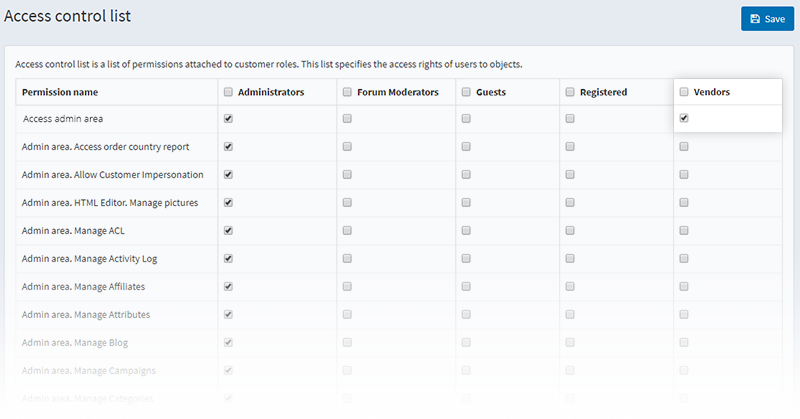
The different actions (aka permissions) are listed in column 1 - “Permission name.” The customer roles are listed from column 2 to column 6. Each customer role has a checkbox for each action (aka permission name). When that checkbox is marked, the customer role is granted permission to complete the action listed in the “Permission name” column.
For example, in the above screenshot, Administrators have access to the admin area of the store. They can also access order country reports and allow customer impersonation, as well as manage ACL, activity log, affiliates, attributes, blog, campaigns, categories, currencies, customers, etc. Forum Moderators, Guests, and Registered users cannot do any of these things, and Vendors can only access the admin area of the marketplace. - The products and orders of each vendor are tracked and managed separately in the administration panel.
- The vendors cannot interact with each other and do not see each other’s activity in the administration panel.
- The products from all vendors appear in a single storefront, i.e., in the marketplace.
- You can define the maximum number of products each vendor can upload to the marketplace.
- Online buyers can place orders that contain products from different vendors.
- A vendor receives an “Order placed” email when a shopper buys their product/s.
- If an order contains products from different vendors, each of the vendors receives a separate “Order placed” email.
- The marketplace has a common payment processing.
- The owner of the marketplace pays the vendor every month. The amount depends on the items the vendor has sold within the past month.
What developers need to know about the multi-vendor feature in nopCommerce.
Developers need to know that the Product and Customer entities have a new property: VendorId. This property needs to be taken into account when implementing product or customer searches, as well as various custom entity mappings.
Now that you know what multi-vendor support in nopCommerce is and what it means for merchants and developers let’s take a closer look at how to create a vendor account or a vendor.
How to create a vendor?
- Go to Customers → Vendors.

- Click on the “+Add New” button (top right corner). An “Add a new vendor” window will be displayed.
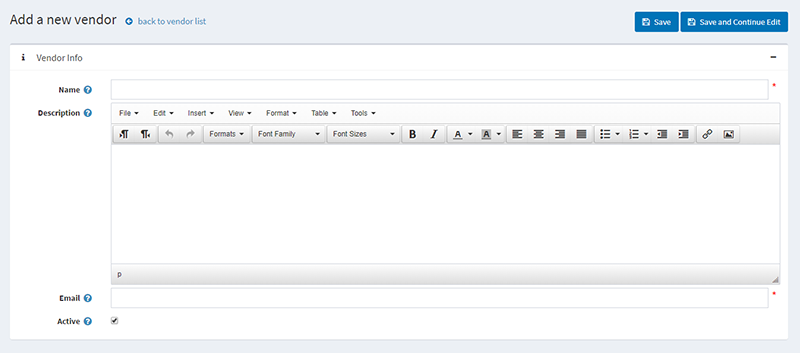
- Fill in the required vendor information - name, description, email where the vendor will receive the “Order placed” emails. Mark the “Active” checkbox and then click "Save."
Creating a vendor in nopCommerce is as simple as that. Once you’ve done this, you can map customers to it - as we already mentioned, vendors in nopCommerce are customers who have been assigned a vendor role. Remember that you can assign more than one customer to the same vendor, but you cannot map the same customer to multiple vendors.
How to map a customer account to a vendor?
- Go to "Customers" in the store administration.
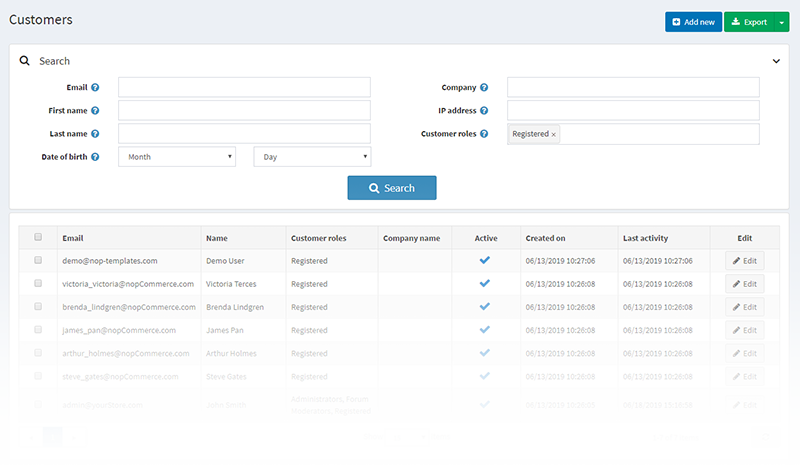
- Find the customer you want to map to a specific vendor. Click on the “Edit” button.
- A “Customer info” window will be displayed.
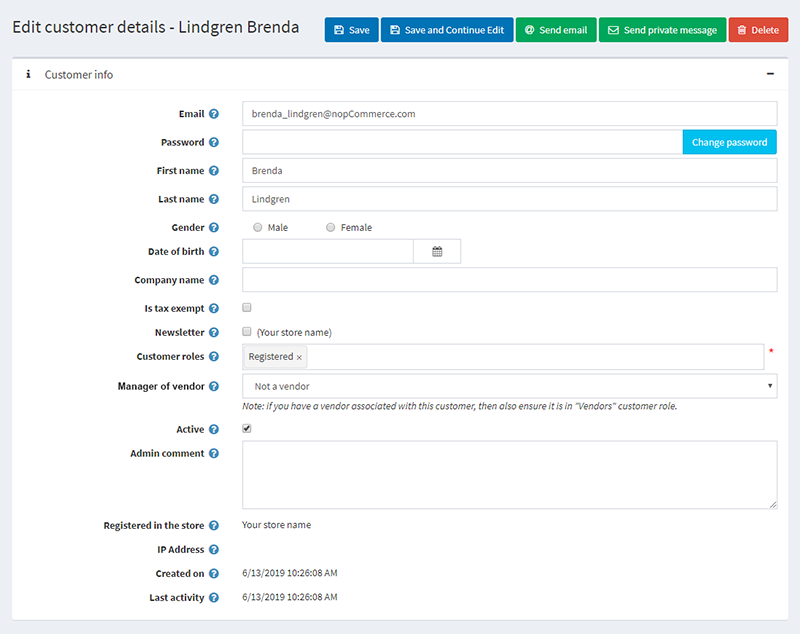
- Choose the vendor you want to map the customer to from the Manager of Vendor drop-down menu. Don't forget to create the vendor record beforehand.
- Add the Vendor customer role in the Customer Roles field. Remember that a customer cannot be assigned both a Vendor role and an Administrator role.
- Click on the “Save” button. Once you do this, the customer will be mapped to the vendor of your choice.
So far, in this article, we have learned what a vendor is, how to create a vendor in nopCommerce, and how to map a customer account to a specific vendor. Next, we will discuss the different types of vendor settings in nopCommerce and how to manage them.
How to manage vendor settings in nopCommerce?
To manage vendor settings in nopCommerce, go to Configuration → Settings → Vendor settings. There are three types of vendor settings: Common, Catalog, and Vendor attributes.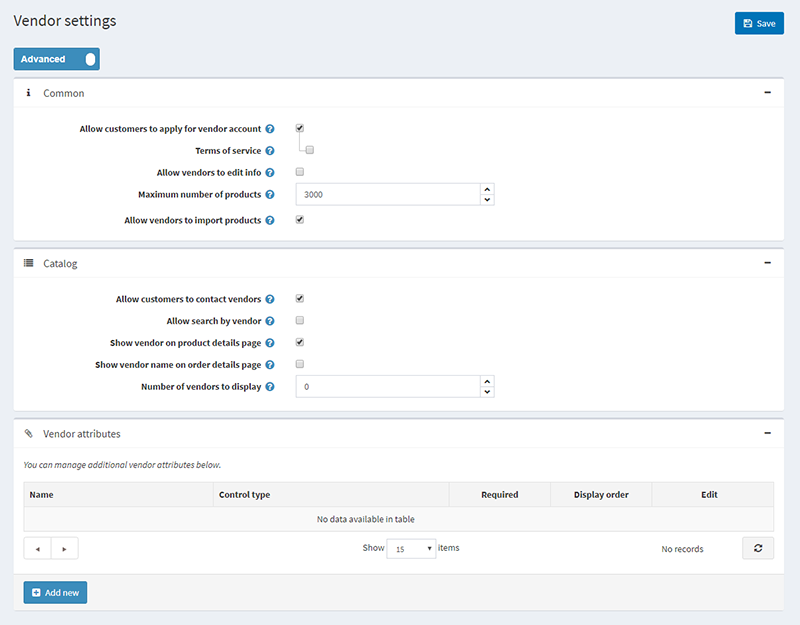
Common Settings
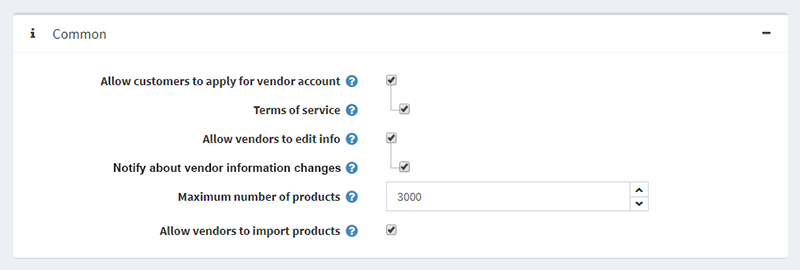
- Mark the “Allow customers to apply for a vendor account” checkbox to allow users to apply for a vendor account. Here’s how the vendor request form looks in the public store:
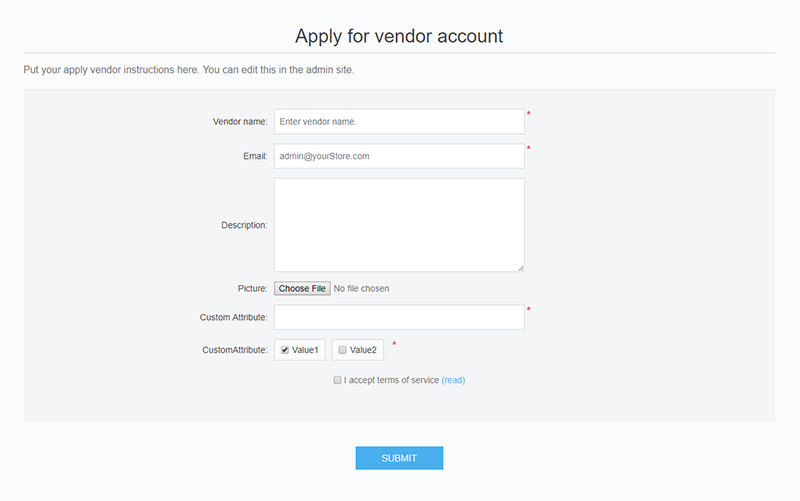
Note that this form contains an “I accept the terms of service (read)” checkbox. This checkbox appears when you mark the “Terms of Service” checkbox in the Common settings. By marking the “Terms of Service” checkbox, you demand that all users, who want to apply for vendors, read and accept the “Terms of Service” before submitting their vendor request forms. - Mark the “Allow vendors to edit info” checkbox to allow vendors to edit their vendor information. If you want to receive notifications when a vendor edits their vendor information, mark the “Notify about vendor information changes” checkbox.
- Define a “Maximum number of products” a vendor can upload to the online marketplace, i.e., a maximum number of products per vendor.
- Mark the “Allow vendors to import products” checkbox to allow vendors to upload products to the marketplace.
Catalog Settings
The Catalog settings are the settings of the vendors' catalog pages (the Vendor List pages) on the marketplace: https://name-of-your-store.com/vendor/all. See an example of a vendor list page: demos.nop-templates.com/vendor/all.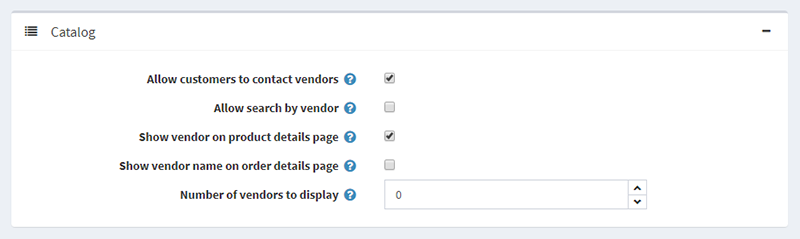
- Mark the “Allow customers to contact vendors” checkbox to allow online buyers to contact vendors using contact forms.
- Mark the “Allow search by vendor” checkbox to allow buyers to filter the products in the marketplace by vendors.
- Mark the “Show vendor on product details page” checkbox if you want to display a vendor on the product details pages.
- Mark the “Show vendor name on order details page” if you want to display a vendor name on the order details pages.
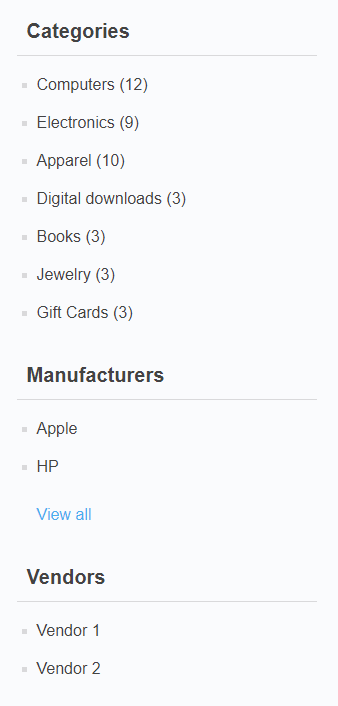
- Define the “Number of vendors to display” in the navigation menu on the vendors' catalog page. In the example below, the value of the “Number of vendors to display” setting is 2.
Vendor Attributes
NopCommerce merchants can create custom vendor attributes as easy as they can create product attributes. The Custom Vendor Attributes feature (added by request in nopCommerce 4.10 and also available in the latest 4.20 version) allows marketplace owners to collect and display more information about the vendors. Examples of custom vendor attributes are brand, official website, links to social media profiles, postal address, contact number, etc.
The vendor attributes appear in the public store (on the “Apply for Vendor” page, and on the Vendor details page), and in the administration panel (on the add/edit a vendor page).
In this section, we will talk about how you can add new (i.e., custom) vendor attributes.
How to add a custom vendor attribute?
Click on the “+ Add new” button (bottom left corner).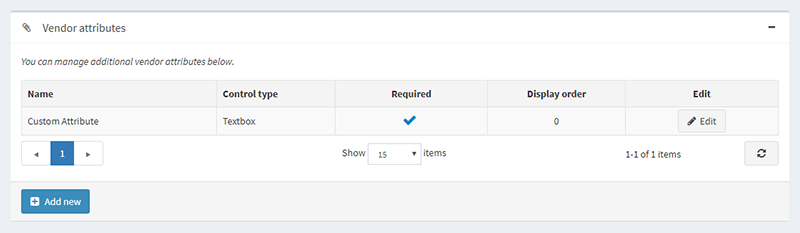
An “Edit vendor attribute details” window will be displayed. The “Edit vendor attribute details” window contains two panels: Attribute info and Attribute values.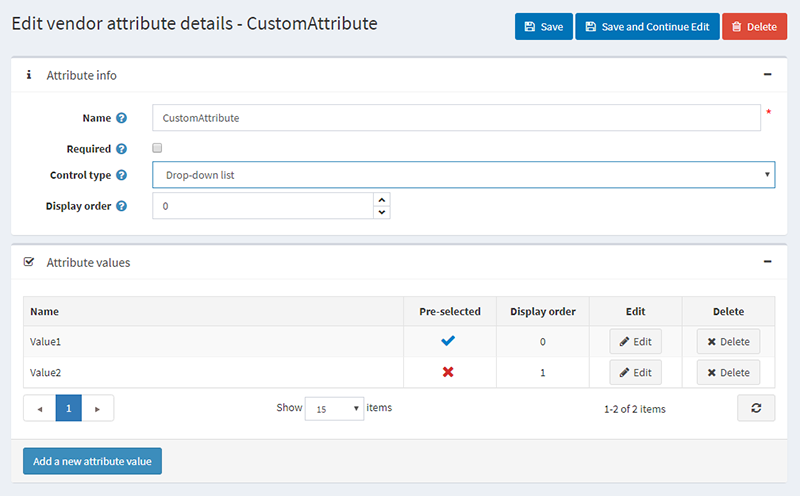
In the Attribute info panel, do the following:
- Give a name to the new vendor attribute.
- Mark the “Required” checkbox if you want the new attribute to be required for all vendors.
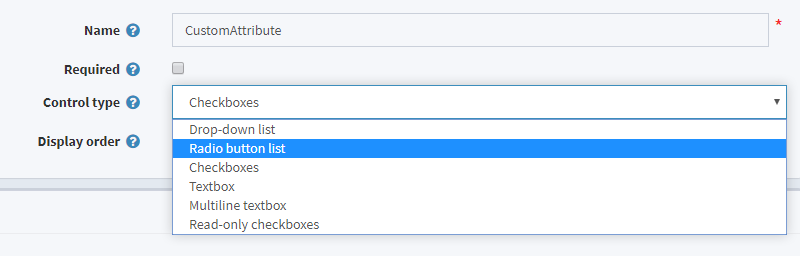
- Choose how to display the attribute value from the Control Type drop-down. The available options are a drop-down list, radio button list, checkboxes, textbox, multiline textbox, and read-only checkboxes.
- Define the display order of the vendor attribute (on the “Apply for Vendor” page in the public store, on the Vendor details page in the public store, in the admin panel, etc.).
- Click on the “Save and Continue Edit” button
In the Attribute values panel, click on the “Add new attribute value” button. An “Add new attribute value” window will be displayed. Give a name to the attribute value, choose the display order, and decide whether the attribute value to be pre-selected. 
Click on the “Save” button. The new attribute will appear on the “Vendor details” page (administration panel) and on the “Apply for vendor” page (public store), as well as on the add/edit vendor page in the administration panel.
With this, we conclude the section on Vendor settings. Now that you know how to manage them let’s take a closer look at how to edit vendor details.
How to edit vendor details?
- To edit vendor details, go to Customers → Vendors.
- Choose the vendor whose details you want to edit. Click on the “Edit” button.
- The Vendor details page will be displayed. The Vendor details page contains four panels: Vendor info, Display, SEO, and Vendor notes.
Vendor Information Panel
In the vendor information panel, you can edit the name of the vendor, the vendor description, the email address, the customers mapped to that vendor. You can upload a picture (optional) or leave a comment (for internal use only). 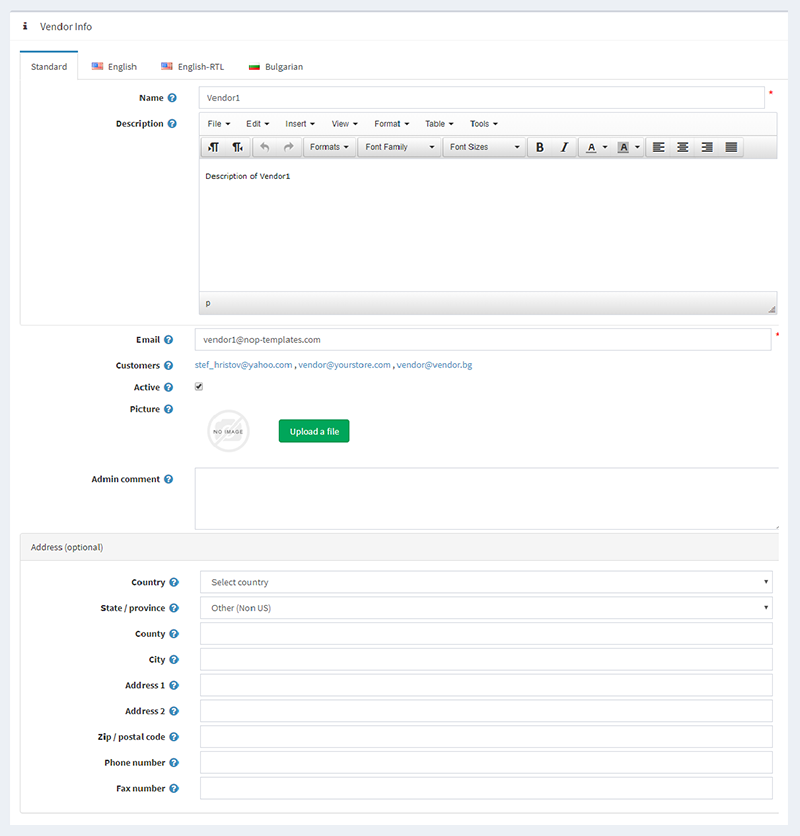
Display Panel
The Display panel controls the settings of the vendor catalog page, i.e., the page where the vendor’s products are displayed.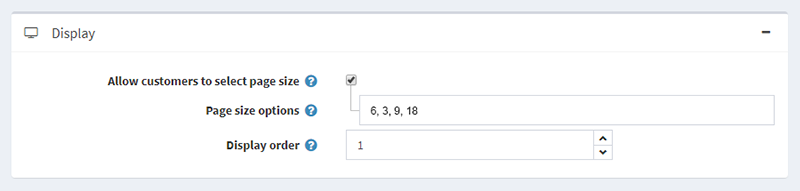
Mark the “Allow customers to select page size” checkbox if you want to allow customers to choose how many products per page they want to see. If you allow customers to select а page size, you have to define the page size options in the “Page size options” field. The numbers must be separated by commas (as shown in the above screenshot).
If you allow customers to select а page size, a “Display items per page” drop-down menu will appear in the public store. The options in this drop-down will be the page size options you have defined in the Display panel on the Vendor details page.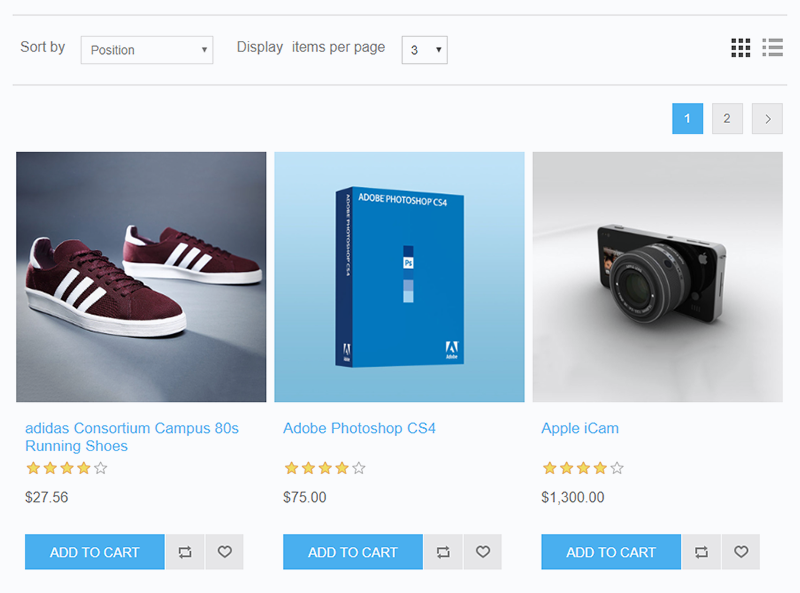
The last setting in the Display panel is Display order. This setting refers to the display order of the vendors on the Vendor List page.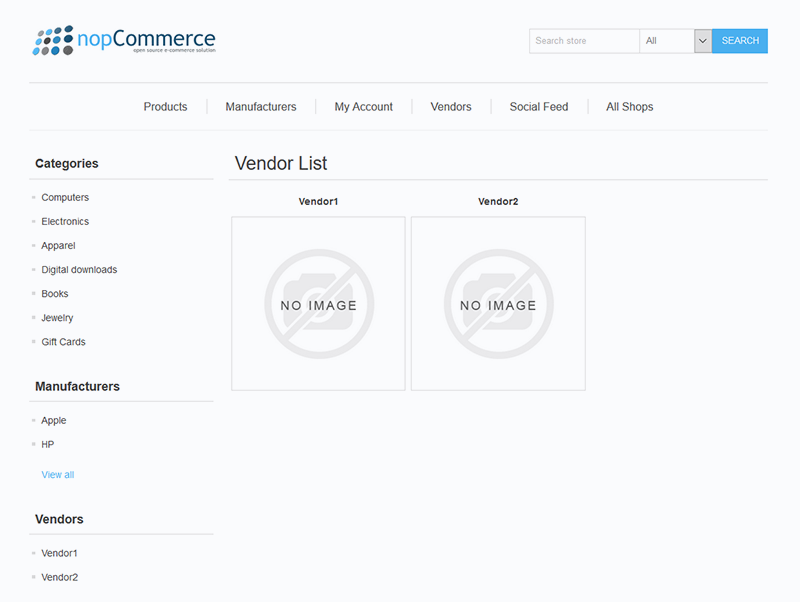
For example, in the above screenshot the value of the Display order of “Vendor1” is “1”, and the value of the Display order of “Vendor2” is “2”.
SEO Panel
In the SEO panel, you can write the SEO parameters for each vendor, such as the search engine friendly page name, meta description, meta keywords, meta title. 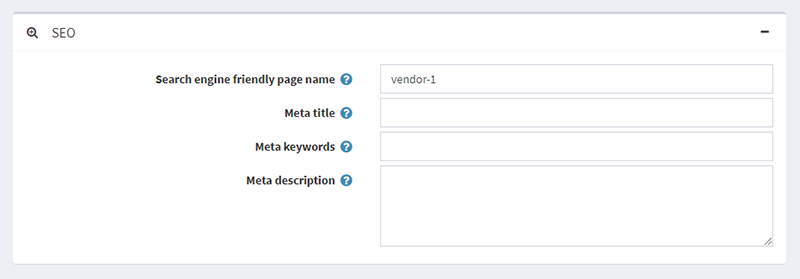
Vendor Notes
In this section, you can provide additional information about the vendor or add comments made by the vendor. You can add notes by pasting the vendor’s comment in the Note field and clicking on the “Add vendor note” button. Keep in mind that this step is optional and the information is for internal use only.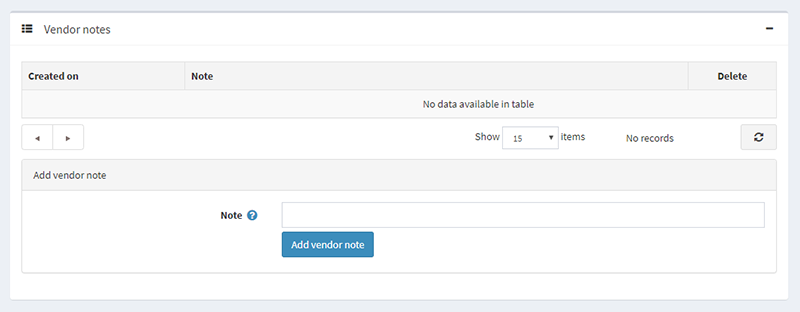
Wrap-up
That's pretty much everything you need to know about the multi-vendor feature in nopCommerce. To sum up, let’s walk through the most important things to remember:
- You can create as many vendor accounts as you want.
- You can map more than one customer to a vendor account, but you cannot assign the same customer to more than one vendor account.
- You have to create the vendor account before you map customers to it.
- A customer cannot be assigned both a vendor role and an administrator role. Therefore, vendors cannot be administrators of the marketplace. You (aka the marketplace owner) are the administrator of the marketplace. Still, you can give vendors restricted access to the administration panel of the marketplace. Vendors cannot interact with each other and cannot see each other’s activity.
- All vendors add their products to the same storefront. You can set a maximum number of products a vendor can add to the marketplace.
- Customers can place orders that contain products supplied by different vendors.
- Each vendor receives an “Order placed” email when a customer orders a product they supplied.
- The vendors ship the products on your behalf.
- You pay the vendors monthly. The amount you pay each vendor depends on the items the vendor has sold within the past month.
Ultimately, the multi-vendor feature in nopCommerce allows you to create a marketplace and sell online without having to worry about stock levels, inventory, and logistics. Instead, you work with a network of drop shipping partners who take care of all this for you.
We hope you find the information in this guide helpful! If you have further questions or need any technical assistance, leave us a comment in the comments section below!


It is very informative regarding multi vendor setup. But where is the commission option and setup. there must be a option for commission from vendor to market place owner in either fixed amount of sales price or Percentage per transaction. Without this what is the benefit for the market place owner and how we can say its complete M/V system?
thank you
NopCommerce does not offer vendor commissions out-of-the-box (this is why it is not included in the article). There are plugins that offer this functionality. You can check the nopCommerce marketplace for more information: https://www.nopcommerce.com/marketplace.aspx?searchterm=&category=24
Best Regards
1- the ability to sort/display products by categories under the vendor page, right now everything is displayed together
2- show main vendor image on top of their page.
3- the abilities to search for vendors directly from main search (not advanced)
4- ability to do an in vendor page search, for products only listed by that vendor.
5- vendor rating, displayed on vendor/all (overall) and in vendor page (detaild rating)
5- possibly operating hours for local shopping, and ability to search for (open now) vendor.
6- tje ability to make vendor/all the default/home page
If someone can do such changes for me please PM me to discuss cost.
Cheers.