How to run a sales campaign using the Nop Sales Campaigns Plugin for nopCommerce

Do you want to run sales the same way any brick and mortar store does! Do you wish your customers to instantly know when there’s a sale on?
We would like to present to you our latest Nop Sales Campaigns plugin with which you can run sales with minimum work required, without spending hours updating product prices.
Now you can create your own campaign for the products you like, for the period of time you wish to, with just a few clicks from the admin panel.
With the Nop Sales Campaigns plugin you can:
- Run a sale based on a category, product type, manufacturer, or even create your own product segments based on condition
- Explicitly include or exclude products from the segment you have created
- Run a sale for the period of time you like – hours, days, weeks, etc.
- Run a sale based on a time pattern – every Monday, every day at 12PM, etc.
- Automatically adjust the price of the products, showing old/new price
- Have a live sale countdown clock added to the products
- Run no coupon required campaigns
To see the plugin in action, let’s create a sale campaign of our own.
Let’s say that I run an online store selling electronic devices. Recently I have noticed that the ACER products that I offer are not selling very well and that I have a great quantity on stock. In order to try to move these items faster I would like to discount them and to run a campaign for 3 day. Let’s get started.
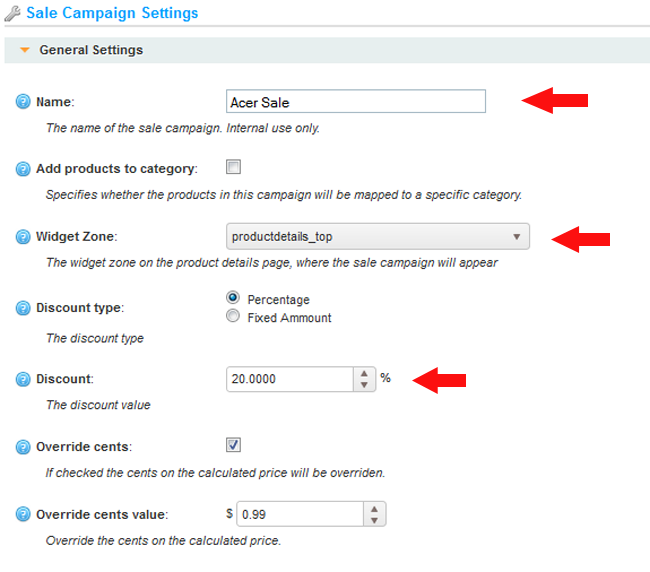
First let’s set the general settings for our campaign. We will give it a name, set the discount we would like to offer and select the widget zone on the product details page where we would like the countdown clock to be displayed as shown below.
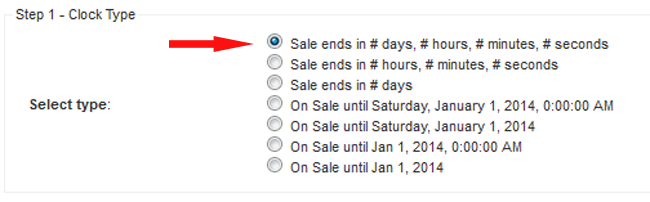
Next let’s customize the countdown timer. I want my sale to last for three days only, but I also want to show minutes and seconds for a more dramatic effect. So, in step 1 in the admin panel I will choose the first option as shown here.
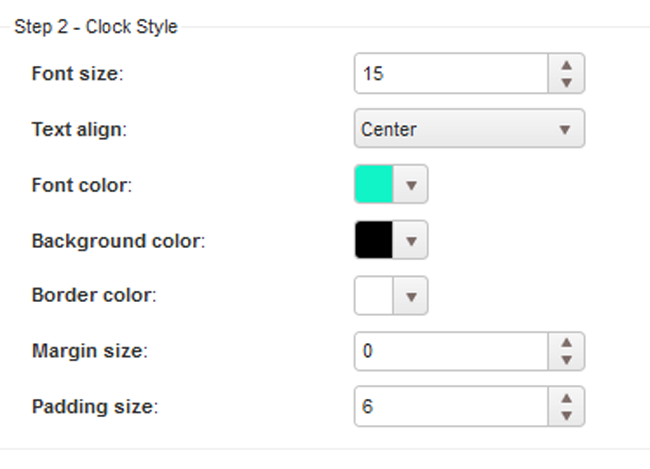
Then in step two I will customize the style of the clock – I will set the font size, choose the color, align the text and change the padding size.
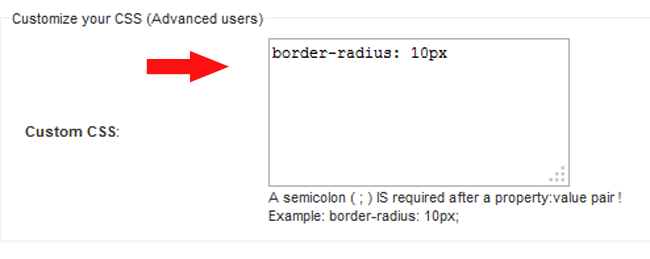
We can further customize the countdown timer via CSS. In this case I will only change the border radius as shown here.
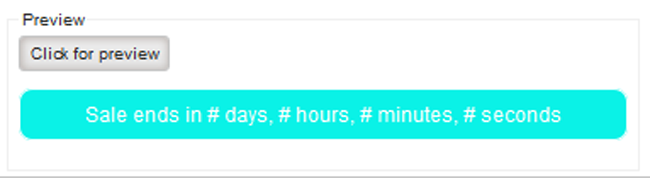
When I click preview we will see how our timer will look like. If we are not happy with the results we can go back and change the settings. In our case I will go back and change the background color.
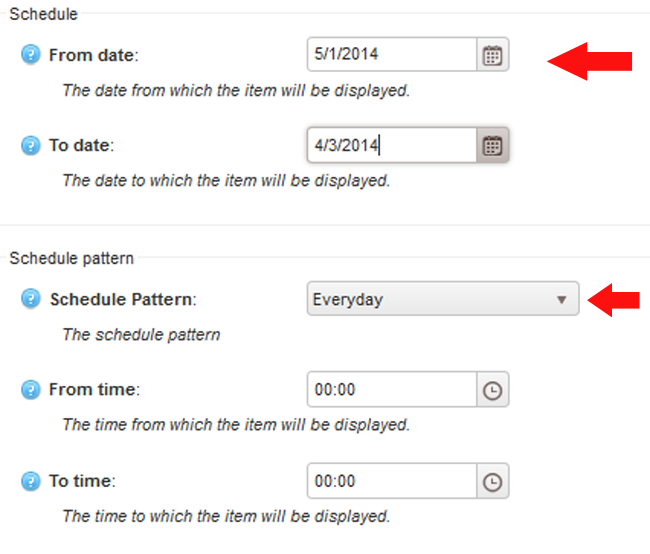
Once we have customized the countdown timer, we have to set the scheduling for our campaign – we will set the time span and the scheduling pattern.
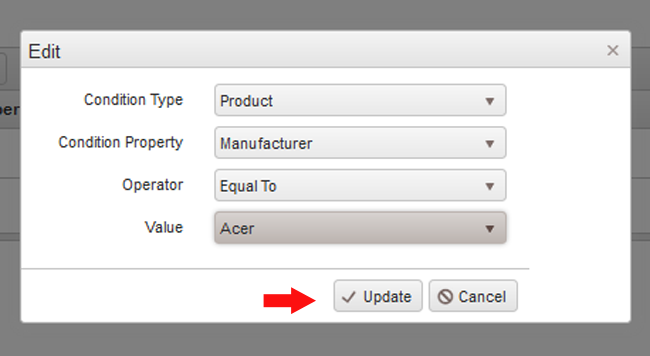
With this done let’s move forward and set the conditions for our campaign. As said before we want the campaign to apply to only products with manufacturer ACER. Once we set the condition, we click update.
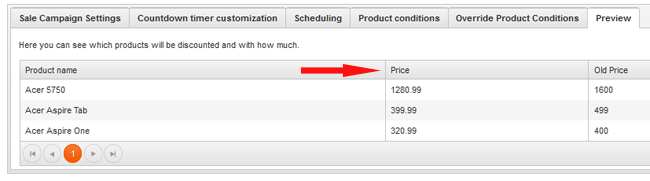
If we click on the preview mode we will see all the products with manufacturer ACER which will be included in our campaign. The price of the products has been discounted automatically with both prices old/new being displayed for our convenience.
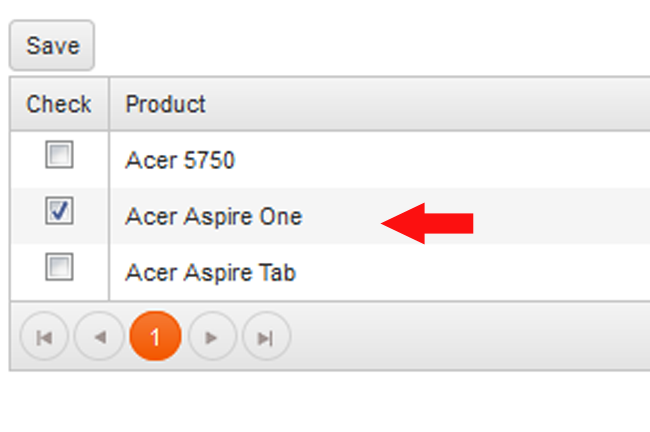
Now I am ready to run our first campaign. But just before doing it my stock manager updates me that the ACER Aspire One laptop has been a bestseller for the past week, so I decide to exclude this product from our campaign.
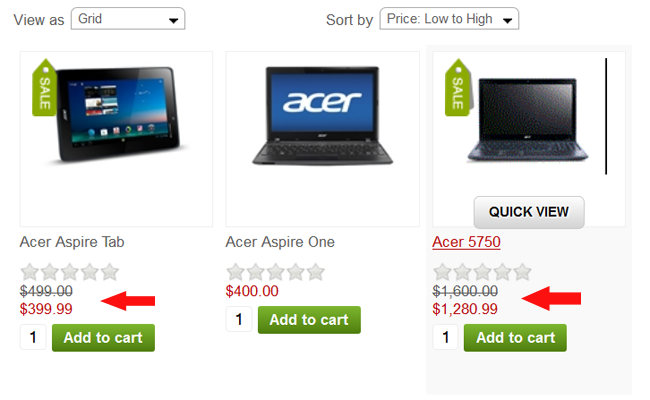
With this done and the campaign started, we can go to the public store and see the results. All ACER products have been discounted except for the one we have excluded from the campaign. The price of the discounted products has been automatically updated.
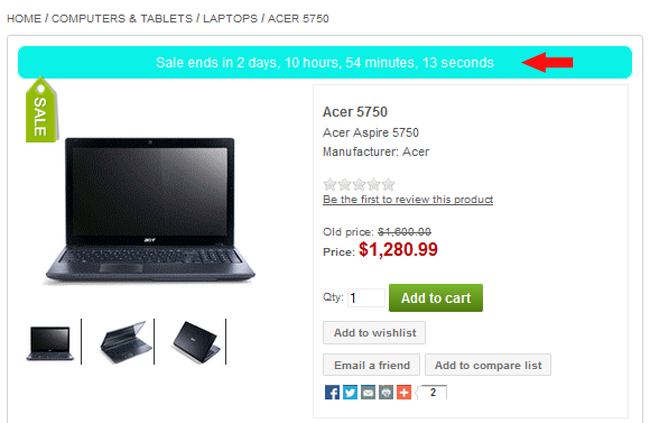
If we go to the product page of any of the discounted product we will see the countdown timer we have previously created displayed.
In no time and with minimum effort we have created our first sale campaign.
Using the Nop Sales Campaigns plugin you can create unlimited number of campaigns for unlimited number of products and schedule them in advance so that your campaigns run seamlessly on their own according to your sales plan.
If you wish to give this great plugin a try, simply go to its administration.
In our next case study dedicated to the Nop Sales Campaigns plugin, we will show you how this plugin integrates with the Nop Ajax Filters, the Nop Mega Menu and works seamlessly with the Nop Product Ribbons.