Integration
Once the Nop Mega Menu plugin is installed you need to integrate it in your web site. The Nop Mega Menu integration is very easy using widgets.
1. Widget Integration
The Nop Mega Menu plugin has widget support meaning that the plugin can be displayed and integrated in a certain widget zone. This can be achieved by completing the following steps:
a) Go to Content Management -> Widgets
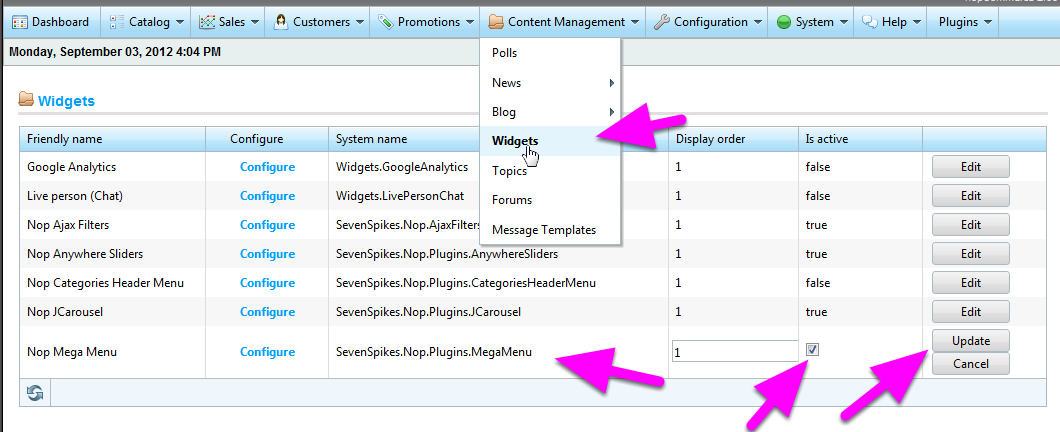
1. Go to Content Management -> Widgets
2. Click the Edit button for the Nop Mega Menu plugin.
3. Check the Is active checkbox.
4. Click the Update button.
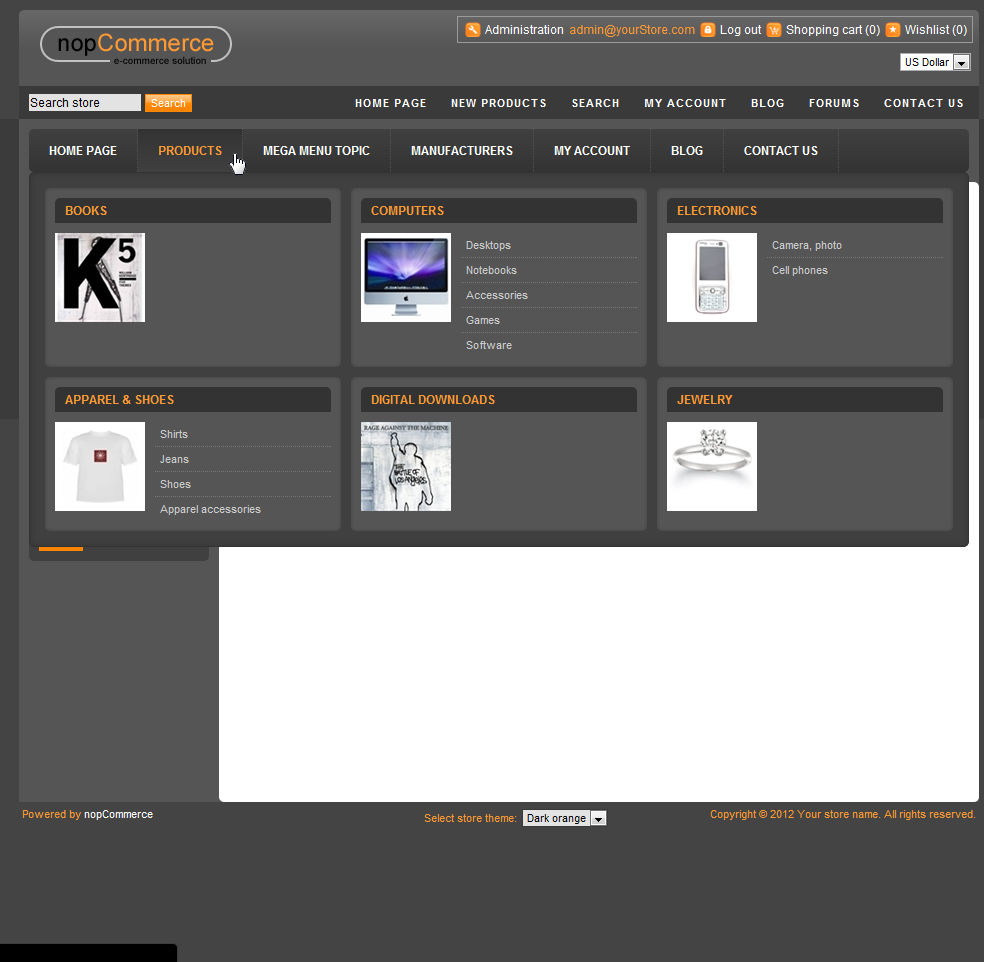
By completing this steps you have successfully activated the widget zone for the Nop Mega Menu plugin. The plugin should be working correctly with its default settings.
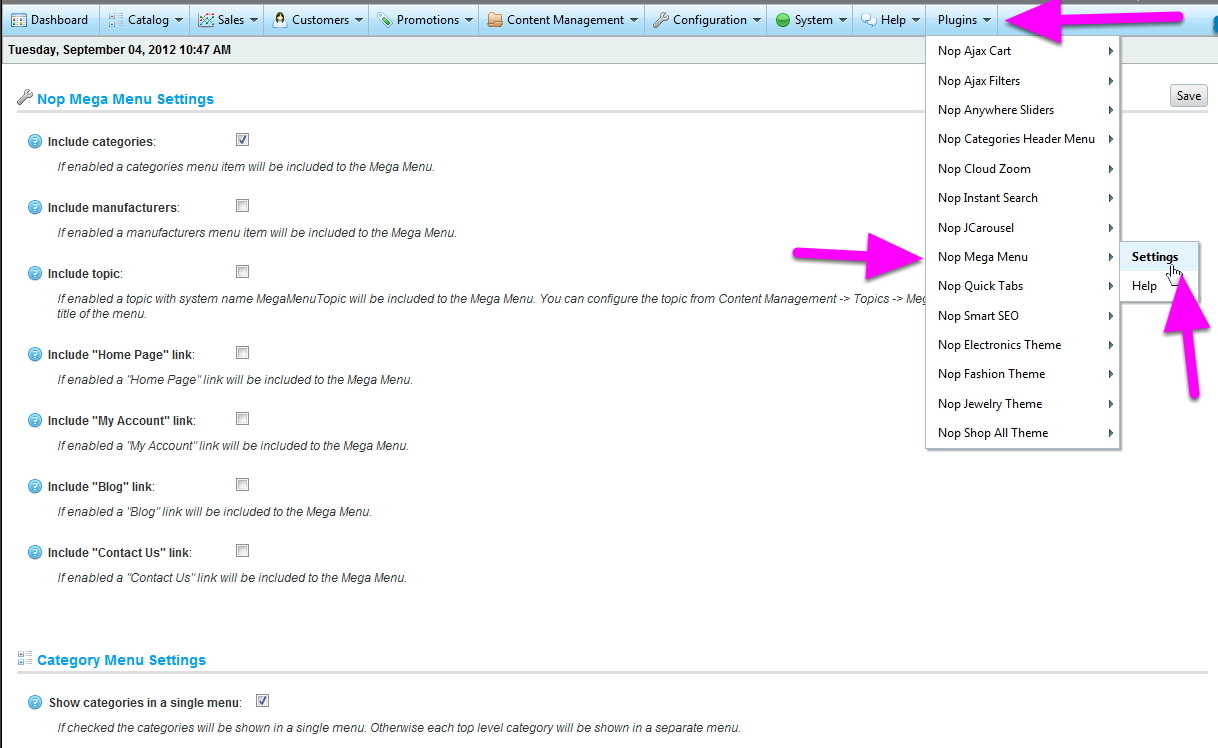
b) Go to "Plugins -> Nop MegaMenu-> Settings" to change the default settings
This is the page where you can configure the settings for the Nop Mega Menu plugin.
Settings sections
The Nop Mega Menu plugin settings are divided into three main sections.
1. General Mega Menu Setiings - allow you to configure what menu items to be included in the mega menu
2. Category Menu Settings - shown if the "Include categories" checkbox is checked. Allow you to configure the menu with the categories.
3. Manufacturer Menu Settings - shown after the "Include manufacturers" checkbox is checked. Allow you to configure the menu with the manufacturers.
General Plugin Settings section - here you can specify which items to be included in the Mega menu
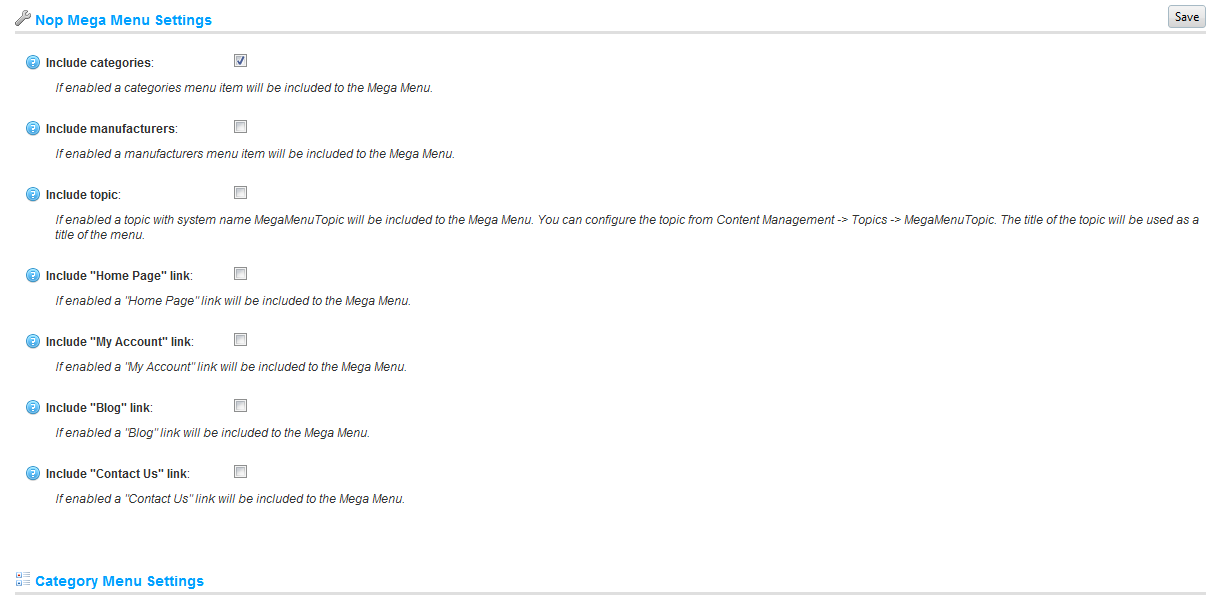
In the General Menu Settings section you can configure settings that are essential for the Nop Mega Menu plugin and are used in the MegaMenu.cshtml view.
When checked, the Include categories and/or Include manufacturers settings, toggle the Category Menu Settings and/or Manufacturer Menu Settings sections.
When checked, the Include topic setting includes a predefined topic to the Nop Mega Menu. The topic name is used for the menu name and you can configure the topic name and content from Content Management -> Topics -> MegaMenuTopic
When you check any of the Include "Home Page" link, Include "My Account" link, Include "Blog" link, Include "Contact Us" link settings a coresponding menu item is added to the Mega Menu.
NOTE: You can change the order of the menus from MegaMenu.cshtml veiw.
Category Menu Settings section
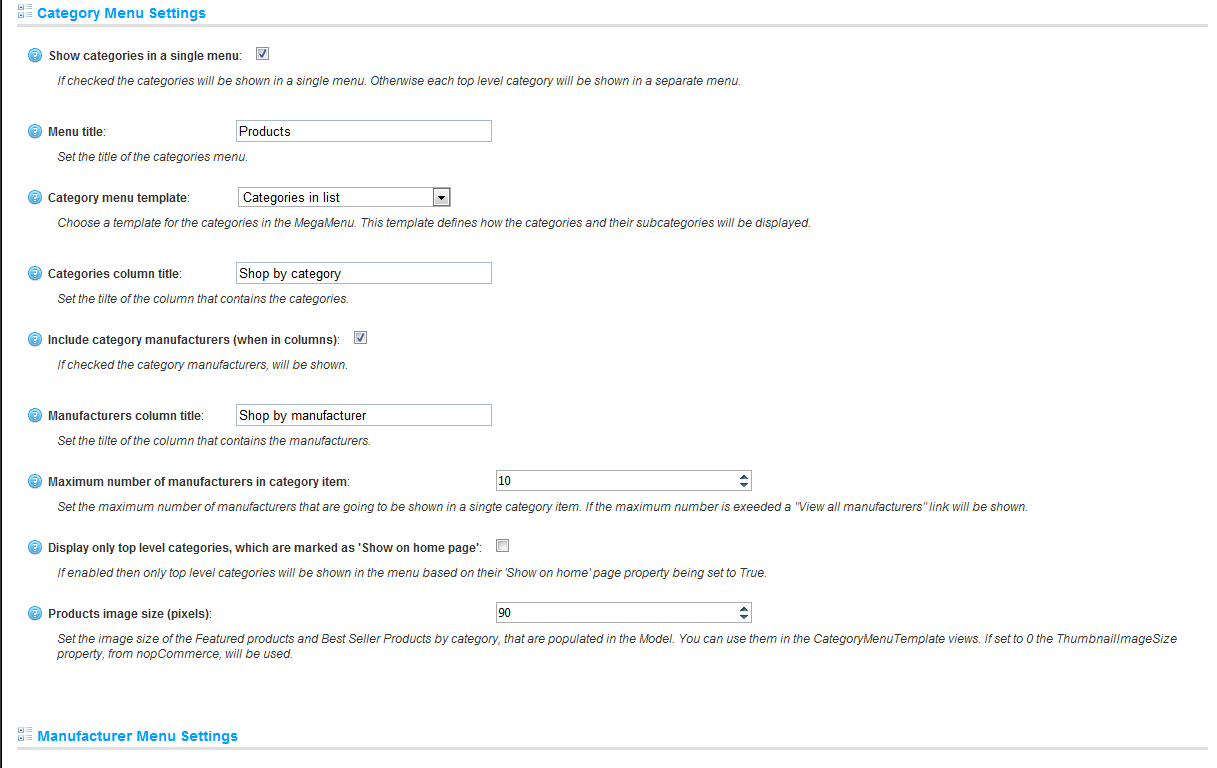
In the Category Menu Settings section you can configure settings that are used by the categories menu.
NOTE: (Advanced users only) You can configure the way the categories are displayed, add products to the categories, ets., by editing the CategoryMenuTemplate.xxx views.
Manufacturer Menu Settings section
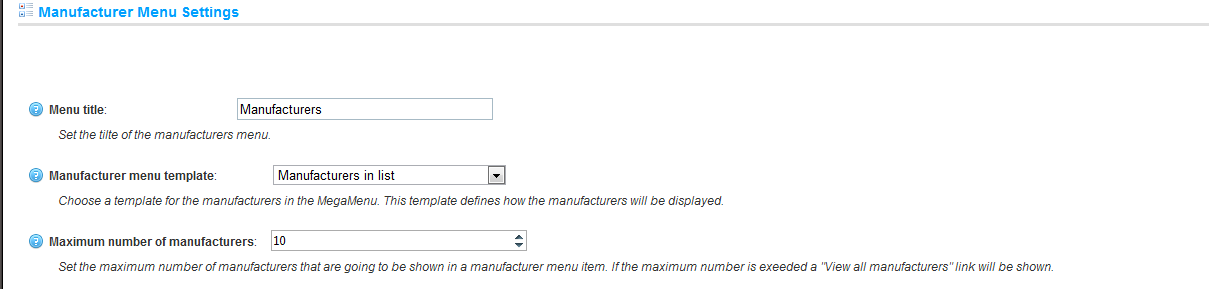
In the Manufacturer Menu Settings section you can configure settings that are used by the manufacturer menu.
NOTE: (Advanced users only) You can configure the way the manufacturers are displayed, by editing the ManufacturerMenuTemplate views.
Add aditional topics
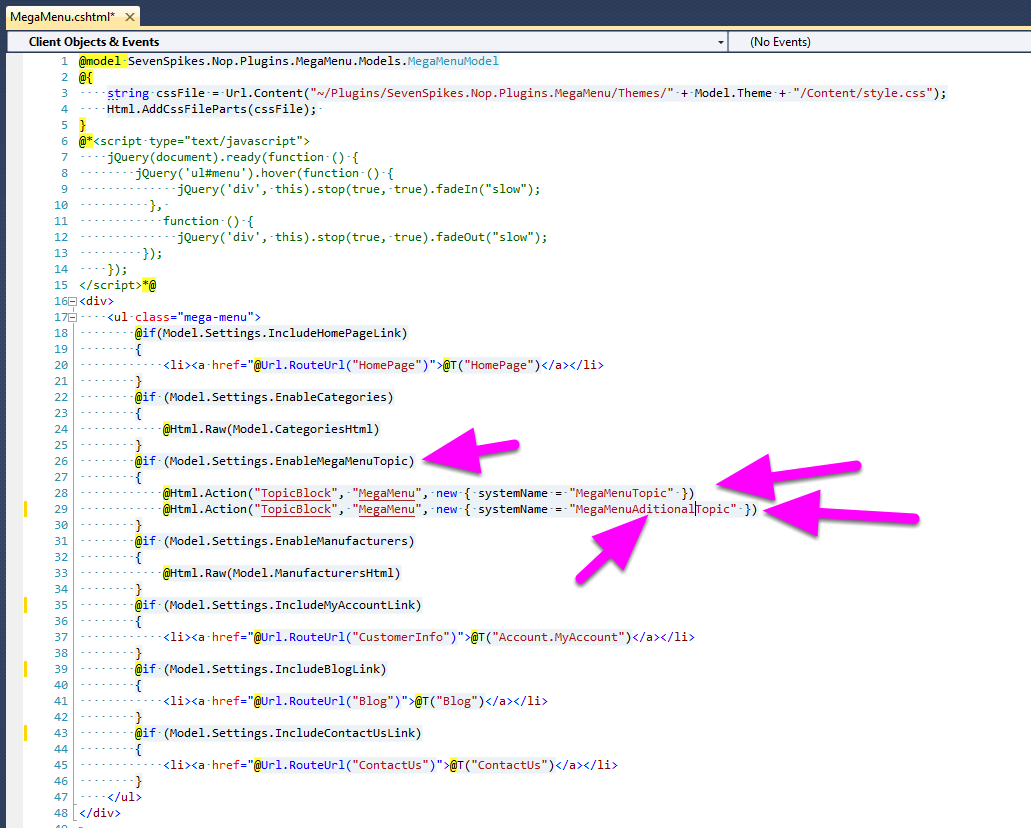
To add additional topics to the Nop Mega Menu you need to edit the MegaMenu.cshtml view.
Copy the following row:
@Html.Action("TopicBlock", "MegaMenu", new { systemName = "MegaMenuTopic" })
paste it in the view where you want to see the topic and change the systemName to the system name of the topic that you want to be displayed. Note that the title of the topic will be used as a title of the menu item.