Installation
Before you can use the Nop Jewelry Theme you need to do some installation of the necessary plugins in nopCommerce.
1. Copy all folders from the Plugins folder of the downloaded theme into the Plugins folder of your nopCommerce installation\web site.
2. Copy the Jewelry folder from the Themes folder of the downloaded theme into the Themes folder of your nopCommerce installation\web site.
3. Go to the Admin panel of your NopCommerce web site and select Configuration -> Plugins:
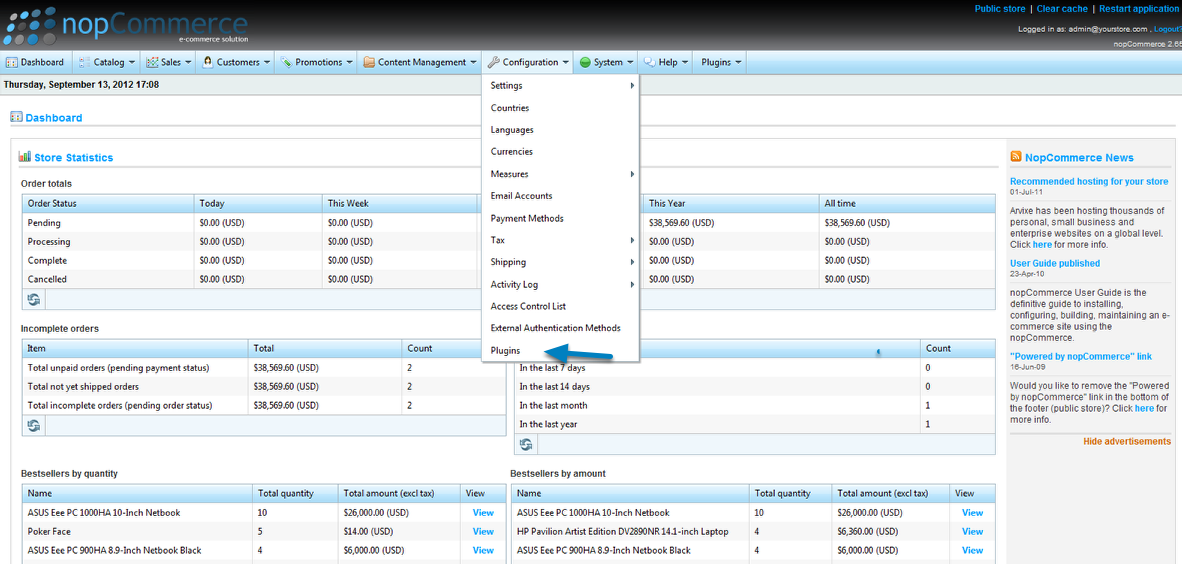
4. Click on the button to the right that says "Reload list of plugins".
5. Install all plugins starting with the Seven Spikes Core plugin, then all others and finally the Nop Jewelry Theme one.
6. You now need to set the Jewelry theme as active. For that purpose go to Configuration -> Settings -> General And Miscellaneous Settings
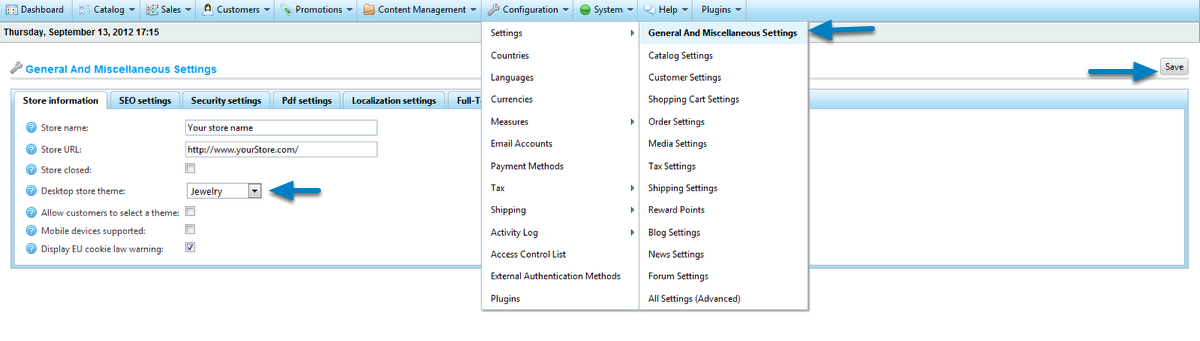
7. From the "Desktop store theme:" dropdown choose "Jewelry" and after that click the button "Save" on the right top corner.
8. Now the "Jewelry" theme is integrated into your nopCommerce web site. As you know the theme comes with all of our plugins already integrated. For best display there are some small configuration that you need to perform.
9. As you can see on the demo there is a slider integrated on the home page. In order to add it you need to go to Administration -> Plugins -> Nop Anywhere Sliders -> Manage Sliders and create a new slider with the following basic setting as shown on the screenshot below.
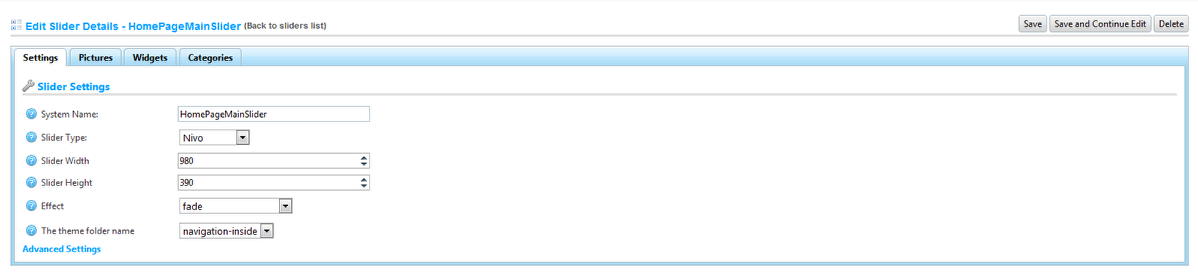
The width of the slider should be 980 as this is the width of the website as a whole. The height should be the same as the height of the image you will show as part of the slider. After you populate the settings click the Save and Continue Edit button to continue configuring the slider. Now you should add pictures to the slider. This can be done on the Pictures tab. When you have chosen and uploaded the pictures you would like to show on the home page just map the slider to the home_page_slider_top widget zone from the Widgets tab. For more info on how to work with the Nop Anywhere Sliders plugin you can read its online documentation.
10. The next plugin that needs to be configured is the Nop Ajax Filters plugin. During installation it has been activated. You just need to map it to the corresponding widget zone in order to have the filters appear on category page.
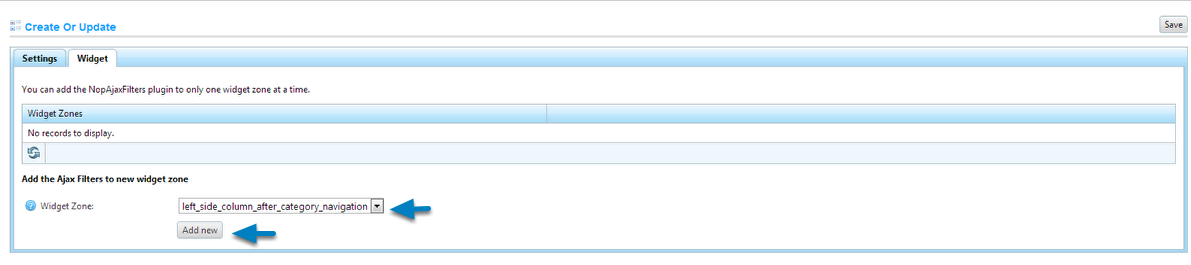
In order to show the filters on the category page just go to Administration -> Plugins -> Nop Ajax Filters -> Settings and click on the Widgets tab. Then choose the left_side_column_after_category_navigation widget zone and click the Add new a button.
As the filters have widget support you can choose to place them on another place. This can be done by just changing the widget zone by choosing some other from the list.
11. If you want to integrate client carousels in your website, you can use the Nop JCarousel plugin. There are 12 predefined data source types that can be used in 15 predefined widget zones specific to the Nop Jewelry Theme.
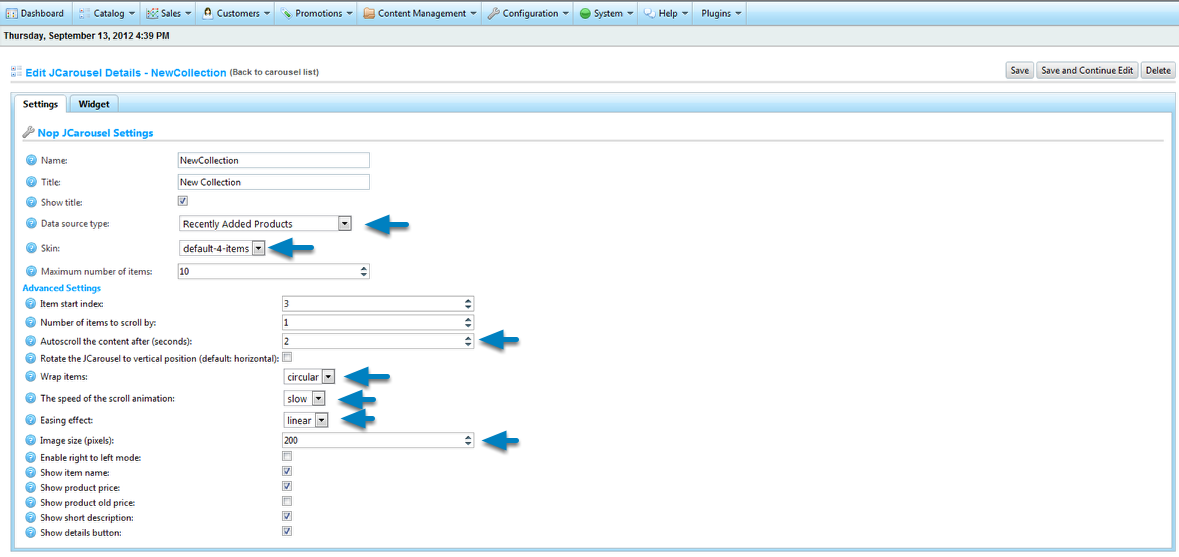
You can do this via the administration part of the plugin. You can open it by going to Administration -> Plugins -> Nop JCarousel -> Manage JCarousels. Create a new carousel and populate the settings as you wish. You can see the settings on our demo on the screenshot above. The most important settings are marked on the image. After you you have set the setting click on the Save and Continue Edit button to continue configuring the carousel.
In order to show the carousel on the home page just below the featured products you need to map the carousel to the jcarousel_home_page_after_featured_products widget zone. For more detailed information for this plugin you can check its online documentation. You can also create as manu carousels as you wish and add them to any widget zone you want by choosing it from the Widgets tab.
12. One of the most important plugin that needs to be configured is the Nop Mega Menu. There are a lot of setting that can change the overall look and feel of your site.
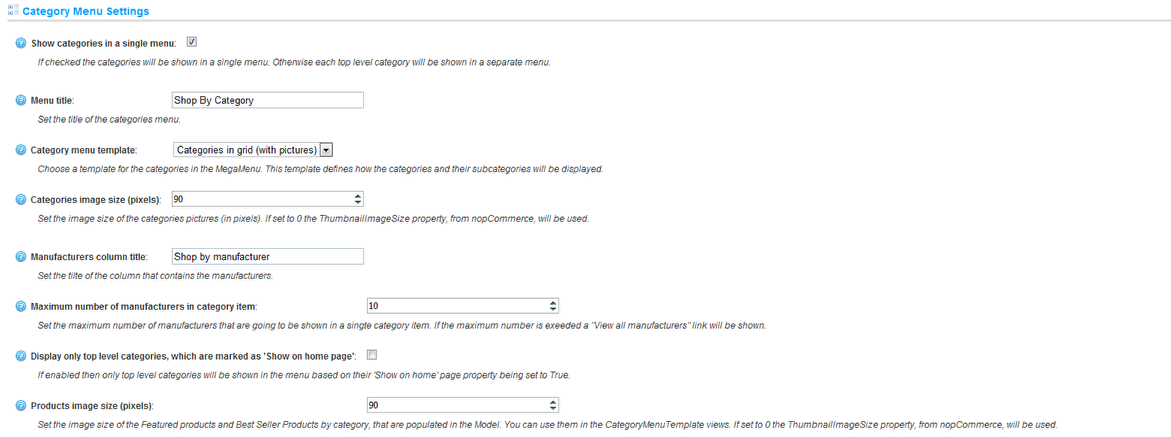
On the above image you can see the settings of the menu as it is on our demo site. From the first part of the administration all options are checked. You can always change the menu to suit your needs. For more information on all settings and options please visit the Nop Mega Menu online documentation.
13. The Nop Jewelry Theme comes with all our plugins integrated. Some of them are integrated via the widget support, while the others are integrated as part of the theme.

If you want to remove some of the plugins in the theme you can either disable them as a widget for those that have widget support by going to Administration -> Content Management -> Widgets or use the menu that comes from the theme for all other plugins. You can open it by going to Administration -> Plugins -> Nop Jewelry Theme -> Settings and click on the Plugins Integration tab. There you can check or uncheck plugins integration after that you will have to click the Save button on the top right corner.
14. Now the theme has been successfully installed and configured. Here you can find several tips and tricks for making it look better.
- Have 3 products marked as "Show on home page".
- Have 4 categories if you wish marked as "Show on home page"
- Have some news so that they are displayed on the home page.
- Edit the Home Page Text topic to suit your needs.
- Have a carousel showing 4 products that are auto rotated on the home page.
- Make sure that the "Product thumbnail image size (catalog)", "Category thumbnail image size" media settings are set to 200.
- Make sure the "Product thumbnail image size (product page)" media setting is set to 78 if the Nop Cloud Zoom is integrated. Otherwise it can be set to 90 for better display.
- Have a high quality square product images so that the zoom on the product page works better.
- Have a play with all the plugins and read their documentation to see how you can use them properly and make the best of them.