Installation
Before you can use the Nop Electronics theme you need to do some installation of the necessary plugins in nopCommerce.
1. Copy the SevenSpikes.Core, SevenSpikes.Nop.AjaxFilters, SevenSpikes.Nop.Plugins.AnywhereSliders, SevenSpikes.Nop.Plugins.AjaxCart, SevenSpikes.Nop.SmartSEO, SevenSpikes.Nop.Plugins.InstantSearch, SevenSpikes.Nop.Plugins.NopQuickTabs, SevenSpikes.Nop.Plugins.CategoriesHeaderMenu, SevenSpikes.Nop.Plugins.CloudZoom and SevenSpikes.Theme.Electronics folders from the Plugins folder of the downloaded theme into the Plugins folder of your nopCommerce installation\web site.
2. Copy the Electronics folder from the Themes folder of the downloaded theme into the Themes folder of your nopCommerce installation\web site.
3. Go to the Admin panel of your nopCommerce web site and select Configuration -> Plugins:
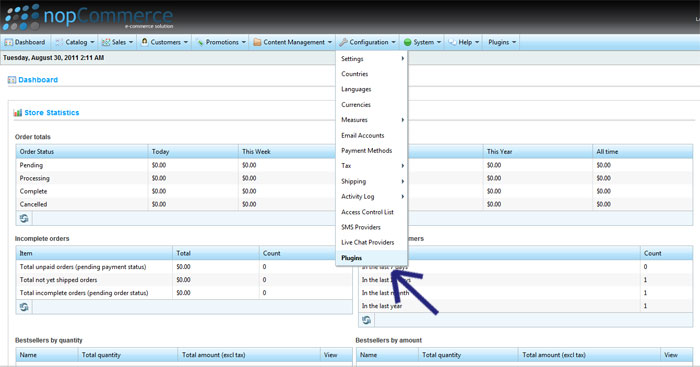
4. Click on the button to the right that says "Reload list of plugins".
5. Scroll through the list of plugins to find the Seven Spikes Core plugin and click on the Install button to install it.
6. Scroll through the list of plugins to find the Nop Ajax Filters plugin and click on the Install button to install it.
7. Scroll through the list of plugins to find the Nop Anywhere Sliders plugin and click on the Install button to install it.
8. Scroll through the list of plugins to find the Nop Ajax Cart plugin and click on the Install button to install it.
9. Scroll through the list of plugins to find the Nop Smart SEO plugin and click on the Install button to install it.
10. Scroll through the list of plugins to find the Nop Instant Search plugin and click on the Install button to install it.
11. Scroll through the list of plugins to find the Nop Quick Tabs plugin and click on the Install button to install it.
12. Scroll through the list of plugins to find the Nop Categories Header Menu plugin and click on the Install button to install it.
12. Scroll through the list of plugins to find the Nop Cloud Zoom Menu plugin and click on the Install button to install it.
13. Scroll through the list of plugins to find the Nop Electronics Theme plugin and click on the Install button to install it.
14. You now need to set the Electronics theme as active. For that purpose go to Configuration -> Settings -> General And Miscellaneous Settings
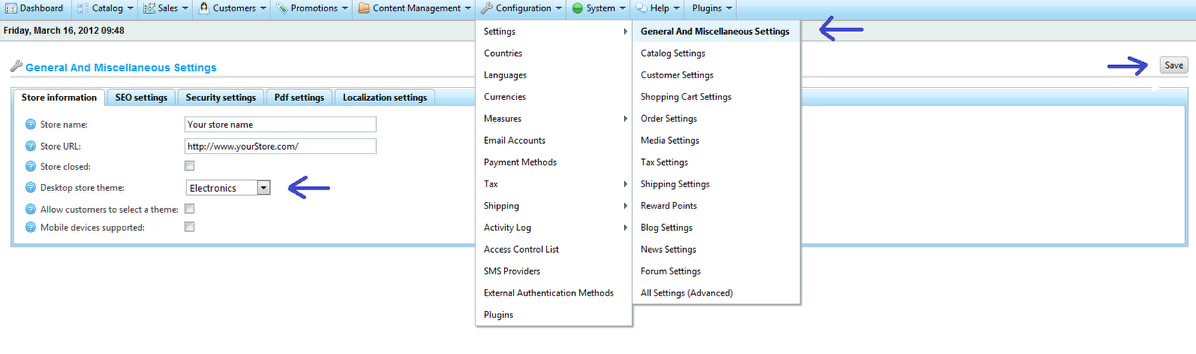
15. From the "Desktop store theme:" dropdown choose "Electronics" and after that click the button "Save" on the right top corner.
16. Now the "Electronics" theme is integrated into your nopCommerce web site.
17. There are three sliders already integrated on the Home page - ohe of them is the main slider. In order to create the big main slider just below the menu you need to go to Plugins -> Nop Anywhere Sliders -> Manage Sliders and create a slider with the exact System Name: HomePageSlider.
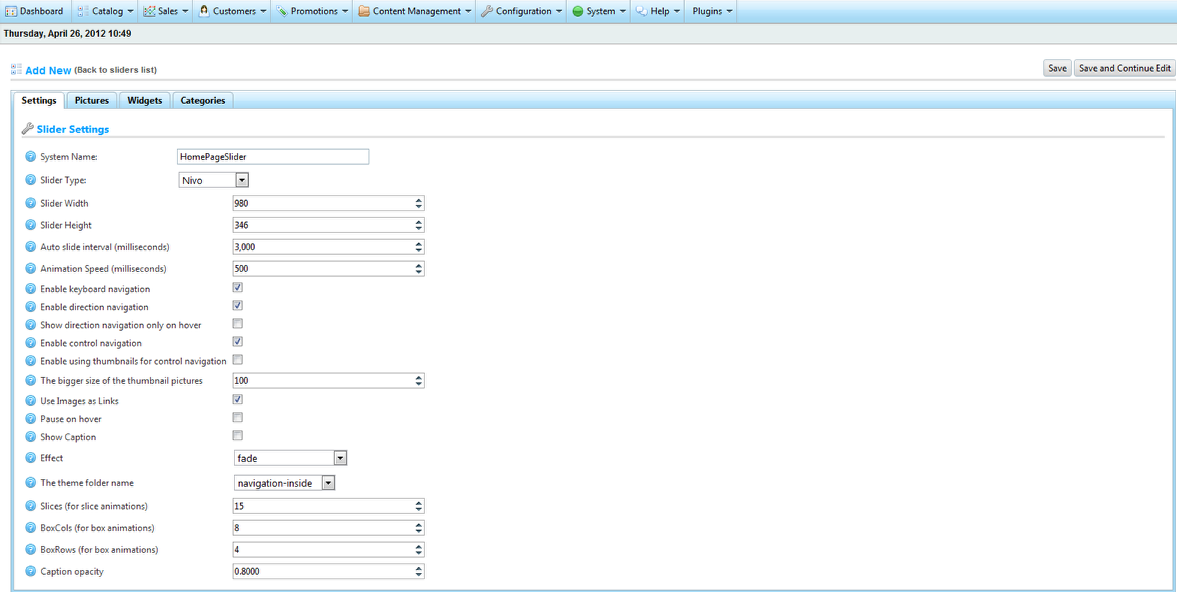
Please use the settings as shown above for better display. Once you set the settings click the Save and Continue Edit button and after that click on the Pictures tab in order to add pictures for the slider. It is always recommended that the size of the pictures matches the width and height from the settings. For more information on Working with Nop Anywhere Sliders please refer to the documentation for the plugin.
18. There also two more sliders that are integrated in the theme and need to be created. The LeftSideBanner and the RightSideBanner. In order to create them go to Plugins -> Nop Anywhere Sliders -> Manage Sliders. Create a new slider with the exact System Name: LeftSideBanner
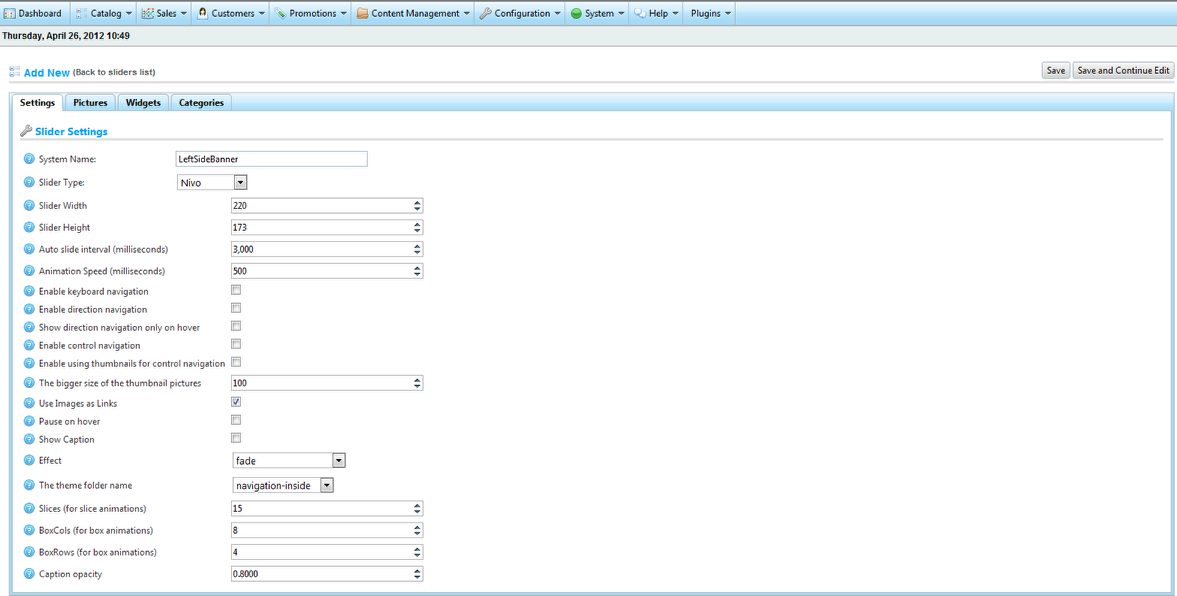
Please use the settings as shown above for better display. Once you set the settings click the Save and Continue Edit button and after that click on the Pictures tab in order to add pictures for the slider. It is always recommended that the size of the pictures matches the width and height from the settings. For more information on Working with Nop Anywhere Sliders please refer to the documentation for the plugin.
19. To add the last slider that is displayed in the right column please go to Plugins -> Nop Anywhere Sliders -> Manage Sliders and create a new slider with the exact System Name: RightSideBanner.
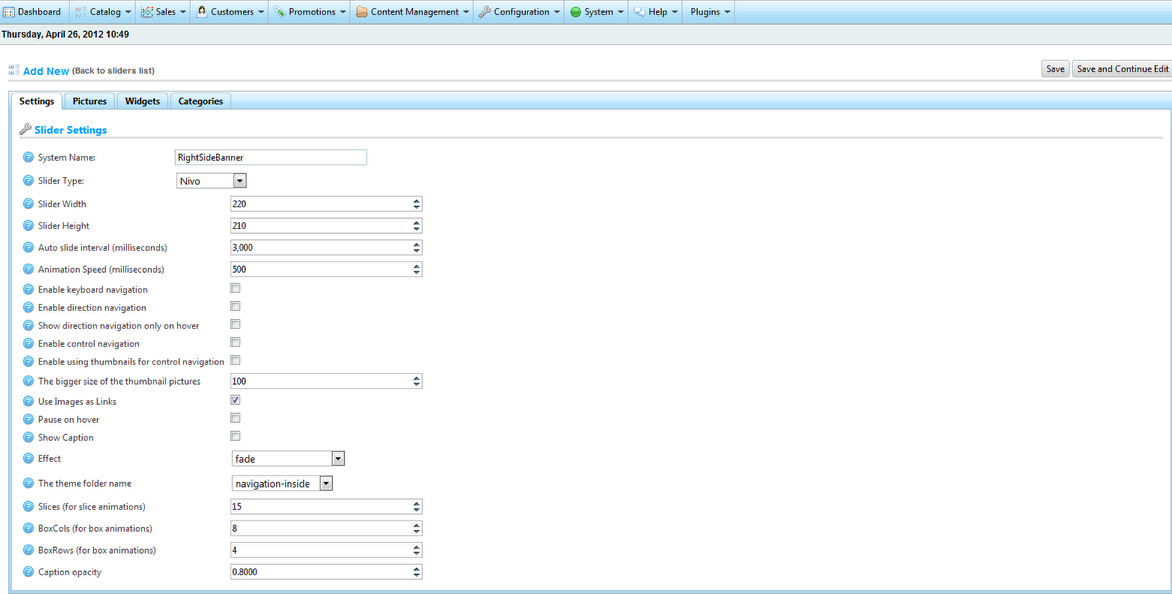
Please use the settings as shown above for better display. Once you set the settings click the Save and Continue Edit button and after that click on the Pictures tab in order to add pictures for the slider. It is always recommended that the size of the pictures matches the width and height from the settings. For more information on Working with Nop Anywhere Sliders please refer to the documentation for the plugin.
You can anytime change the sliders or even remove them if you need. That is no problem. You can also add new ones and use the Nop Anywhere Sliders as you need to suit your needs.
20. The Nop Electronics theme comes with the Nop Ajax Filters plugin integrated. You can change the settings for the plugin anytime you want. Just go to Plugins -> Nop Ajax Filters -> Settings. You will see the page below.
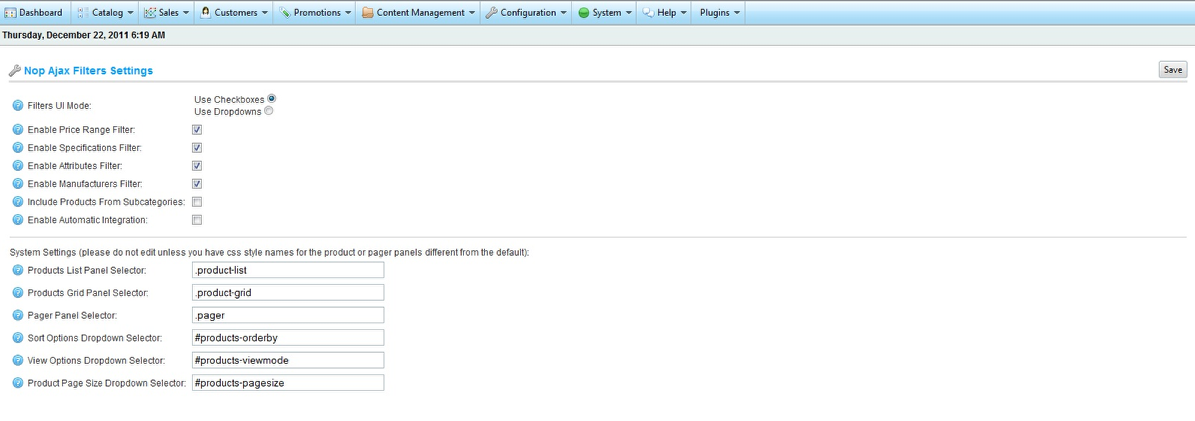
As you can see you can choose from Checkboxes and DropDowns for the filtering outlook. For more information on the plugin and the different options please read its documentation.
21. For best user experience you should configure and enable the Nop Ajax Cart plugin, which allows customers to add products to their cart without leaving the page. For that purpose go to Plugins -> Nop Ajax Cart -> Settings.
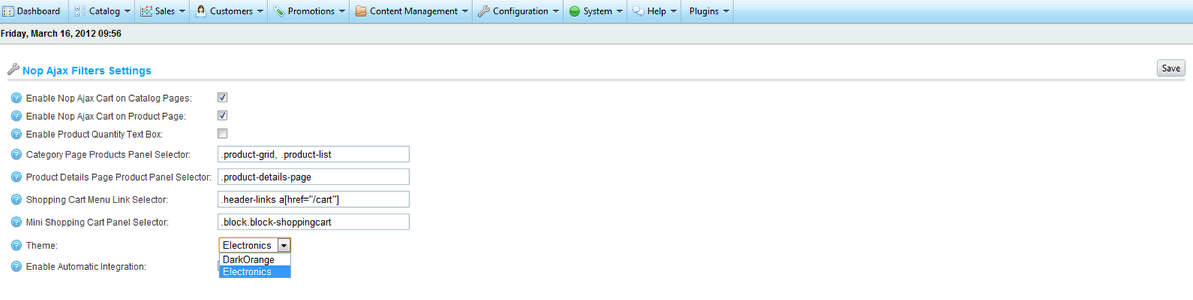
There are several things to have in mind while configuring the Nop Ajax Cart. Please make sure the "Enable Automatic Integration" checkbox is unchecked. You should select the Electronics theme from the dropdown as shown on the image above. Now you can decide whether to enable the Ajax Add To Cart button on the product page or on the catalog pages or both. You can control this via the first checkboxes. You can also either show the quantity text box on the catalog pages or does not show it. It is up to you. When you are ready with your configuration click the Save button on the top right corner.
22. Now you should enable and configure the Nop Instant Search if you want your customers to quickly find the product they are searching for. To do that please go to Plugins -> Nop Instant Search -> Settings
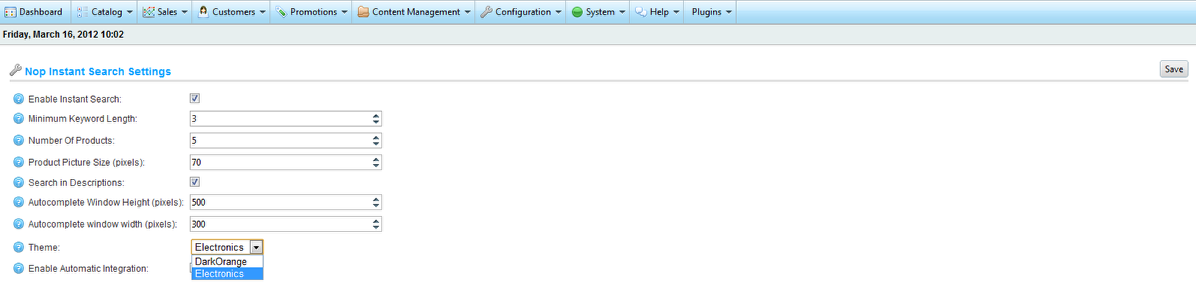
There are several settings that can help you tune your Nop Instant Search. You can see them on the image above. Most important of them are the "Enable Automatic Integration" that should be unchecked and the Theme that should be set to Electronics for better display. When you are ready with all the settings click the Save button on the top right corner.
23. The Nop Electronics Theme comes with the Nop Quick Tabs plugin integrated. In order to set it up correctly you should go to Administration -> Plugins -> Nop Quick Tabs -> Settings.

You have the freedom to include some predefined tabs for every product - description, specifications. reviews. The most important thing is to have the "Enable Automatic Integration" unchecked and for a theme to have the Electronics theme selected. Just as the image above. When all seetings are done you should click the Save button on the top right corner. For more information on this plugin you can visit its online documentation.
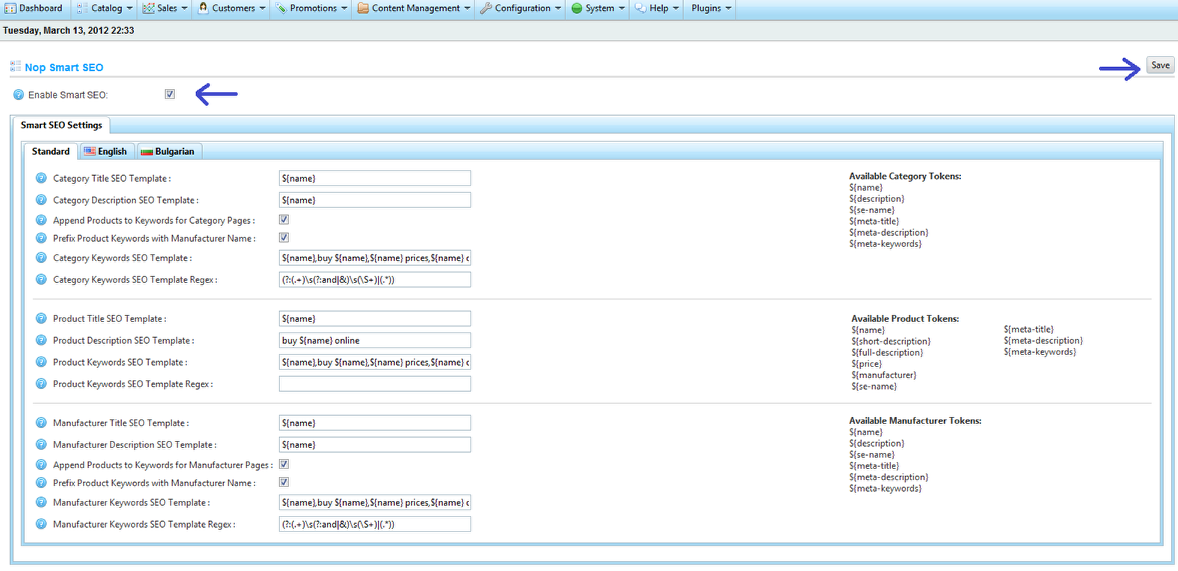
24. You will also need to configure and enable the Nop Smart SEO plugin. So go to Plugins -> Nop Smart SEO -> Settings. Check the "Enable Smart SEO" and then click Save. Now default values will be used for populating meta data. If you want to change these default values please make sure you enter correct regular expression as described in the help of the plugin.
25. If your product pictures are high quality and you want to enhance the user experience of your web site you should configure and enable the Nop Cloud Zoom plugin. In order to set it up correctly you should go to Administration -> Plugins -> Nop Cloud Zoom -> Settings.
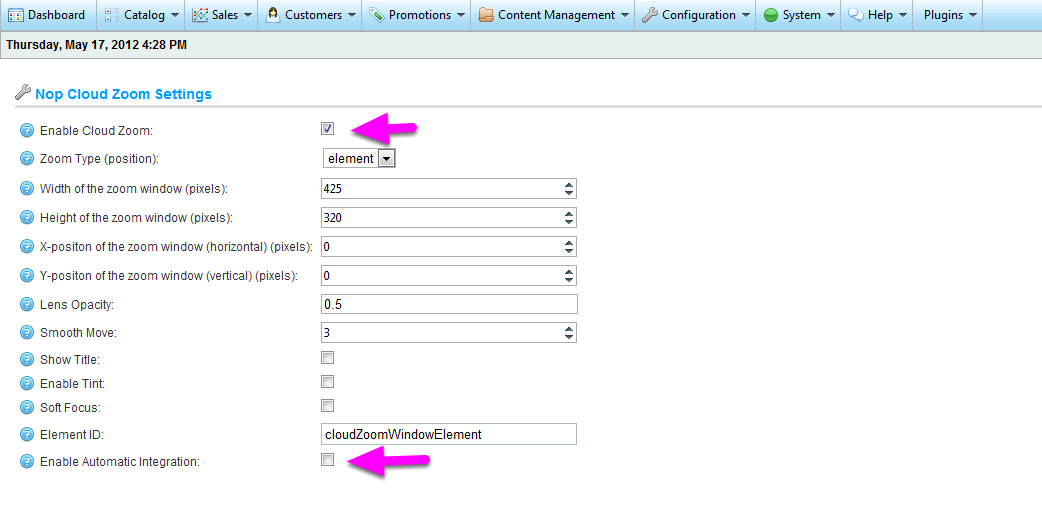
There are several settings that can help you tune your Nop Cloud Zoom. You can see them on the image above. The most important of them are the "Enable Automatic Integration" that should be unchecked and "Enable Cloud Zoom" that should be checked. When you are ready with all the settings click the Save button on the top right corner. For more information please visit the Nop Cloud Zoom documentation.
26. The Nop Electronics Theme has various functionalities that can be controlled via settings and you can take advantage of them. You can see them on the image below. You can access these settings from the Administration -> Plugins -> Nop Electronics Theme -> Settings and click the Theme Settings tab.

- If you have purchased copyright removal from the nopCommerce website you can remove the "Powered by nopCommerce" link by checking the "Remove Copyright" option.
- You can enable or disable the default category navigation according to your needs. By default is disabled as category navigation is achieved through the Nop Categories Header Menu.
