Integration
Once the Nop Anywhere Sliders plugin is installed you need to integrate it in your web site. You have several options to do this: widget integration or manual integration.
1. Widget Integration
The Nop Anywhere Sliders plugin has widget support meaning that a given slider can be displayed and integrated in one of the supported widget zones for the plugin. This can be achieved from the following places.
a) Go to Plugins -> Nop Anywhere Sliders-> Manage Sliders
If you have already created a slider you will see it in the list displayed. In order to add it to a specific widget zone you will need to click the Edit link. If no sliders appear on the list you will need first to create one by clicking the Add new slider and then assing it to a given widget zone. In both of the cases you will end up on the following page on which you can edit all the slider details. Click on the Widgets tab.
Create or update slider page:
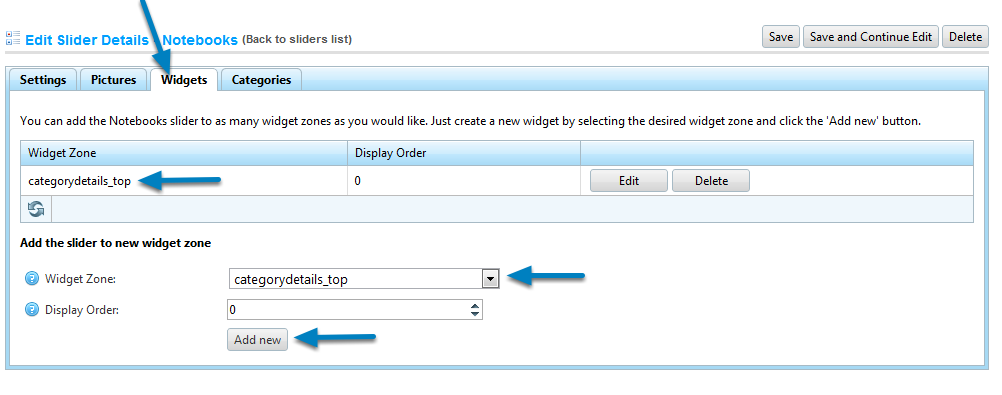
You can add the slider to a specific widget zone by selecting the zone from the dropdown and clicking Add new.
b) Go to Content Management -> Widgets to enable the Widget support for the Sliders

You need to activate the Widget support for the Anywhere Sliders. Make sure it is activated otherwise even if the sliders is added to a widget zone it won't be displayed.
c) Widgets and Categories - you can add a Slider to a category widget zone and then add the Slider to a specific category to make the Slider appear ONLY for this category.
On this page you can choose the categories for which you want your slider to appear. Please note that if you put your slider to a Widget zone that is not a category widget zone then it won't be shown. Also if you are on a category different from the one that the widget is mapped to then the slider won't be shown.
d) Adding custom widget zones in your web site (Advanced users only)
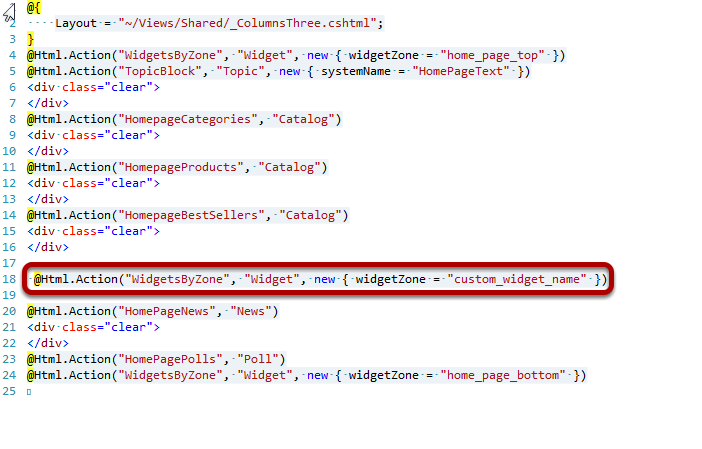
If you want to add a custom widget zone in nopcommerce, you can do it by adding the following code in the View and place, where you want to see the content of the widget.
@Html.Action("WidgetsByZone", "Widget", new { widgetZone = "custom_widget_name" }
For the widgetZone property add your custom widget zone name.
e) Adding new custom zones to the supportd widget zones from the Anywhere Sliders (Advanced users only)
To use the custom widget zone in the Nop Anywhere Sliders plugin you need to do the following:
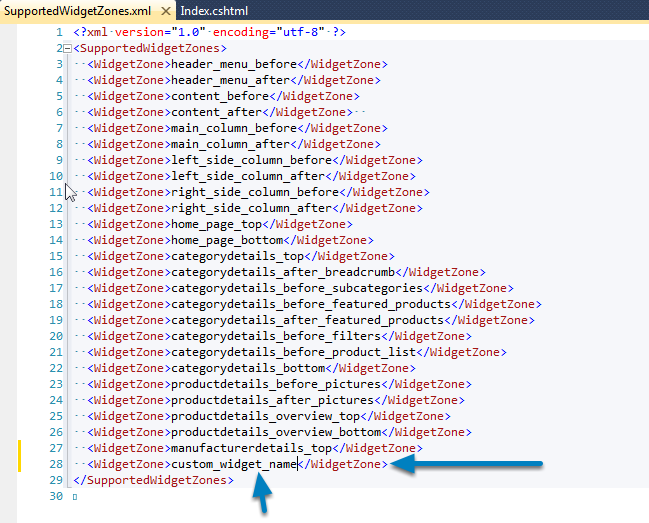
1. Open the SupportedWidgetZones.xml file located in the folder of the Nop Anywhere Sliders plugin.
2. Add a new row like shown in the picture above. Replace the custom_widget_name with the name of the widget that you have created.
<WidgetZone>custom_widget_name</WidgetZone>
2. Manual Integration (Advanced users only) - Please note that 99% of the time you won't need to use the manual integration as it is more for backward compatibility with previous versions.
The other way of integrating the Nop Anywhere Sliders is to do it manually. There are three ways for manual itegration - by system name, by category id, by system name and category id
Please note that 99% of the time you won't need to do this as the Widget support is very powerful.
2.1 Manual Integration by systemName
Manual Integration by systemName - This can be especially useful if you want a given slider to be displayed on a single page only, for example only on the home page. In nopCommerce there is no such built in functionality and widgets work in a way that they are displayed on every page wherever the corresponding widget zone is displayed.
The following example will add a slider named "HomePageSlider3D" on the home page only.
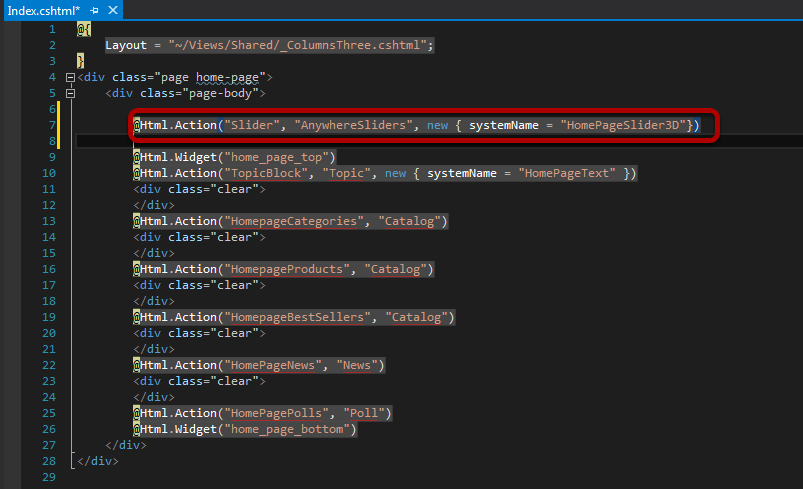
Open your Index.cshtml file in Visual Studio or a text editor and add the following code, wherever you would like the Nop Anywhere Sliders to appear:
@Html.Action("Slider", "AnywhereSliders", new { systemName = "HomePageSlider3D"})
Please note the parameter named "systemName". It should be equal to the system name of the slider that we want to be displayed on this place.The system name of the slider can be viewed on the Plugins -> Nop Anywhere Sliders -> Manage Sliders page. The system name of an existing slider can be edited anytime.
2.2 Manual Integration by categoryId
Manual Integration by categoryId - This can be very useful if you want to display a given slider only on specific categories. The first thing you need to do is to create a slider and map it to specific categories. You can do this by going to the specific slider in the Administration and edit it. Then from the Categories tab you need to select tha categories for which you want it to be shown.
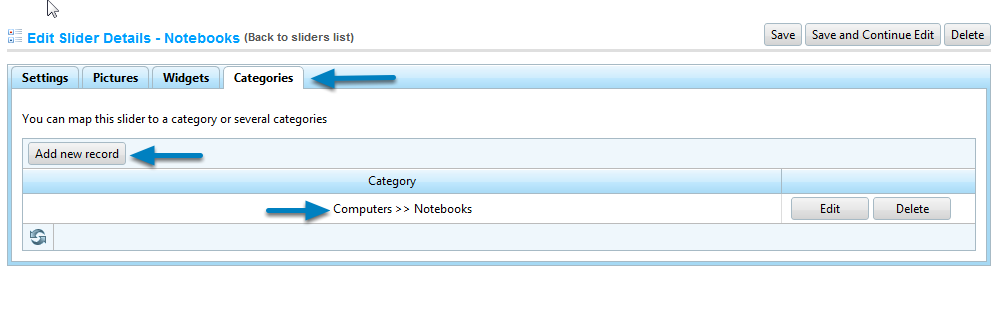
a) Edit your slider and select a category or several categories for which you want the slider to be shown.
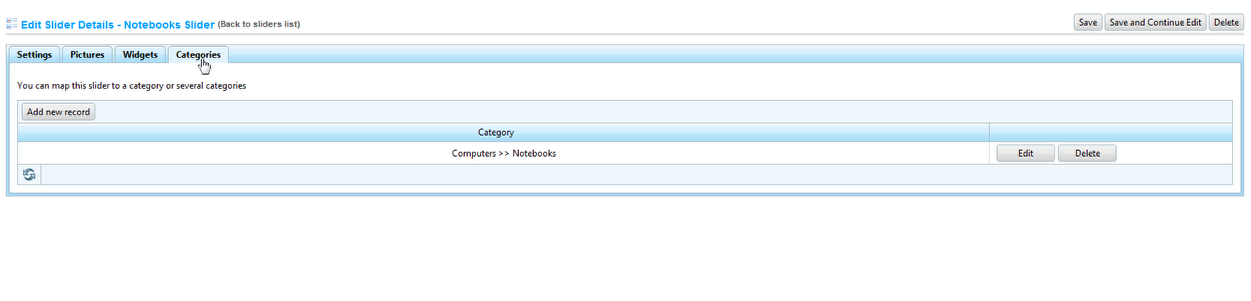
Here we have added the Notebooks category for our Notebooks slider
b) Now we need to actually integrate the slider where we want it to be shown namely on the Notebooks category just above the products in the category
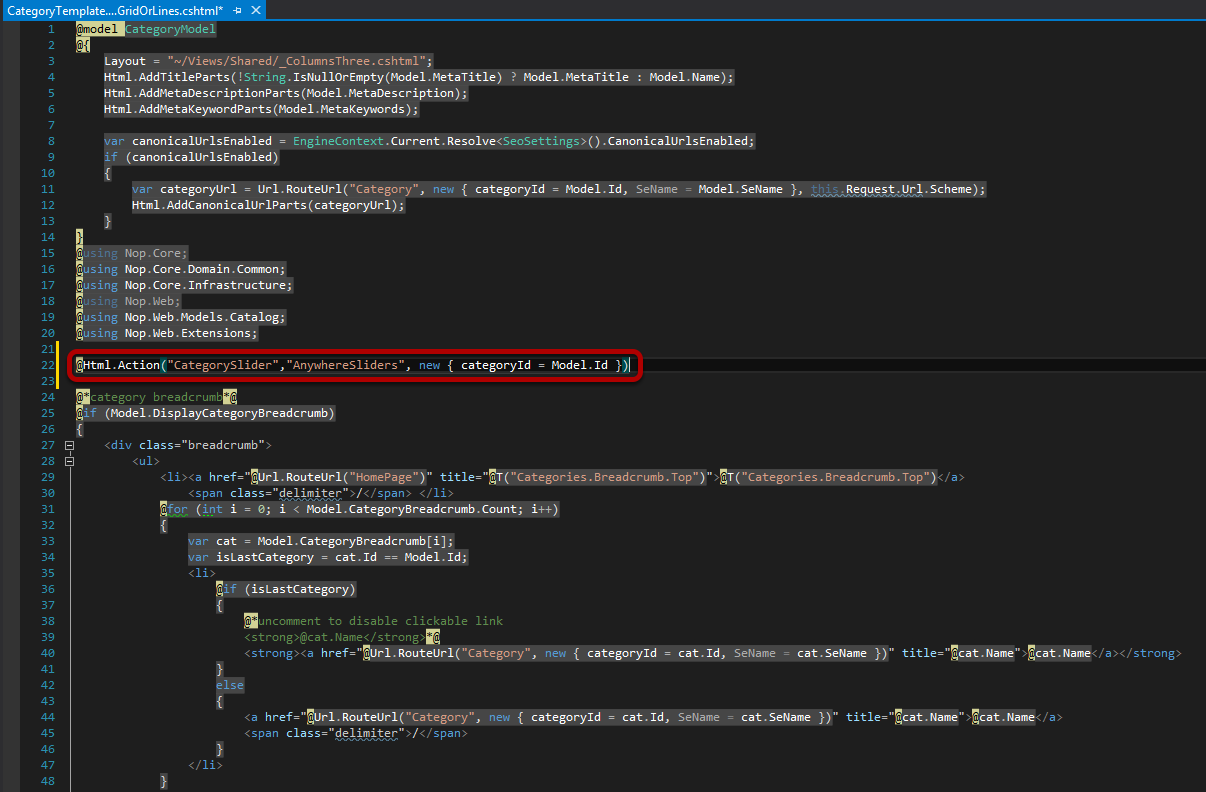
Open Views\Catalog\CategoryTemplate.ProductsInGridOrLines.cshtml file in Visual Studio or in a text editor and add the following line just before the category breadcrumb:
@Html.Action("CategorySlider","AnywhereSliders", new { categoryId = Model.Id })
Note that the parameter categoryId is taken from the CategoryModel, which contains the id of the category. The plugin will check if there is any slider for the given category (by its id) and if there is a slider then it will be shown. If there are no sliders mapped to this category then nothing will be shown. If there are more sliders for this category then only the first added slider will be shown. Also note that the name of the action that is called is CategorySlider.
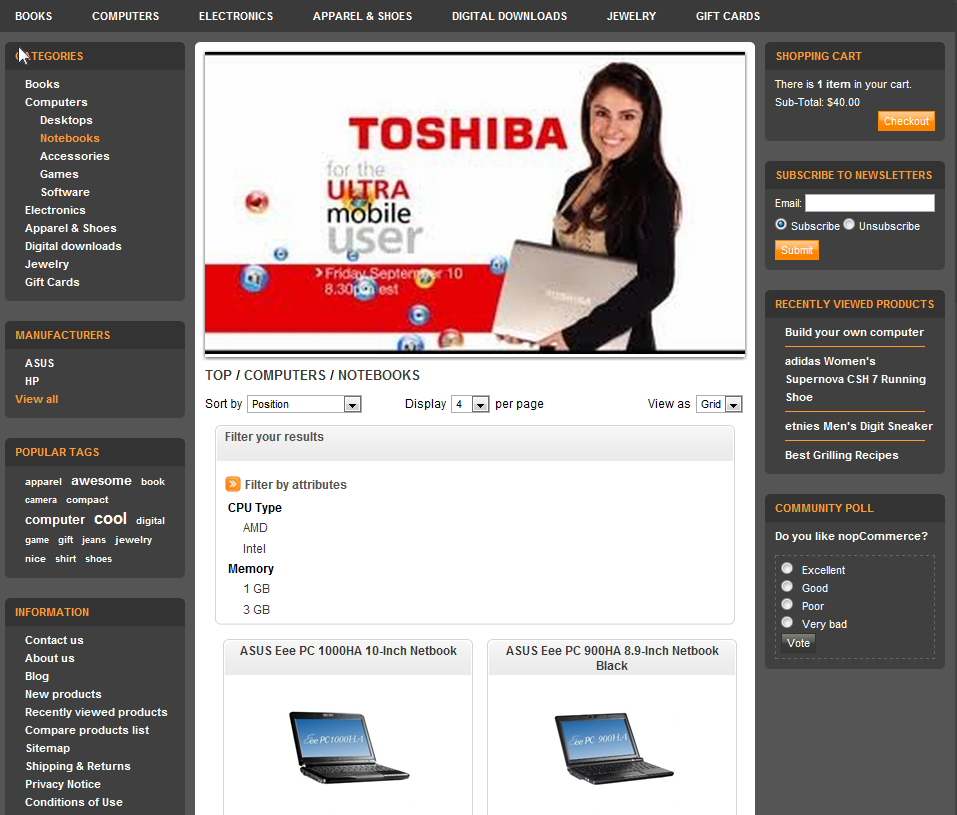
c) Here is the result when sliders are integrated manually on the category page just above the category bread crumb and mapped to the Notebooks category
2.3 Manual Integration by categoryId and systemName
This is the same as manual integration by category id but you can also specify the name of the slider to be shown. This way you can have several sliders on the same category but just on different places. To do so you need to pass one more parameter systemName like below:
@Html.Action("CategorySlider", "AnywhereSliders", new { categoryId = Model.Id, systemName = "Notebooks Slider" })
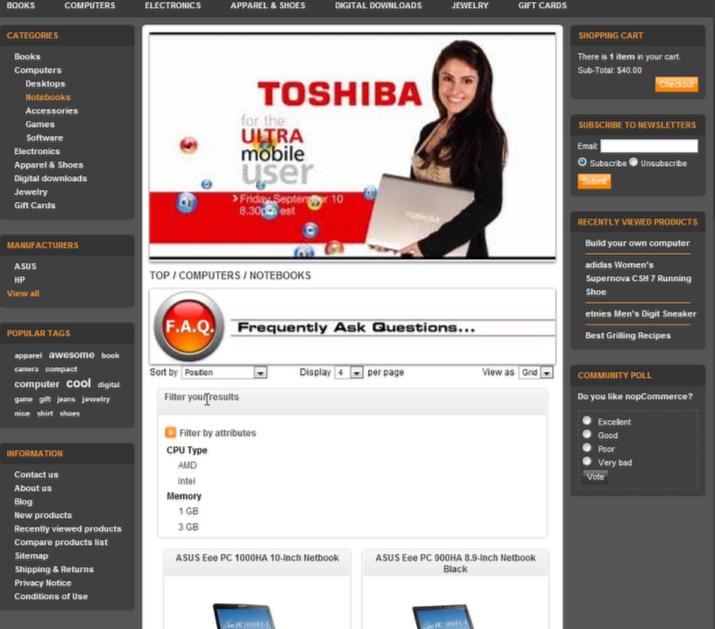
a) We will create a new smaller slider that will place just below the bread crumb and will give it a SystemName "Notebooks Slider Small" and map it to the Notebooks category again
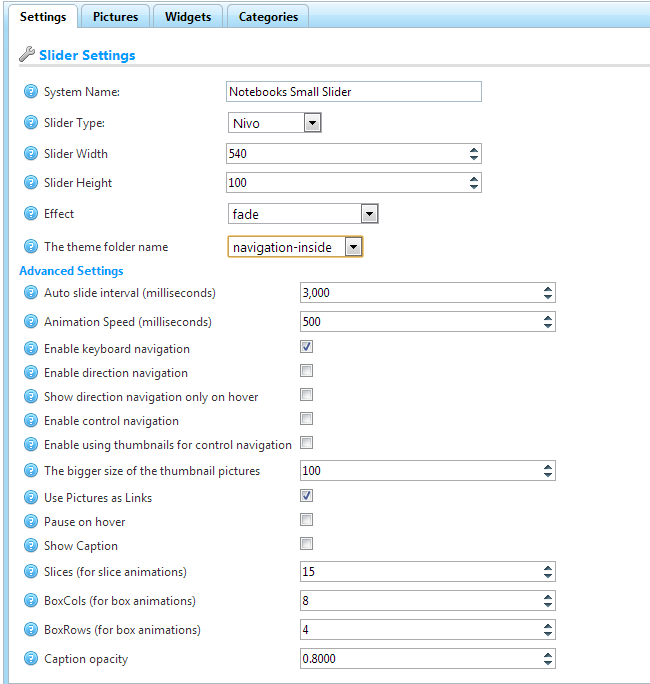
We created a new Nivo slider that will be smaller just a 100px high and named it "Notebooks Slider Small" and mapped it to the Notebooks category.
b) So now we have two sliders mapped to the Notebooks category but they have different sytem names - Notebooks Slider and Notebooks Slider Small

c) Now we need to integrate the sliders on the category page by categoryId and systemName

We do the same as manual itegration by categoryId but now we specify the sytem names of the sliders.
@Html.Action("CategorySlider", "AnywhereSliders", new { categoryId = Model.Id, systemName = "Notebooks Slider" })
and
@Html.Action("CategorySlider", "AnywhereSliders", new { categoryId = Model.Id, systemName = "Notebooks Slider Small" })
d) Here is the result: Two different sliders shown only on the Notebooks category in two different places - one before the category breadcrumb and one after it.
Note that if no slider for the given category id is found then nothing happens even though there might be a slider with the given system name.
If a slider fo the given category is found but it has a different system name then again nothhing happens.