Configuration (Optional)
When you install the Nop Ajax Filters plugin, it is integrated and configured by default to run on the left hand side of your category page. You can switch the Nop Ajax Filters to show in one of the predefined widget zones. If you would like to show the Nop Ajax Filters in a custom widget zone, please follow the steps in this lesson.
1. Change the widget zone
When the Nop Ajax Filters plugin is installed, it is integrated using widgets by default. The default widget for the Default Clean, Dark Orange and nopClassic themes is left_side_column_before. To change the widget zone follow this instructions:
Go to Plugins -> Nop Ajax Filters -> Settings
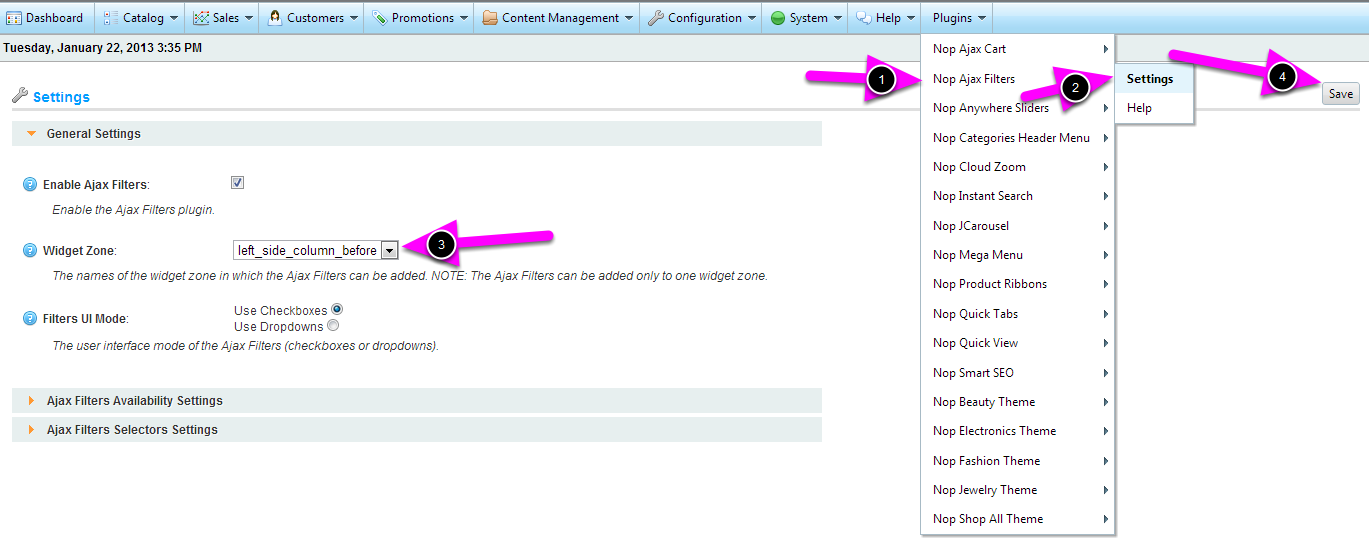
1. Go to Plugins -> Nop Ajax Filters -> Settings.
2. Select a Widget Zone from the drop down
3. Click the Save button.
NOTE: You can use only one widget zone at a time.
2. Add a custom widget zone and add the Nop Ajax Filters to it
a) Add a custom widget zone
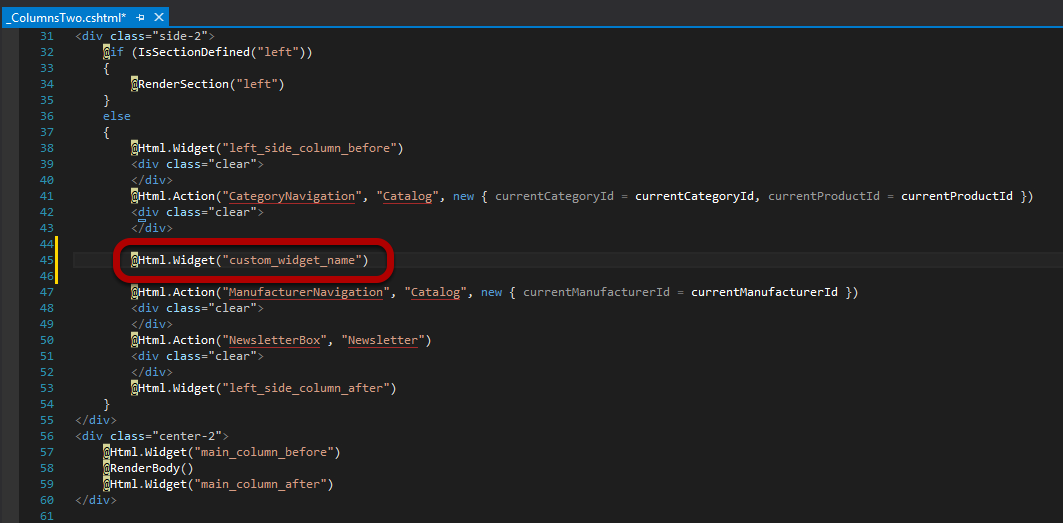
If you want to add the Nop Ajax Filters to a specific part of the Category page, you need to add a custom widget zone to either the Category.cshtml view or its layout view (in this case the _ColumnsTwo.cshtml).
To add a custom widget zone, use the following code:
@Html.Widget("custom_widget_name")
Instead of "custom_widget_name" add the name of your custom widget zone.
After doing this, the Nop Ajax Filters will be shown where you have added the custom widget zone, in this example - after the category navigation. But before that you need to complete the steps below.
b) Add the custom widget zone to the Nop Ajax Filters
To use the custom widget zone in the Nop Ajax Filters plugin you need to do the following:
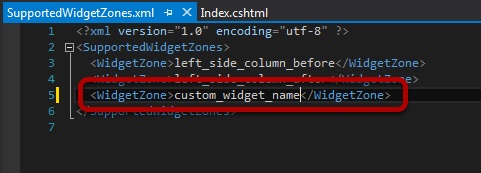
1. Open the SupportedWidgetZones.xml file located in the folder of the Nop Ajax Filters plugin.
2. Add a new row like the one shown in the picture above. Replace the custom_widget_name with the name of the widget that you have created.
<WidgetZone>custom_widget_name</WidgetZone>
Save the file and restart your application.
c) Set up the Nop Ajax Filters to work with the custom widget zone
To add the Nop Ajax Filters plugin to your custom widget zone, please follow the steps below:
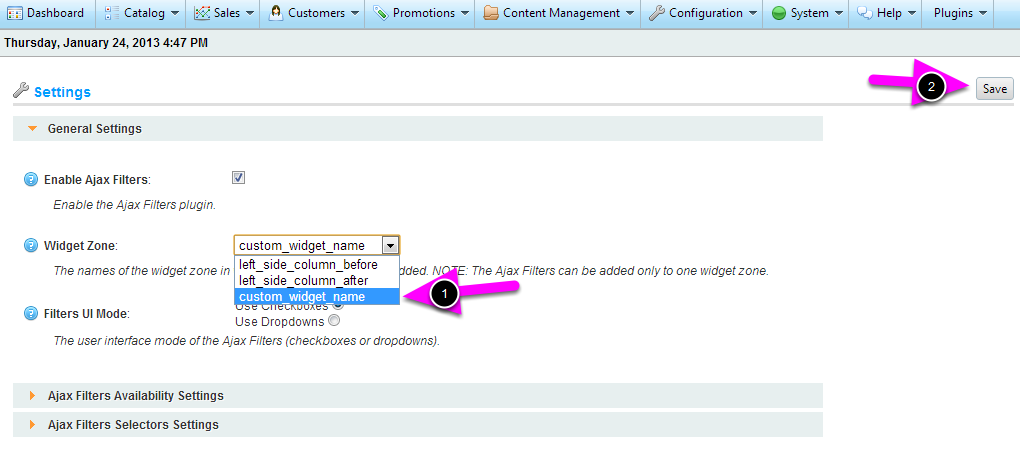
- Go to Plugins -> Nop Ajax Filters -> Settings
- Click on the Widget Zone dropdown and select your custom widget.
- Click the Save button.